
Waterfall braids are popular because they look romantic and “done,” yet they can be learned with a simple repeat. You braid across, and each time you add a new top piece, you drop one strand so it falls into the hair like a ribbon. The best part is how flexible it is. You can keep it neat for events, loosen it for casual days, or adapt it for short hair with a few pins. Below are 22 waterfall braid ideas that feel special but stay realistic to do at home.
1. Classic Side-to-Back Waterfall
This is the beginner version that frames your face and looks pretty fast. Start at one temple. Take three small sections. Begin a normal braid, but when it’s time to bring the top strand down, drop it instead. Let it fall into your hair.
Now pick up a new top section from above the braid to replace the dropped piece. Keep braiding across the back of your head, repeating the same drop-and-replace pattern.
Budget tip: Practice on slightly “dirty” hair or add a little dry shampoo first. Clean hair can slip and make your sections fall apart.
If you want a boho feel, wave your hair first using a heat-free braid for 30–60 minutes. Undo it, then do the waterfall on top. Finish by pinning the braid behind your ear or at the back with two crossed bobby pins for stronger hold.
2. Waterfall Braid with Loose Beach Waves
This look is soft and casual. It’s perfect when you want your hair down but not in your face. Start your waterfall braid at one side and keep the sections slightly bigger so it looks relaxed.
Budget tip: For waves without heat, dampen hair lightly and braid it into two big braids for an hour. Undo, finger-comb, then start the waterfall.
As you braid, don’t worry if the dropped strands aren’t perfectly even. Slight variation looks natural. When you reach the back, pin the braid under a top layer of hair so the pins don’t show.
If you want more volume, gently tug the braid loops. Go slowly so you don’t pull the whole braid loose. Use a small amount of mousse on your hands to smooth flyaways at the hairline.
3. Double Waterfall for Extra Dimension
Double waterfall braids look detailed, especially on thick hair. Do the first waterfall braid as usual across the back. Then start a second waterfall braid just below it.
Use the top braid’s dropped strands as a guide, and keep your second braid line parallel. Pin both at the back.
Budget tip: If your hair is thick, use small elastics to hold the first braid end while you work on the second. It stops the first one from loosening.
This style helps control bulk because the braids “organize” the top layer while leaving the rest down. Curl the bottom lightly or keep it natural. If your hair is fine, keep both braids a bit looser so it looks fuller.
4. Half-Up Waterfall with a Small Bow Clip
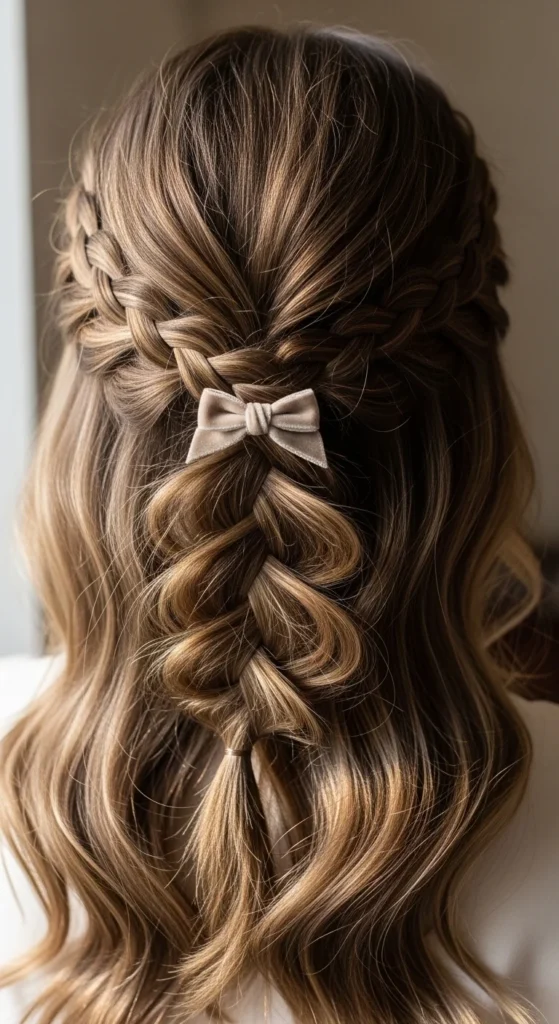
A half-up finish keeps things easy and pretty. Create a waterfall braid from one side to the back, then secure it in the center. You can stop there, or do a second waterfall from the other side and join them.
Budget tip: Use a simple clip you already own. Even a plain barrette looks nice when the braid is doing the work.
To hide pins, slide them under the braid edge and angle them upward. If your hair is slippery, add a tiny amount of gel to the braid sections only.
This is perfect for school, brunch, or photos. It also works with straight hair if you don’t feel like curling.
5. Reverse Waterfall Braid (Under-Flip)
A reverse waterfall changes the direction of the braid so it looks modern and a bit sharper. The concept stays the same: you still drop a strand and replace it. The difference is the braid movement, which makes the “chain” sit differently.
Budget tip: Keep your sections medium, not tiny. Tiny sections can make this feel frustrating when you’re learning.
Try this on smoother hair for a cleaner result. If you want it softer, loosen the braid lightly after it’s pinned. Finish at the back with bobby pins and a small elastic if needed.
This is a good option if you’ve done the classic waterfall and want something new without learning a totally different skill.
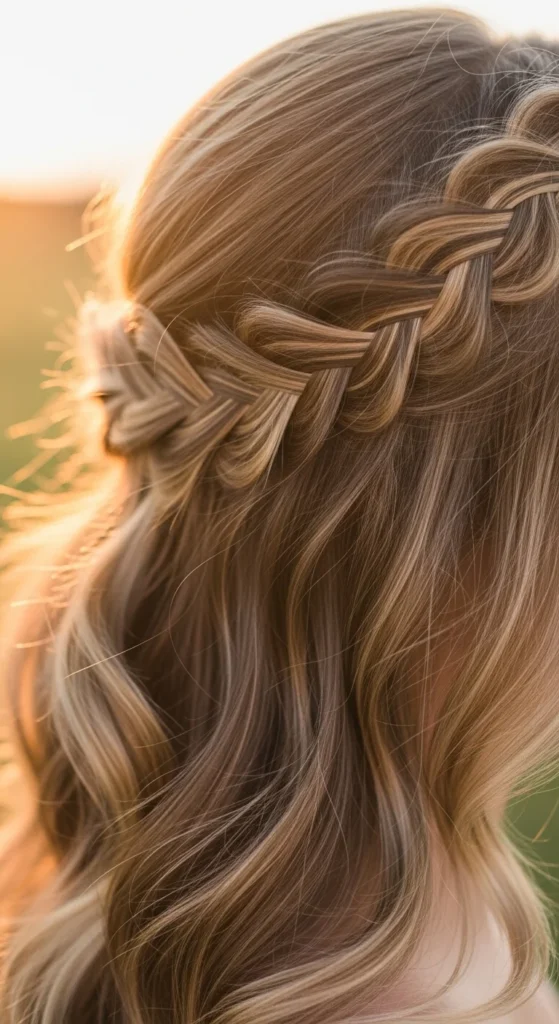
6. Diagonal Waterfall Across the Back
Diagonal waterfall braids feel a little edgy while still romantic. Start the braid high near one temple. Angle it down toward the opposite side behind the head.
Budget tip: Use a mirror plus your phone camera to check the diagonal line as you braid. It helps you keep the direction clean.
Once you reach the lower side, pin the end behind the ear or tuck it into a low ponytail. This is great with highlights because the diagonal line shows the dropped strands clearly. Add soft curls under it for a “special occasion” vibe without being too formal.
7. Waterfall Crown Wrap
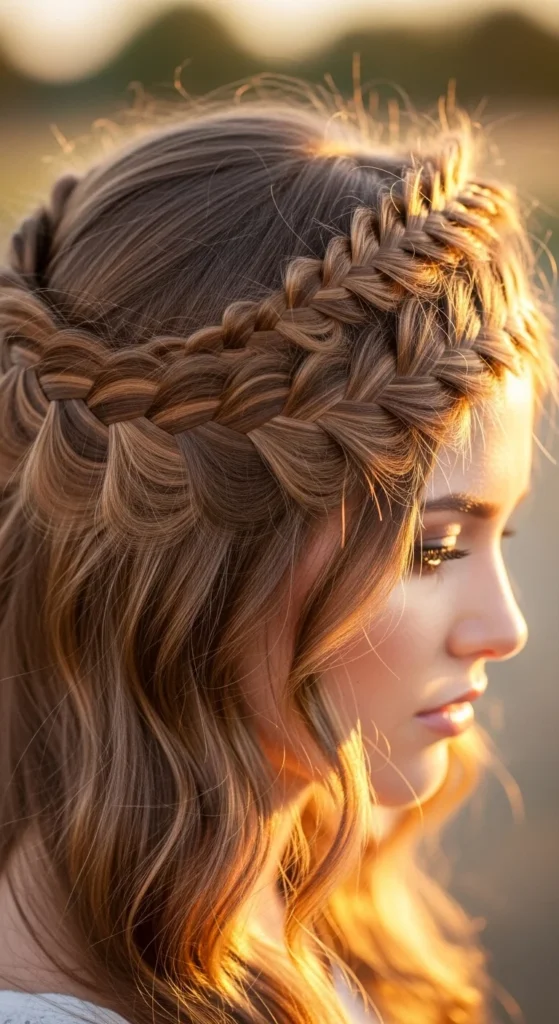
This is a crown look that still keeps hair down. Start near one ear and braid around the head like a halo while dropping strands. You’ll get a ribbon-like cascade around the crown area.
Budget tip: If a full wrap feels hard, do two shorter waterfall braids—one from each side—and pin them together at the back.
Keep the dropped pieces smooth so the “waterfall” looks clean. A tiny amount of leave-in conditioner can help if your hair frizzes easily.
This style looks great for outdoor events and photos because the braid line frames your head beautifully.
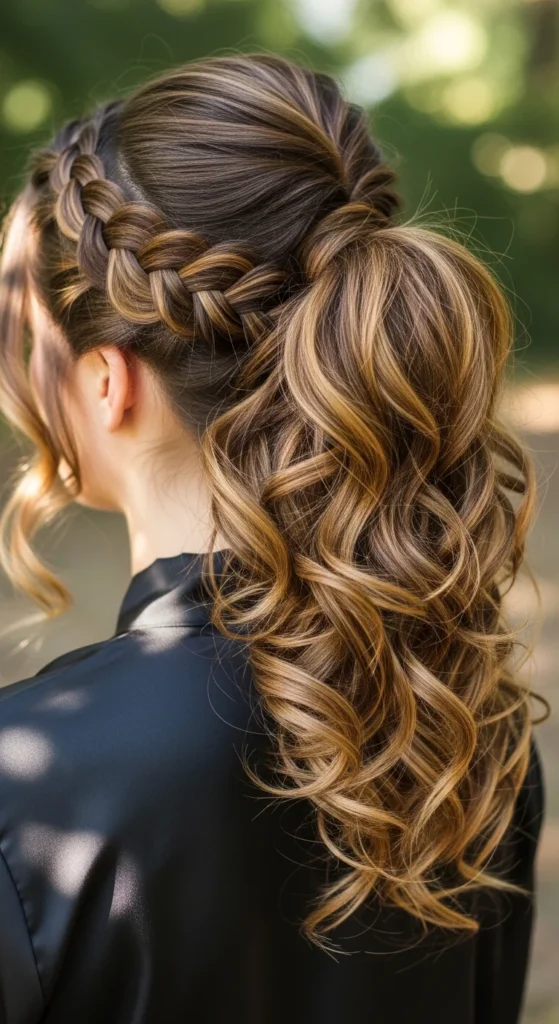
8. Bridal Waterfall with Ringlets
This is a wedding-friendly look that still feels achievable. Do a classic waterfall braid across the back. Then curl the rest of your hair into defined ringlets.
Budget tip: If you don’t have a curling tool, use heat-free rollers or small braids overnight. In the morning, separate curls gently with fingers.
Add small floral pins or pearl pins along the braid line. Keep accessories minimal so the waterfall effect stays the focus.
If you want it secure, spray a little hairspray onto your bobby pins before inserting them. It helps them grip better. This style photographs well from all angles.
9. Waterfall Braid with Tiny Flower Tucks
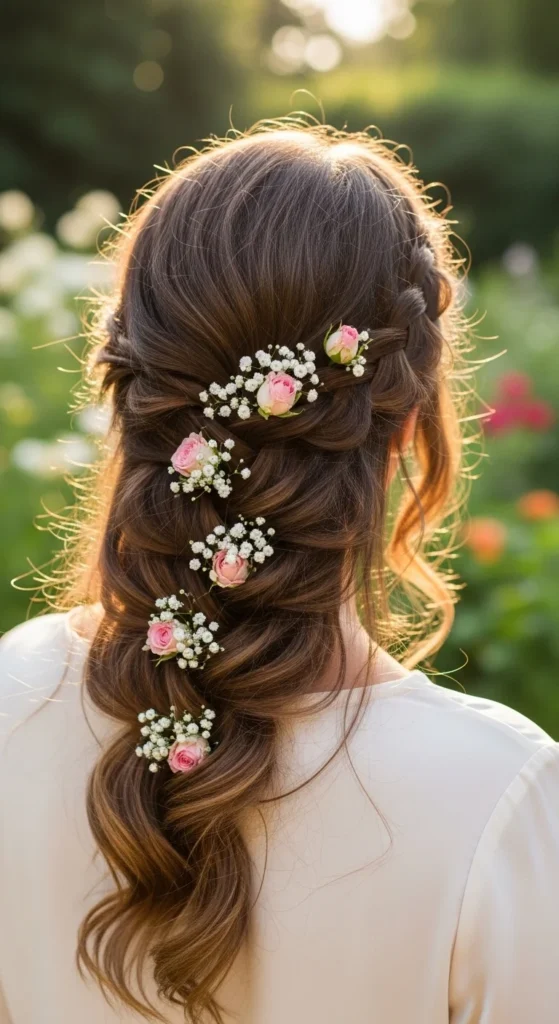
This is perfect for spring and summer. Do a waterfall braid and tuck tiny flowers into the braid edges every few inches.
Budget tip: One small bunch of flowers can be split into tiny pieces. You don’t need a full bouquet.
Make sure flowers sit lightly so they don’t pull the braid loose. If you want longer wear, use small pins to secure each flower.
This works for picnics, parties, and photos. Keep the rest of your hair softly waved or natural.
10. Short Hair Waterfall on a Bob
Waterfall braids can work on short hair with small changes. Start the braid at one temple, but keep sections small. Pin often as you go.
Budget tip: Use mini bobby pins. They hold short pieces better and don’t feel heavy.
If layers fall out, that’s okay. It can look cute and textured. Add a little mousse and scrunch the ends for movement.
For extra security, end the braid with a tiny clear elastic and hide it under a top layer of hair with pins.
11. Medium Bob Party Waterfall Waves
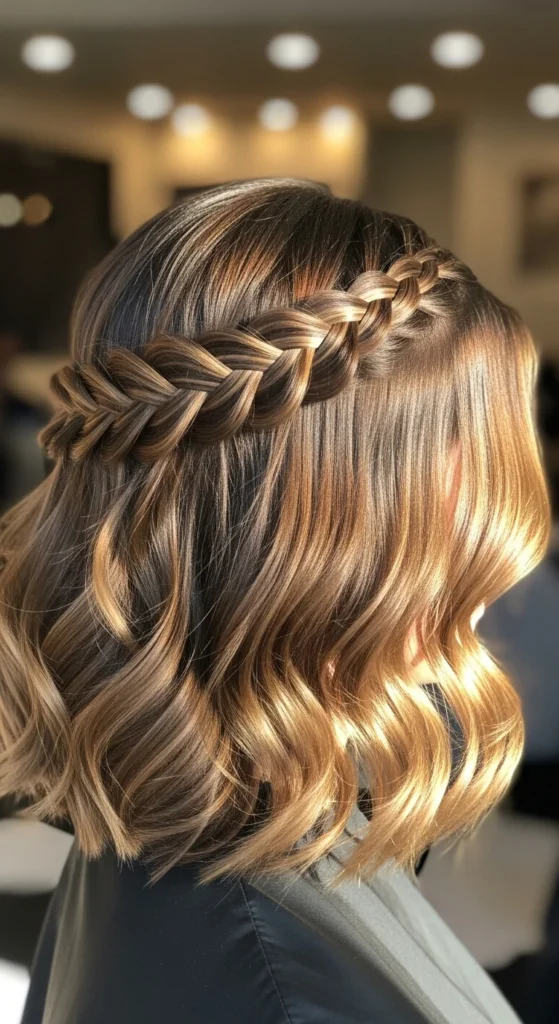
This is a fun “going out” look. Start a waterfall braid from the side and pin it at the back. Curl the rest of the bob into soft waves.
Budget tip: If you don’t curl, twist damp hair into two buns for an hour, then undo for waves.
Use a little smoothing cream on the braid sections to keep them neat. For volume, gently lift the crown with your fingers and secure with one hidden pin.
This style works well on medium hair because the ends still move, but the braid keeps the top shaped.
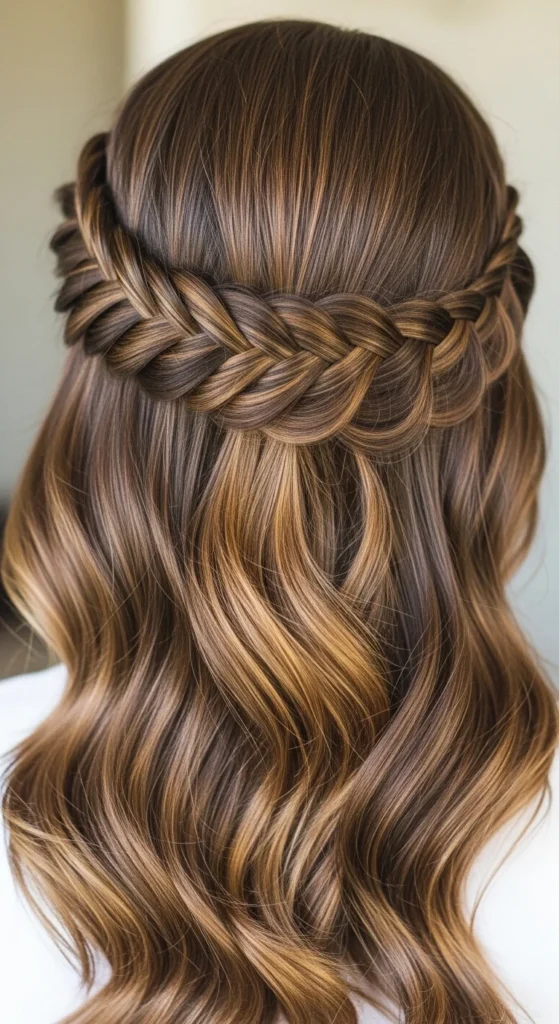
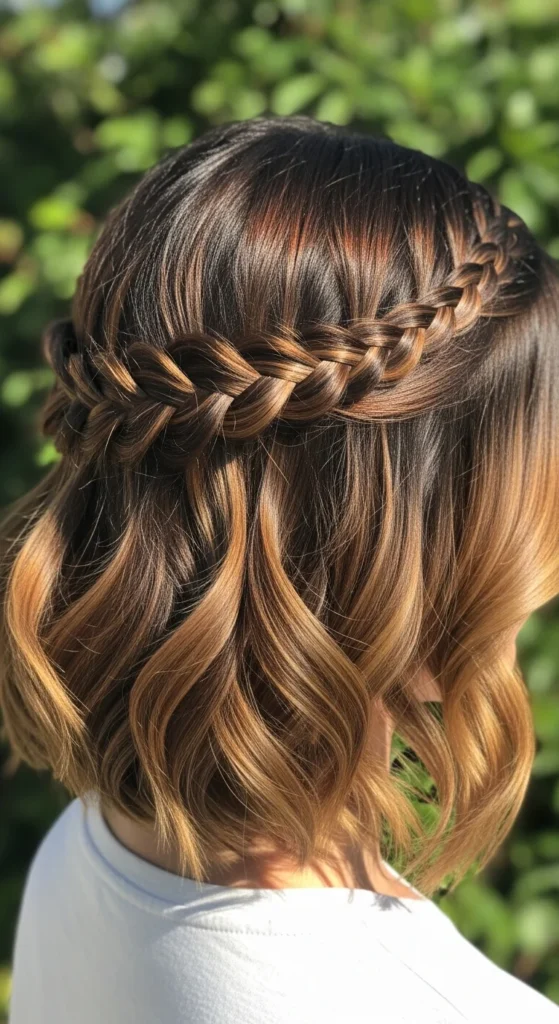
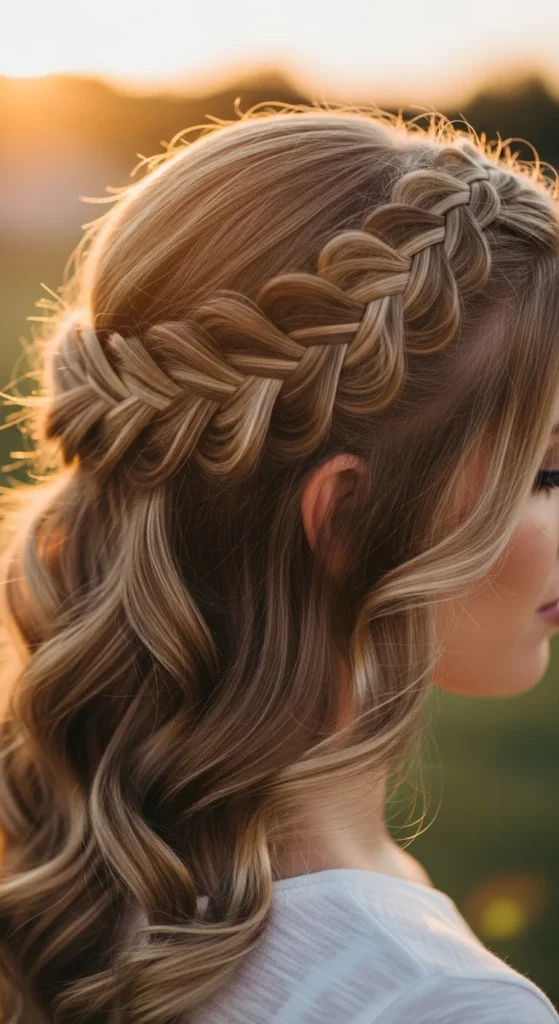
12. Waterfall Braid with Balayage Showcase
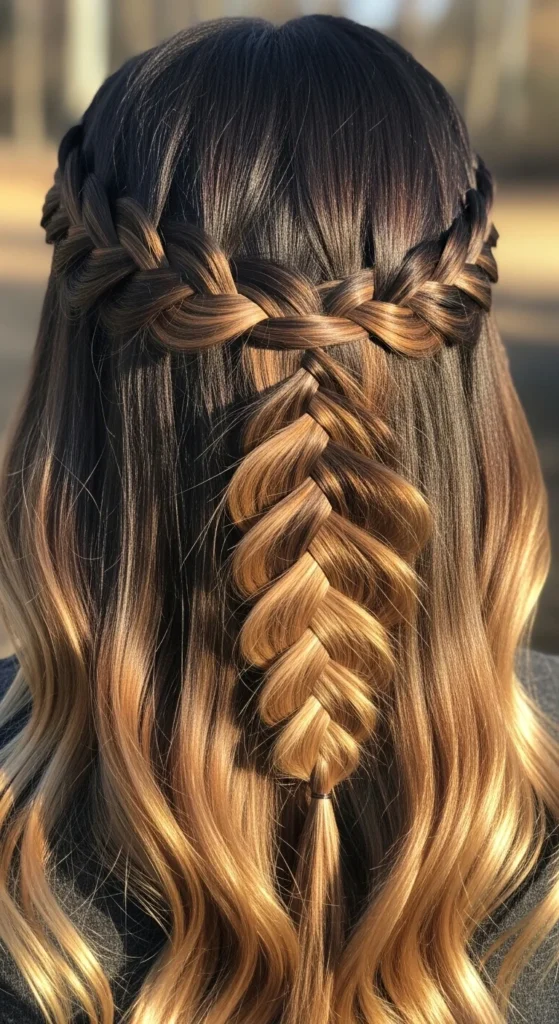
If you have balayage or highlights, waterfall braids show off the color shifts beautifully. Keep your dropped strands visible by smoothing them as they fall.
Budget tip: No color? You can mimic contrast by using a slightly darker hair powder at the roots for depth. It helps the braid stand out in photos.
Braid slowly and keep the drop strands the same thickness. Pin the end at the back and let the rest flow.
This style is great for photos because the waterfall effect becomes more noticeable when different tones catch the light.
13. Loop-Overlapping Waterfall (Textured)
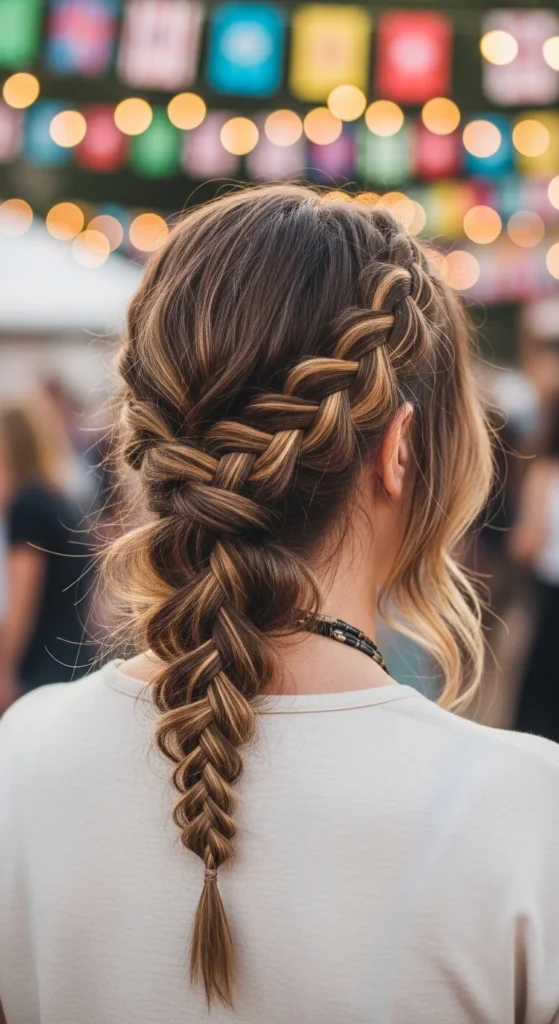
This variation looks chunky and modern. Instead of keeping everything tight, you create slightly larger loops and let the dropped strands fall more freely.
Budget tip: If the braid feels loose, secure every few inches with a hidden pin. You don’t have to rely on braid tension alone.
This is great for festivals because it looks textured and relaxed. Pair it with soft waves and a casual outfit. After finishing, tug the braid loops gently so it looks fuller.
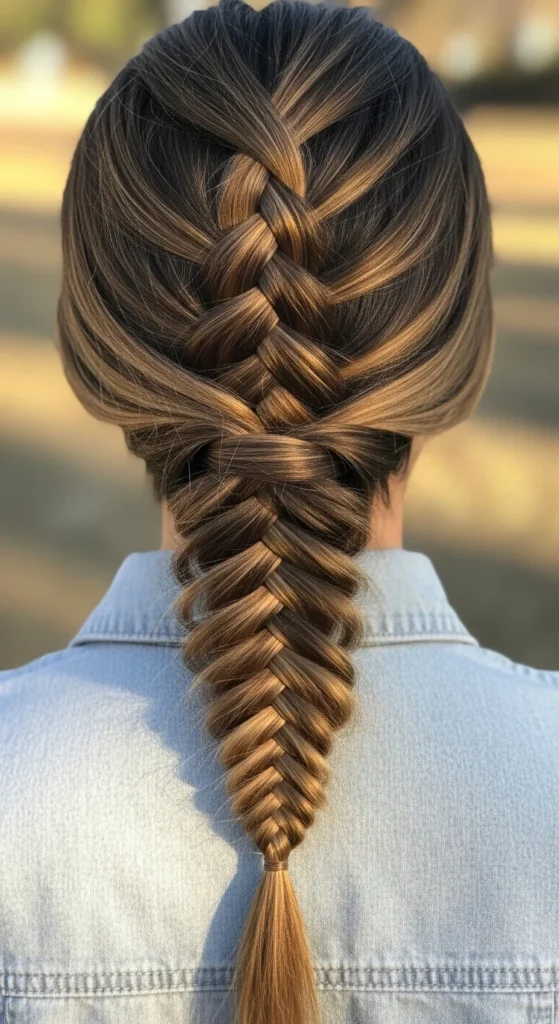
14. Rope Finish Waterfall (Twist Closure)
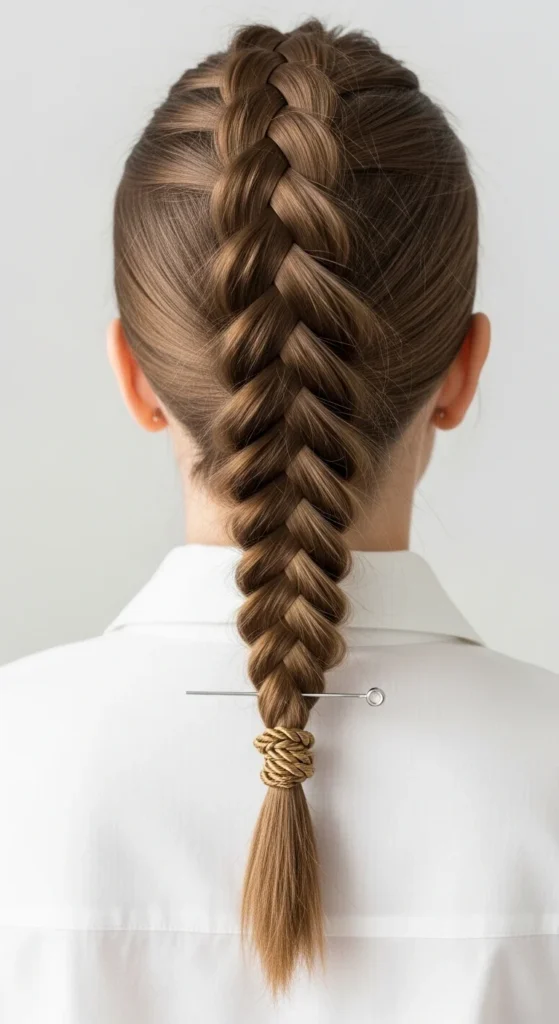
Sometimes the hardest part is ending the braid neatly. This solves it. Do your waterfall braid across the back. When you’re ready to stop, twist the last two pieces into a rope twist and pin it under the braid line.
Budget tip: A rope twist holds well with just pins. You don’t even need an elastic if your hair grips.
Hide the twist end under the braid for a clean finish. This looks great for daily wear because it stays comfortable and doesn’t feel heavy.
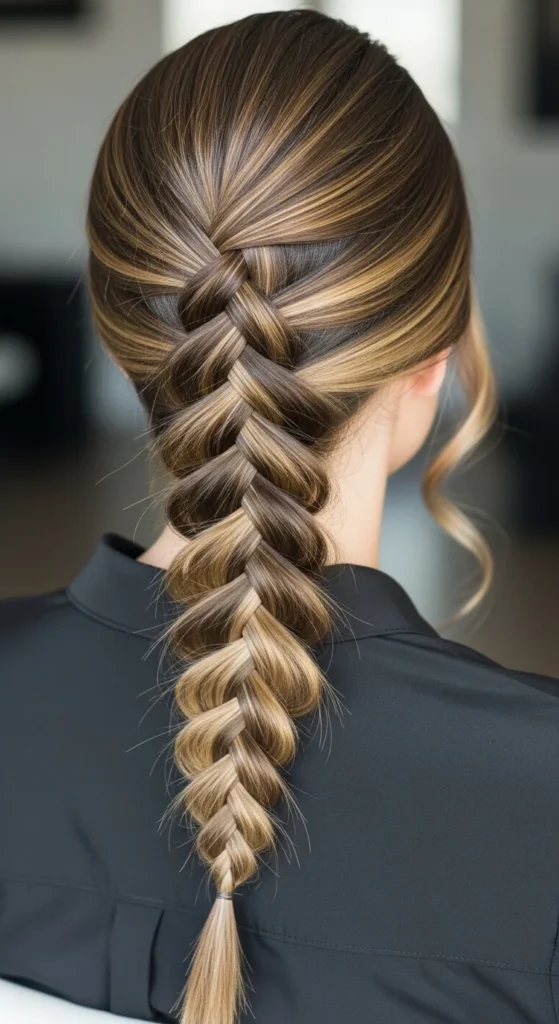
15. Waterfall into a Low Ponytail
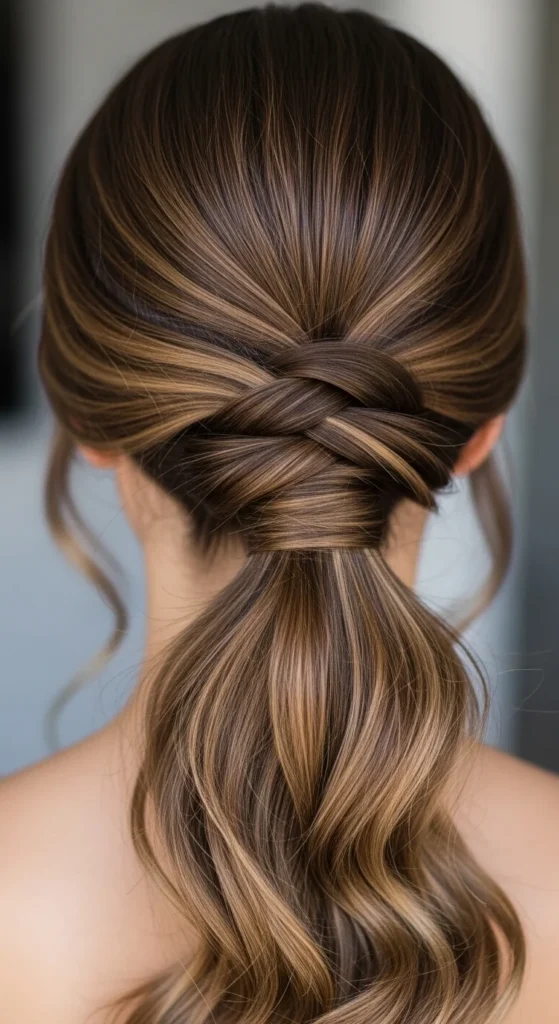
This style looks neat and keeps hair controlled. Do a waterfall braid from one side to the back. Then gather all hair into a low ponytail.
Budget tip: Wrap a small strand of hair around the elastic to hide it. Pin under the ponytail.
Add waves to the ponytail if you want a softer finish. This is great for workdays because it looks styled but stays practical.
16. Waterfall into a Side Ponytail
Start a waterfall braid and direct it toward one side. Secure it, then pull hair into a side ponytail.
Budget tip: If the ponytail feels thin, tease the ponytail lightly at the base using a comb you already own. Smooth the top layer over it.
This works well with curls or waves and looks cute for casual outings.
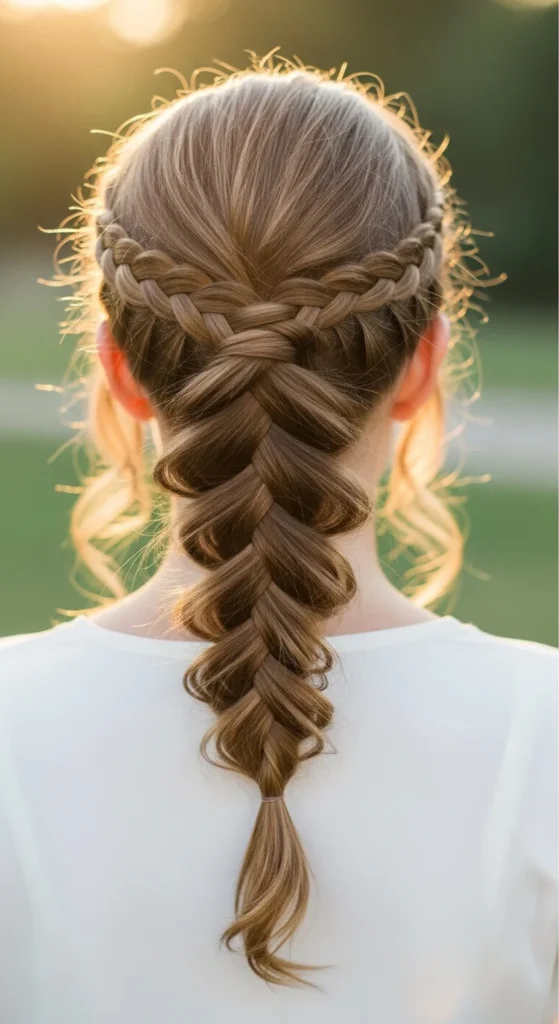
17. Waterfall with a Tiny Fishtail End
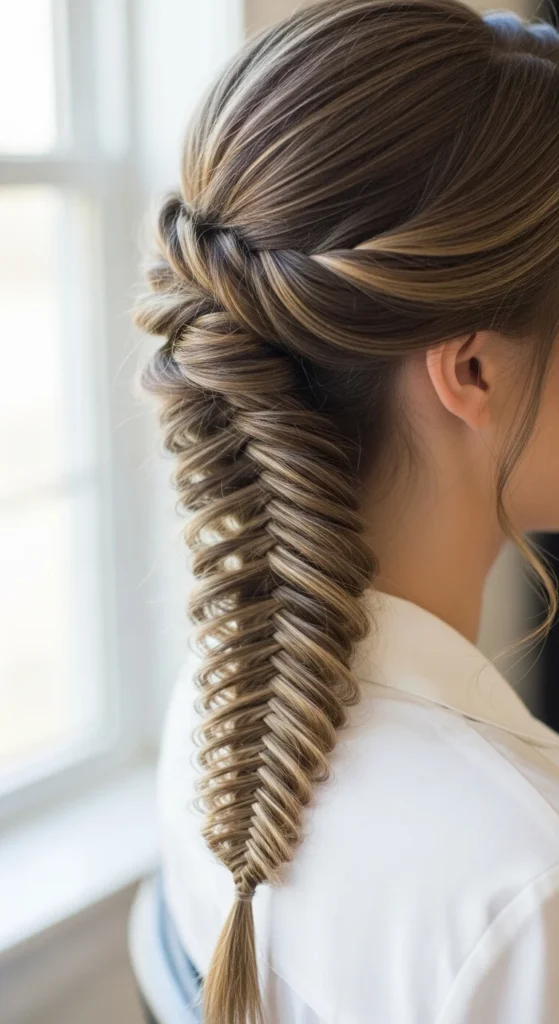
Want a trendy switch-up? End your waterfall braid with a mini fishtail tail. Once you stop adding new hair, split the remaining hair into two and do a few fishtail crosses.
Budget tip: Keep the fishtail short so you don’t spend forever. Even 2–3 inches looks like a design choice.
Pin the end under the braid line or let it hang for detail. This is a great “extra” touch without a full second hairstyle.
18. Asymmetrical Waterfall with Highlight Pop
Asymmetrical styles feel modern. Start the braid on one side and stop before reaching the other, leaving a clear “one-sided” effect.
Budget tip: Use one statement clip at the end point. It makes the asymmetry look intentional.
This works well for thick hair and highlights. Keep the braid neat near the face and let the rest stay soft and loose.
19. Minimalist Thin Waterfall for Sleek Hair
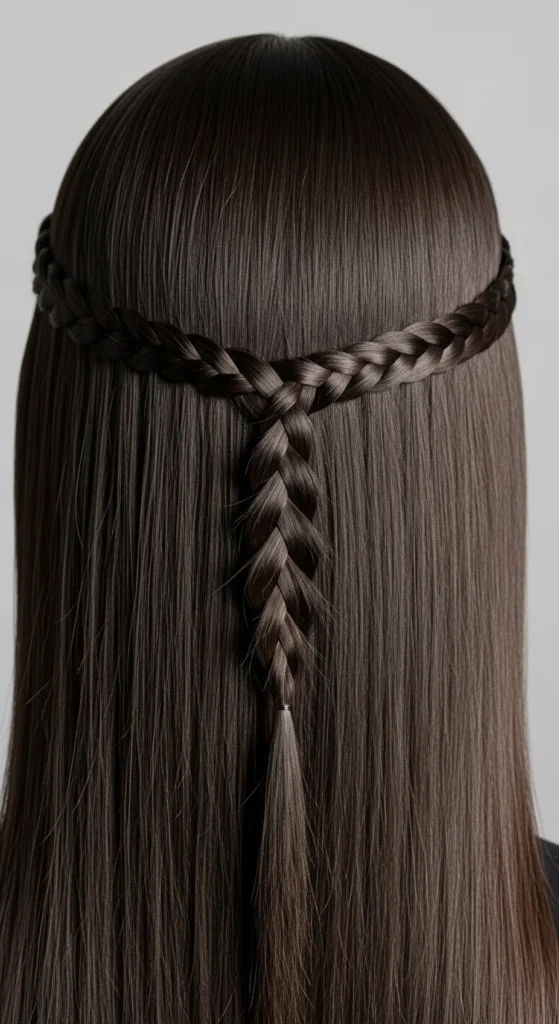
If you like clean styles, do a narrow waterfall braid. Keep your sections small and smooth. Let the dropped strands fall straight.
Budget tip: A little hand lotion can smooth flyaways if you’re in a pinch. Use a tiny amount.
This look is great for daytime and looks tidy without heavy styling. Pin the end behind the ear for a simple finish.
20. Waterfall with Colored Thread Accent
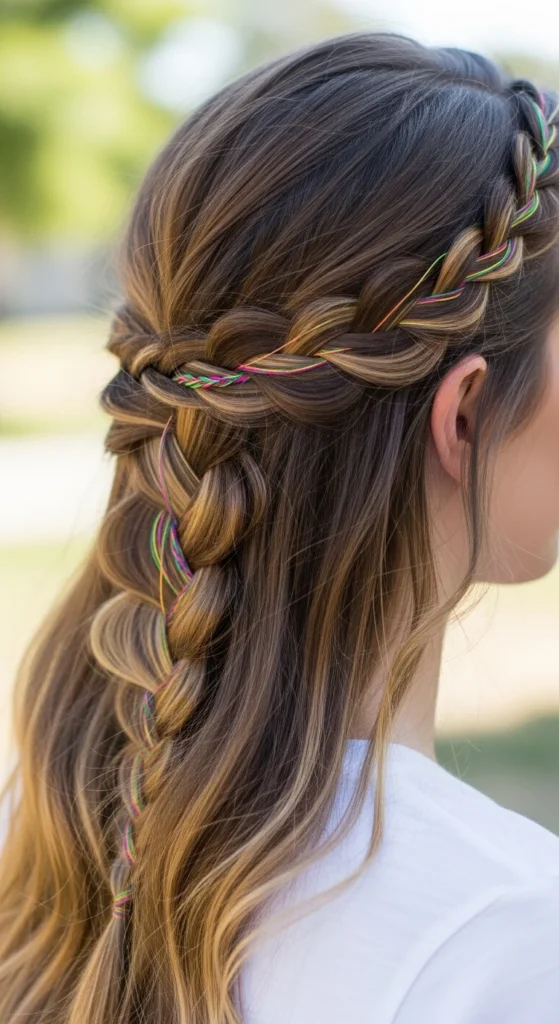
This is fun and unique. Start your waterfall braid. As you braid, weave a thin colored thread alongside one strand so it appears in the braid pattern.
Budget tip: Use embroidery thread. It’s inexpensive and comes in many colors.
Keep the thread subtle so it doesn’t overpower the braid. This is cute for younger styles, festivals, and creative photos.
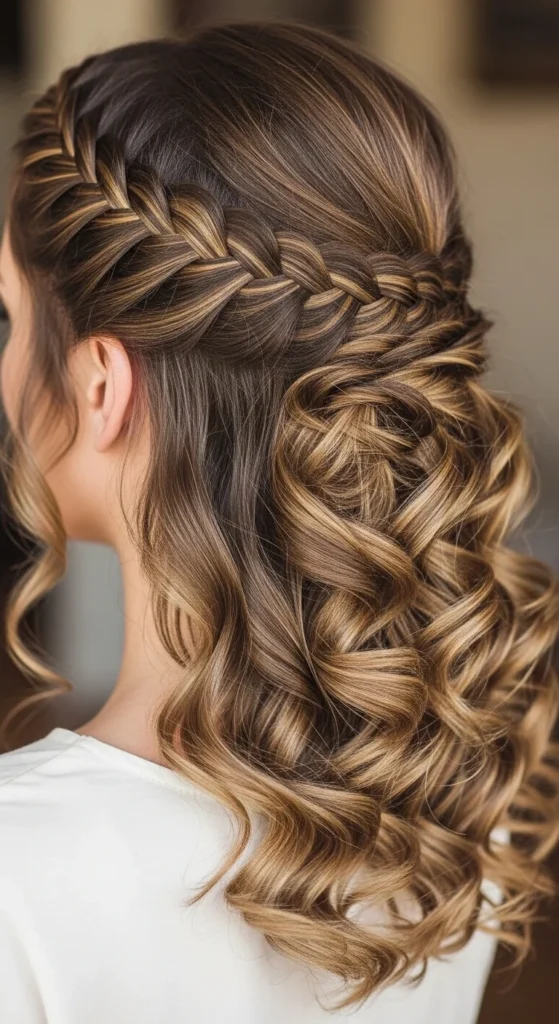
21. Waterfall Braid with Soft Curl Crown
This is a classic “special night” look. Do a waterfall braid across the crown area. Curl the rest into soft curls and brush them lightly for a gentle finish.
Budget tip: If you don’t curl, twist damp hair into a loose bun for an hour, then undo.
Pin the braid securely at the back. Add one small pin or clip if you want sparkle, but keep it simple.
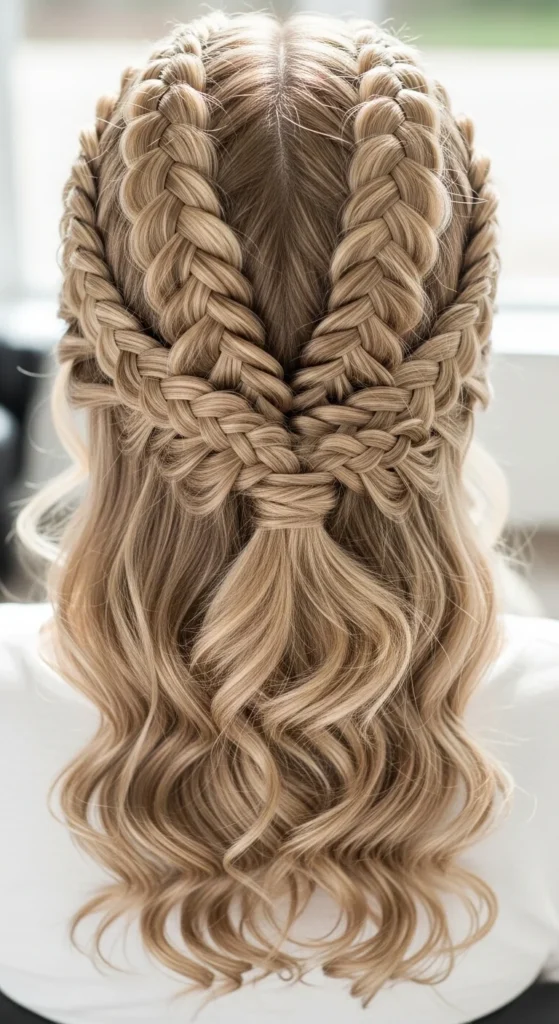
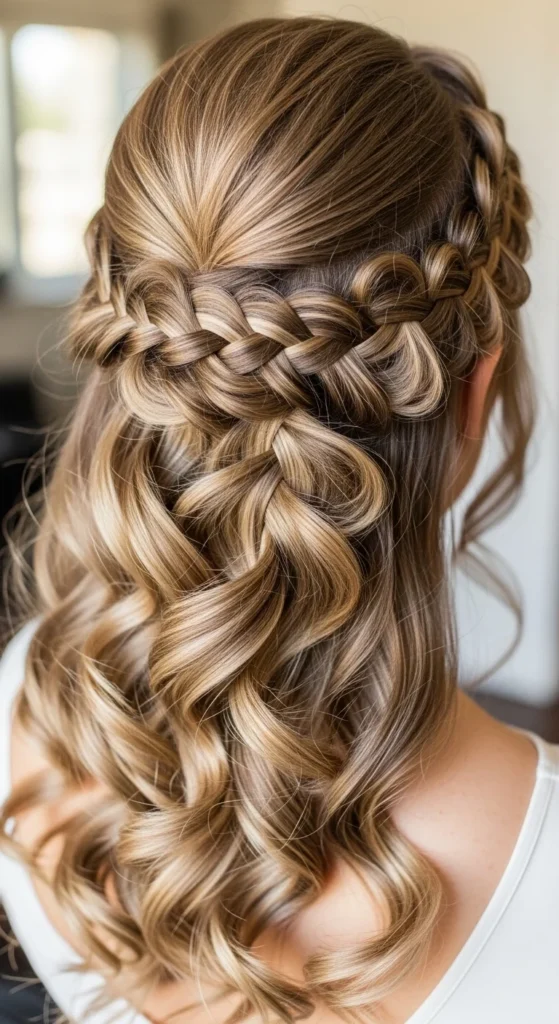
22. Double Waterfall with Center Join
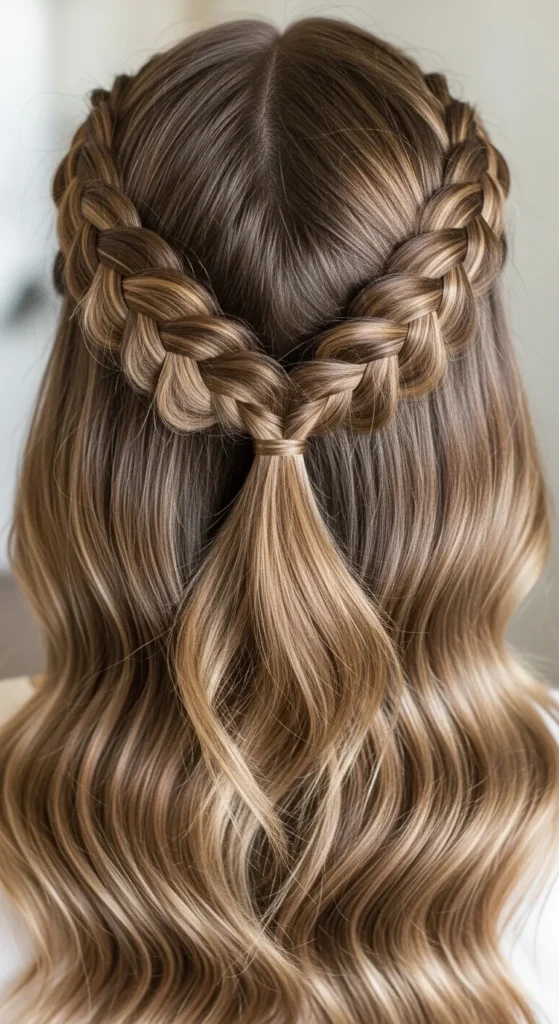
This style is symmetrical and pretty. Create one waterfall braid from the left side toward the center back. Create another from the right side and join them together with pins or a small elastic.
Budget tip: Use a tiny clear elastic to join, then cover it with a small hair strand wrapped around it.
This is great for photos and events because it looks balanced from behind. If you want it more relaxed, loosen the braid loops slightly after joining.
Conclusion
Waterfall braids look romantic because the dropped strands create a soft “ribbon” effect over your hair. Start with the classic side-to-back version, then experiment with double rows, diagonal lines, short-hair options, and simple add-ons like a clip or a tiny fishtail tail. Try one style, practice it twice, and you’ll have an easy go-to braid that works for casual days and special plans alike.

Leave a Reply