
A good highlighter doesn’t shout—it whispers. That soft, lit-from-within glow that catches the light when you move? That’s the goal. Whether you’re a beginner or just tired of looking too shiny, highlighting is all about smart placement, the right texture, and knowing when to stop.
What Highlighting Really Does (And Why It Works)
Highlighting reflects light on the high points of your face—areas the sun naturally hits first. When done correctly, it:
- Makes skin look fresh and awake
- Adds dimension when paired with contour
- Lifts features without heavy makeup
The key difference between glow and grease? Control. Placement and finish matter more than how sparkly the product is.
Step 1: Choose the Right Highlighter for Your Skin
Before application, pick a formula and shade that actually works with your skin.
Pick Your Formula
- Cream or liquid: Best for dry or normal skin, melts in naturally
- Powder: Ideal for oily skin or long wear
- Stick: Beginner-friendly and precise
Pick Your Shade
- Fair skin → pearl or soft champagne
- Medium skin → warm champagne or light gold
- Deep skin → rich gold or bronze tones
If a highlighter looks gray or chalky on you, the undertone is off—switch shades, not techniques.
Step 2: The Most Important Highlight Zones (Glow Map)
Think “strategic,” not “everywhere.”
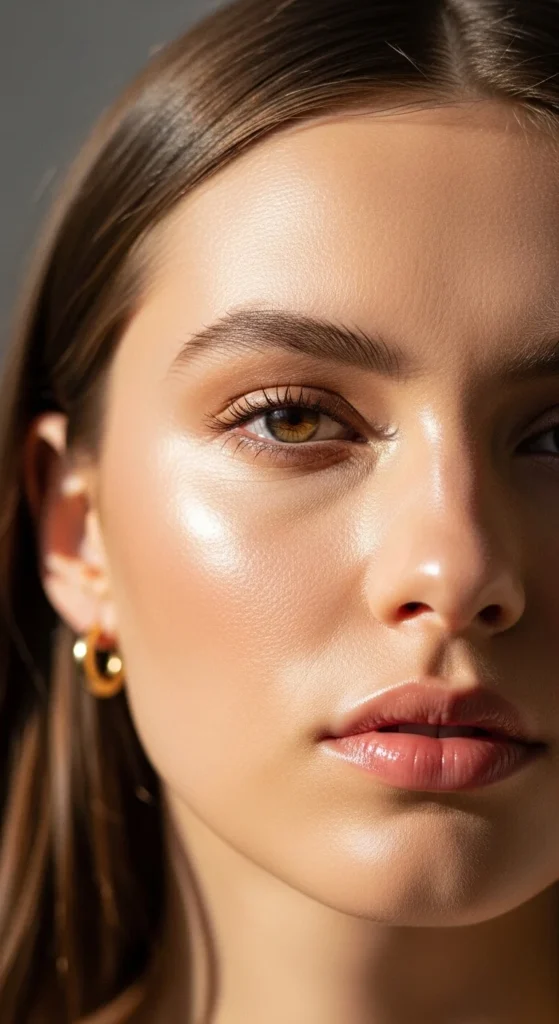
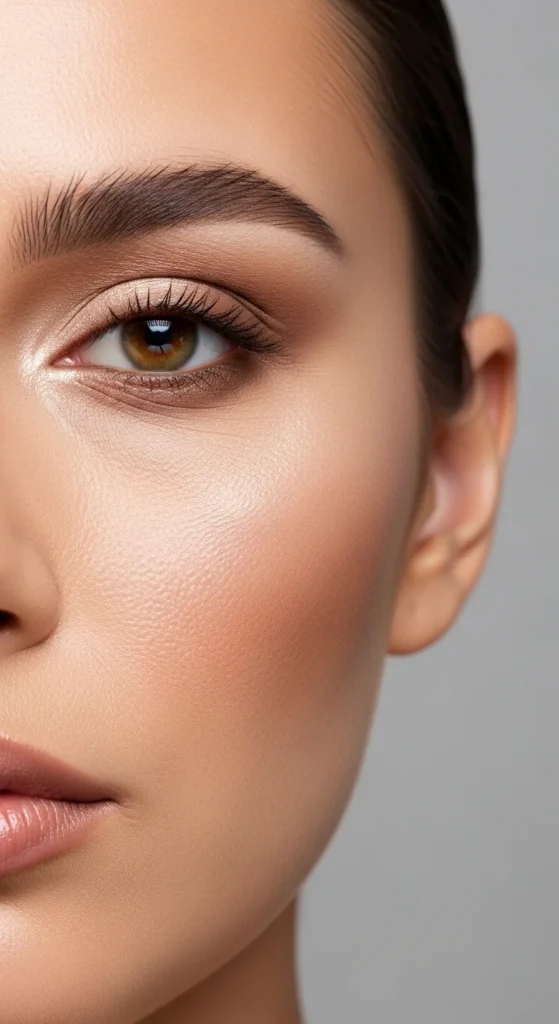
Cheekbones (Main Glow Zone)
Apply highlighter to the tops of the cheekbones, just above blush, blending upward toward the temples. This instantly lifts the face.
Inner Eye Corners
A tiny dot here:
- Brightens dark areas
- Makes eyes look bigger
- Instantly wakes up your face
Blend gently—this is a small but powerful spot.
Brow Bone
Apply just under the arch (not the entire brow). This opens up the eye area without looking shiny.
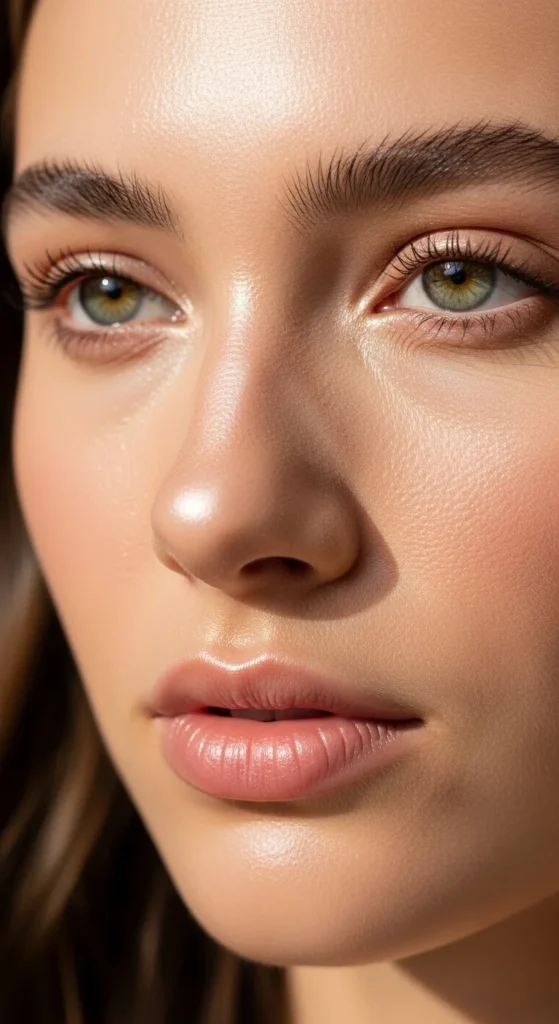
Step 3: Subtle Glow for the Center of the Face
These areas are optional but effective when done lightly.
Nose
- Draw a thin line down the bridge
- Add a tiny dot on the tip if desired
- Blend well to avoid harsh shine
This creates a soft sculpting illusion.
Cupid’s Bow
Tap a small amount along the curve of your upper lip. It:
- Enhances lip shape
- Creates a fuller appearance without extra product
Chin & Forehead (Use Sparingly)
- A touch on the center of the chin balances round faces
- A light tap on the middle of the forehead adds dimension
If your T-zone gets oily, skip these areas completely.
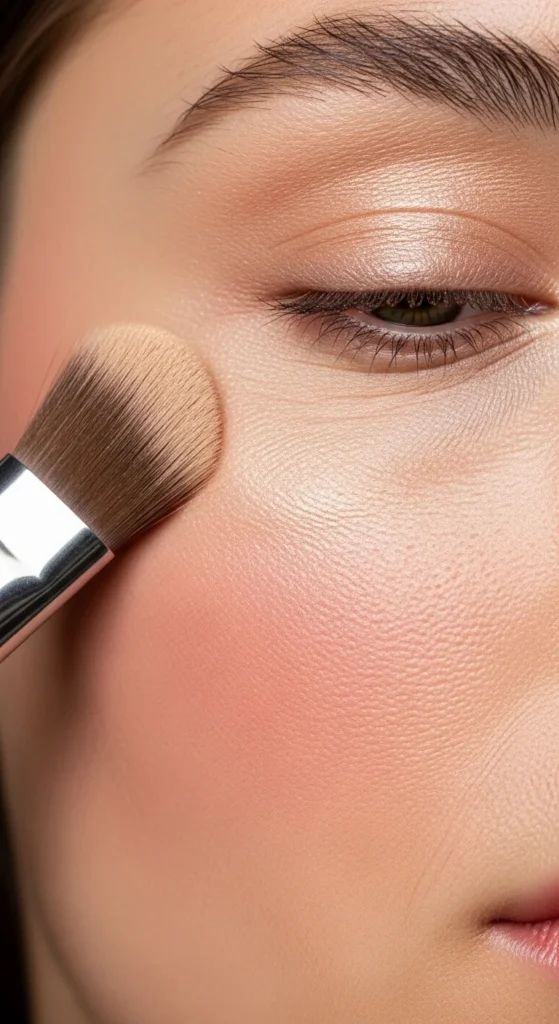
Step 4: How to Apply for a Natural Finish
Tools matter—but technique matters more.
Best Application Methods
- Fingers: Warm the product for a skin-like finish
- Damp sponge: Sheers out cream and liquid formulas
- Fan brush: Diffuses powder edges softly
Application Rules
- Tap, don’t swipe
- Start with a satin finish, then build if needed
- Blend until you can’t see where it starts or ends
A great no-tool hack: tap highlighter with your fingers for 30 seconds on high points. Instant glow.
Step 5: Build Gradually (Avoid the Overdone Look)
The most common highlighting mistake? Too much, too fast.
To keep it natural:
- Apply a small amount first
- Step back and check in natural light
- Add more only where light naturally hits
For daytime looks, satin finishes beat heavy shimmer every time. Save stronger shine for evenings or special moments.
Step 6: Highlight + Contour = Dimension
Highlight works best when paired thoughtfully with contour:
- Contour creates shadow
- Highlight brings light
Place highlight above contour on the cheekbones, not on top of it. This contrast makes features look sculpted but still soft.
Common Highlighting Mistakes to Avoid
- Highlighting textured or oily areas
- Using chunky glitter instead of fine shimmer
- Applying too close to the nose pores
- Highlighting the entire brow bone
- Skipping blending
If you ever think, “This might be too much,” it probably is. Blend again.
Final Takeaway
Highlighting isn’t about sparkle—it’s about light. When placed thoughtfully and blended well, it gives your skin that effortless, healthy glow that looks good in real life and on camera.
Save this guide for later, experiment with one glow zone at a time, and remember: soft glow always wins ✨

Leave a Reply