
Contouring doesn’t have to feel intimidating—or look heavy. The secret to a naturally sculpted face isn’t sharp lines or dramatic shades; it’s placement, blending, and knowing your face shape. Once you crack that code, contour becomes a five-minute glow-up that still looks like you.
Step 1: Find Your Face Shape First (This Changes Everything)
Before picking up any contour product, take a moment to identify your face shape. This determines where you contour—and where you don’t.
Quick guide:
- Round: Soft curves, similar width and length
- Square: Strong jawline, angular edges
- Oval: Balanced proportions, slightly longer than wide
- Heart: Wider forehead, narrow chin
- Diamond: Wide cheekbones, narrow forehead and jaw
- Long/Rectangle: Longer face, straighter sides
Why this matters? Contour is about balance. You’re either adding definition or softening structure—never both at the same spot.
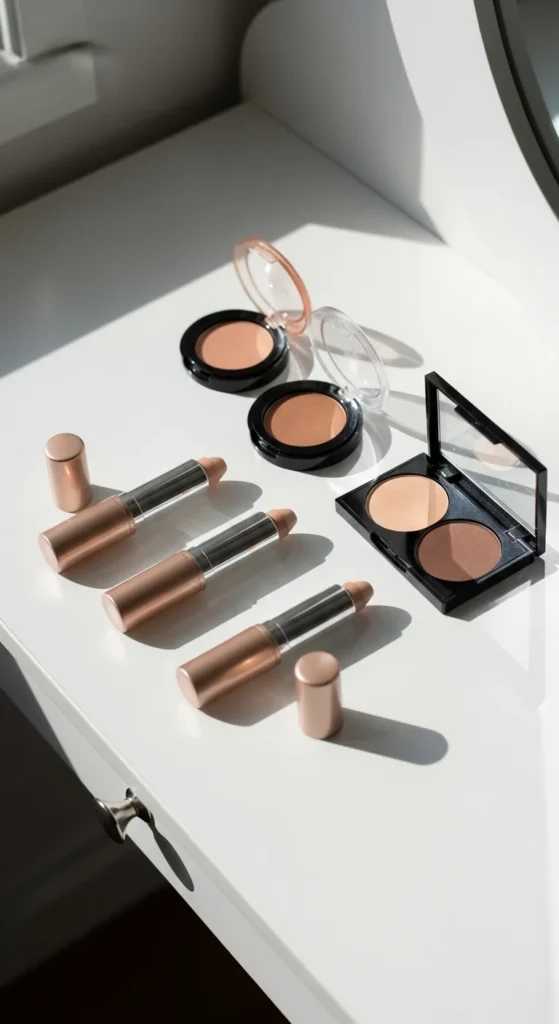
Step 2: Choose the Right Contour Formula & Shade
A muddy contour can ruin even perfect placement. Keep it simple.
Shade rule:
- Choose a contour 1–2 shades deeper than your foundation
- Match undertone:
- Cool skin → soft taupe
- Warm skin → gentle golden brown
- Olive skin → neutral-golden tones
Formula tips:
- Cream contour: Best for beginners, dewy, easy to blend
- Powder contour: Great for oily skin or long wear
- Matte bronzer: Works as a soft contour for warmth
Start after foundation and concealer so everything blends seamlessly.
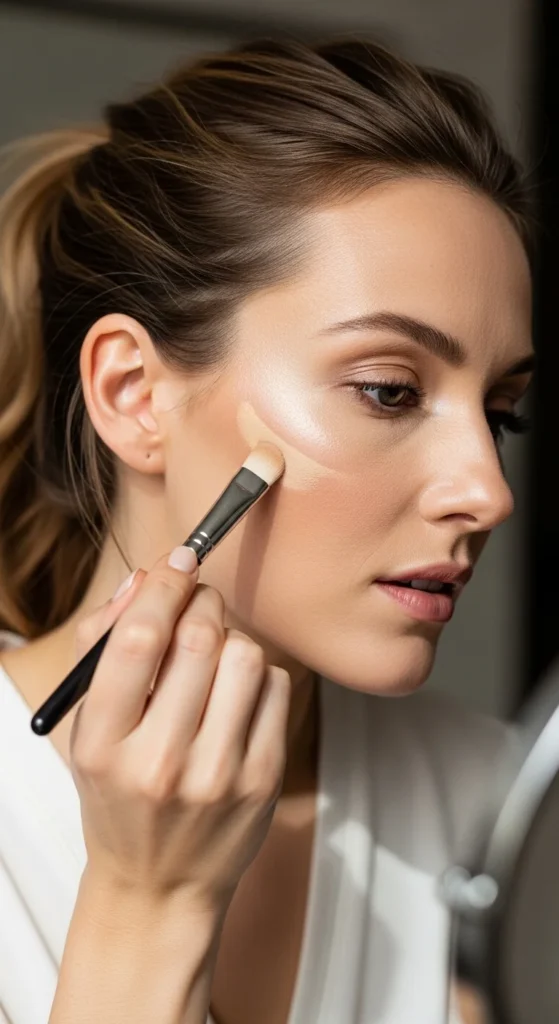
Step 3: The Beginner-Friendly “3” Shape Method
If you’re new to contour, this is your go-to technique.
Using a brush or cream stick, draw a soft “3” shape on each side of your face:
- Along the hairline/temple
- Into the hollows of the cheeks
- Down toward the jawline
This method frames the face naturally and takes less than five minutes.
Pro placement tip:
To find your cheek hollows, gently suck in your cheeks—the natural dip is where contour belongs. Stop before the corner of your mouth for a lifted look.
Step 4: Contour Placement by Face Shape
This is where contour goes from “okay” to wow.
Round Face
- Focus on diagonal lines from temple to cheek
- Light contour along jawline
- Avoid heavy contour on the center of cheeks (it widens)
Square Face
- Soften angles at temples and jaw corners
- Use gentle C-shapes instead of straight lines
Oval Face
- Contour mainly on cheek hollows
- Minimal jaw and forehead contour needed
Heart-Shaped Face
- Shade temples to balance a wider forehead
- Light contour along sides of the chin
Diamond Face
- Focus on deep cheek hollows
- Soft shading at temples to balance width
Long/Rectangle Face
- Add contour to the center of the chin
- Lightly shade hairline to shorten face length

Step 5: Blend Like a Pro (No Harsh Lines Allowed)
Blending is the difference between “sculpted” and “striped.”
Best tools:
- Angled brush: Precision on cheeks and jaw
- Fluffy brush: Diffusing powder contour
- Damp sponge: Seamless cream blending
How to blend:
- Use small circular motions
- Blend upward and outward (never drag down)
- Build slowly—less product, more blending
A great trick? Do one side of your face first, then check symmetry before moving on.
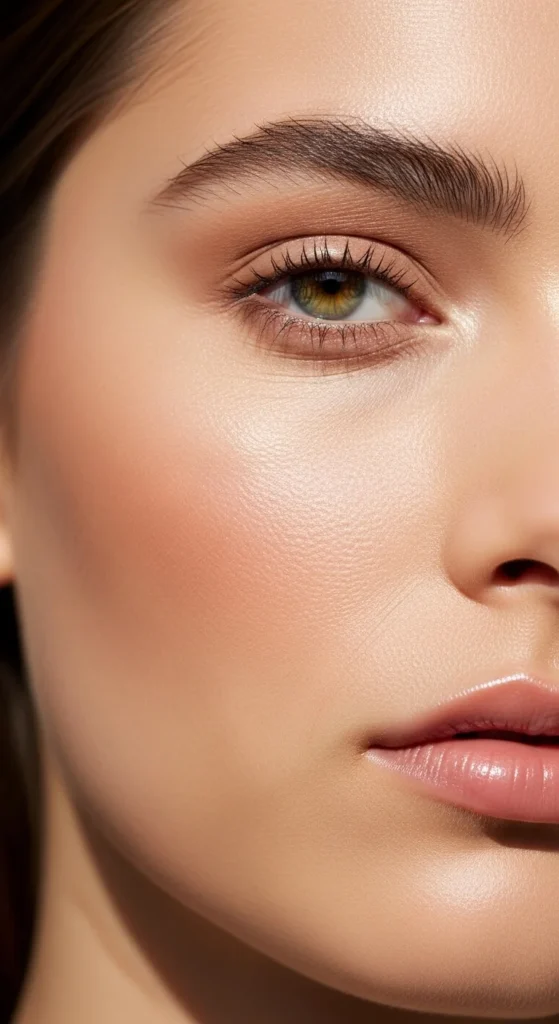
Step 6: Don’t Forget Highlight (Soft Glow Only)
Contour works best with contrast. Add a soft highlight to:
- Tops of cheekbones
- Bridge of the nose
- Cupid’s bow
Keep it subtle—this isn’t about shine overload. Just enough glow to make the contour look intentional and fresh.
Common Contour Mistakes to Avoid
- Using a shade that’s too dark or orange
- Applying contour too close to the mouth
- Skipping blending (the biggest mistake)
- Over-contouring areas your face doesn’t need
- Forgetting undertone matching
Remember: contour should enhance your bone structure, not redraw it.
Final Takeaway
Natural contour is all about strategy, not drama. When you understand your face shape, choose the right shade, and blend patiently, contour becomes easy—and honestly kind of addictive.
Save this guide for later, grab your favorite brush, and practice one technique at a time. Soft sculpt always wins ✨

Leave a Reply