
Gel nails are popular because they stay shiny, resist chips, and look neat for days. When people search for glossy gel nail designs, they usually want ideas that last through work, errands, and daily handwashing. This list shares gel looks that stay polished on short to medium lengths, with options for simple DIY and salon requests. Each design is written so you can screenshot it, show it to your nail tech, or try a simplified version at home with basic tools like a thin brush, dotting tool, and a strong glossy top coat.
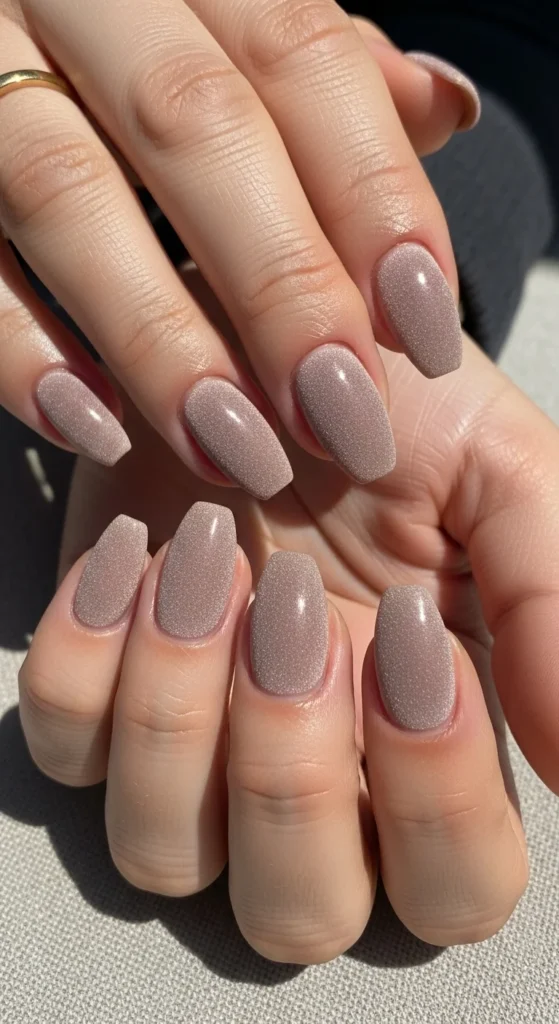
1. Velvet Chrome Short Almond
Velvet chrome looks plush and glossy at the same time. It suits short almond nails because the curved shape shows the sheen without looking heavy. Ask for a neutral velvet chrome if you want a wearable look that still feels special.
Try this at home:
- Use a neutral gel base (beige, pinky nude, or latte).
- Apply a velvet-effect magnetic gel and hold the magnet slightly above the nail for a soft “halo” line.
- Seal with a high-gloss top coat for longer wear.
Budget tip: use velvet on two accent nails and keep the rest in a matching glossy nude. That saves product and still gives the “salon” vibe.
Care tip: avoid hand sanitizer right after curing. Let the top coat cool for a minute so shine stays smooth.
2. Jelly Base Cat-Eye Glow
Cat-eye gel over a jelly base creates depth, like light sitting inside the nail. It’s great for short ovals because it looks clean and tidy even when you type or cook.
DIY-friendly steps:
- Apply a sheer jelly shade (soft pink, nude, smoky beige).
- Add a thin layer of cat-eye gel with fine particles.
- Use a magnet to pull the shimmer into a curved line near the center.
- Top coat for glassy shine.
Budget tip: choose one jelly color and one cat-eye gel, then vary the magnet shape (diagonal, curve, center stripe) across nails. It feels like a custom set with minimal products.
If you want a work-friendly version, keep the shimmer line subtle and stick to neutral tones.
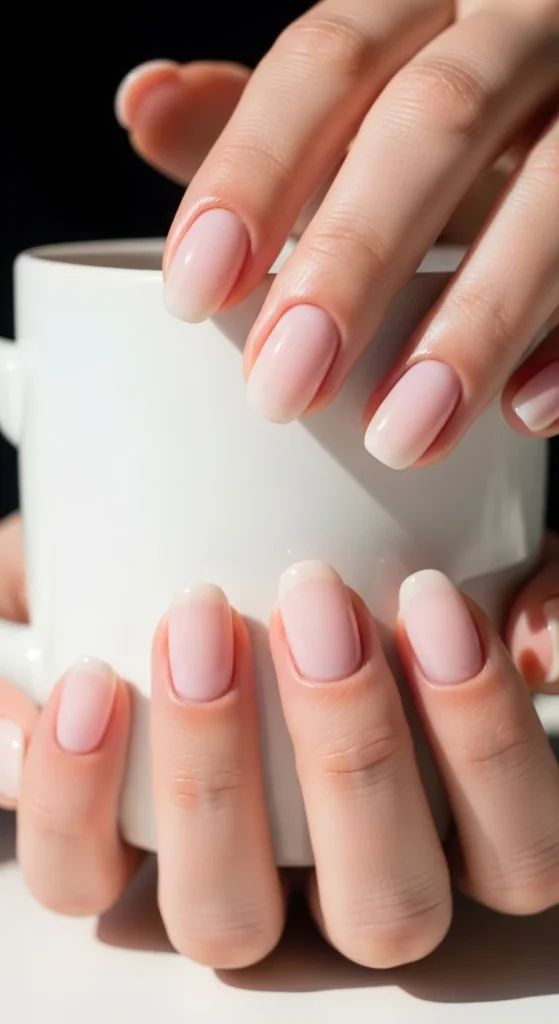
3. Soap Nails Gloss
Soap nails look like clean, hydrated nails with a smooth glass finish. This style is ideal when you want shine without obvious nail art. Short oval shapes make it look extra neat.
How to get the look:
- Choose a milky pink or milky beige sheer gel.
- Apply thin coats so the natural nail line looks soft, not hidden.
- Add a glossy top coat and cap the free edge.
Budget tip: skip extra art and spend on a good top coat. Shine is the whole point here.
If your gel chips at the tips, lightly buff the nail edge before base coat, then cap the tip with every layer. This keeps the manicure looking tidy for longer.
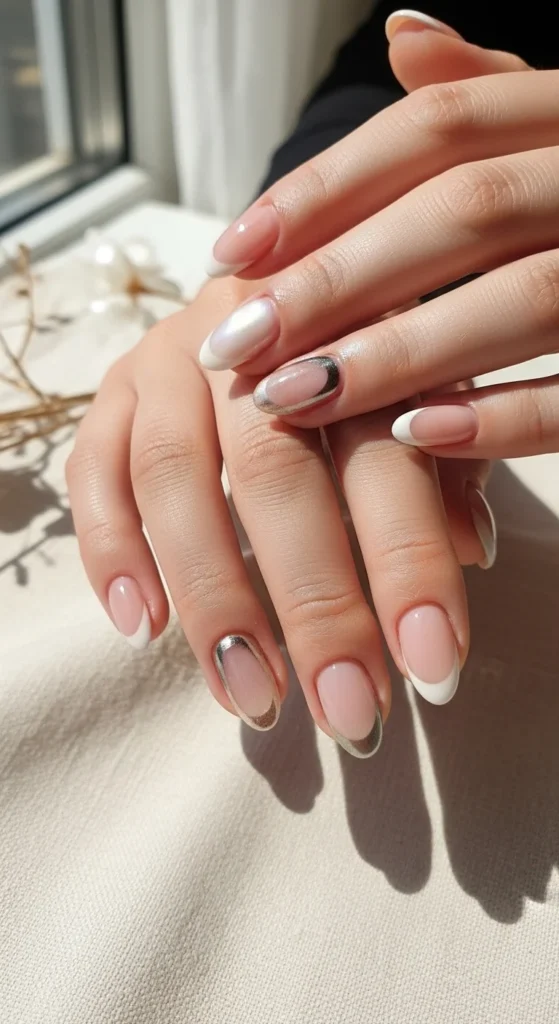
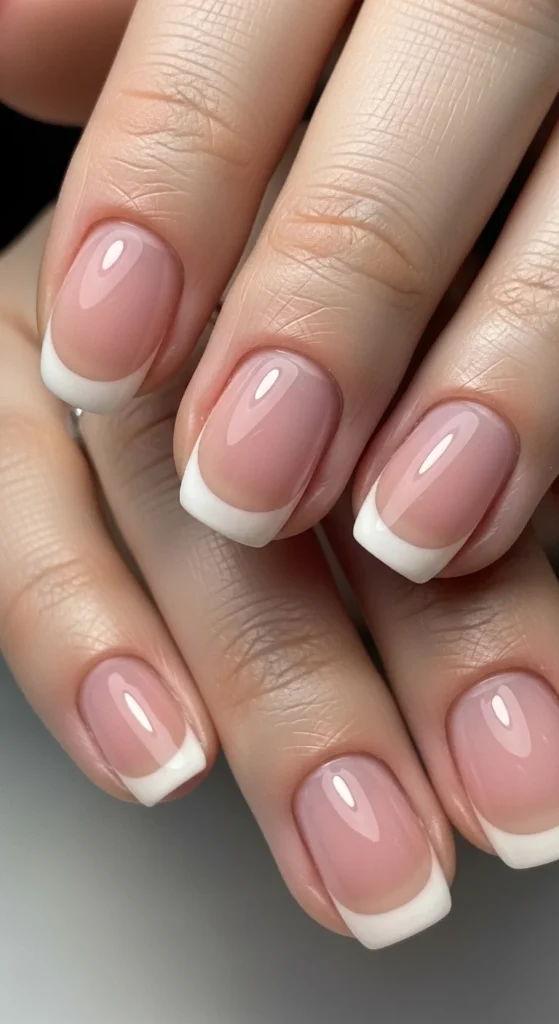
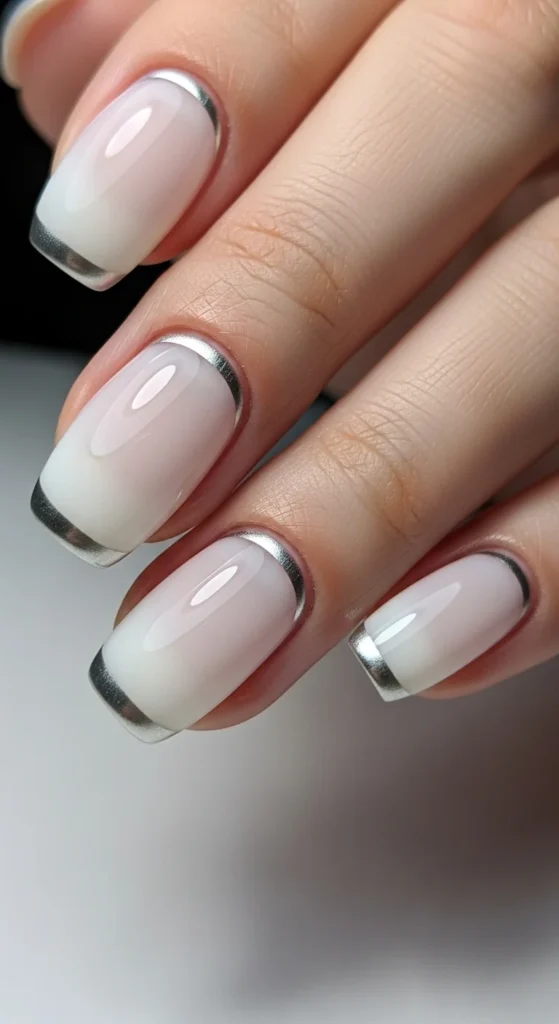
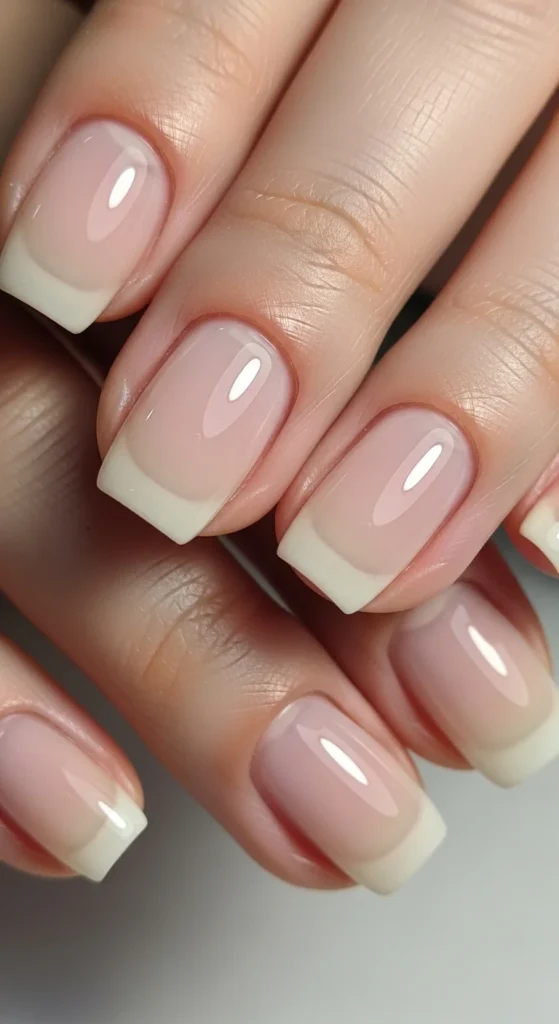
4. Micro French Tips
Micro French tips give a polished look while keeping the design minimal. On short nails, the thin tip line looks modern and clean.
At-home approach:
- Use a sheer pink base gel.
- With a thin liner brush, paint a tiny curved line at the free edge.
- Cure, then top coat for a smooth finish.
Budget tip: try micro tips on just two nails per hand, and keep the rest plain glossy sheer. You get the style without spending extra time.
Color ideas: off-white, soft gray, espresso brown, or muted metallic. Keep it narrow so it doesn’t shorten the nail visually.
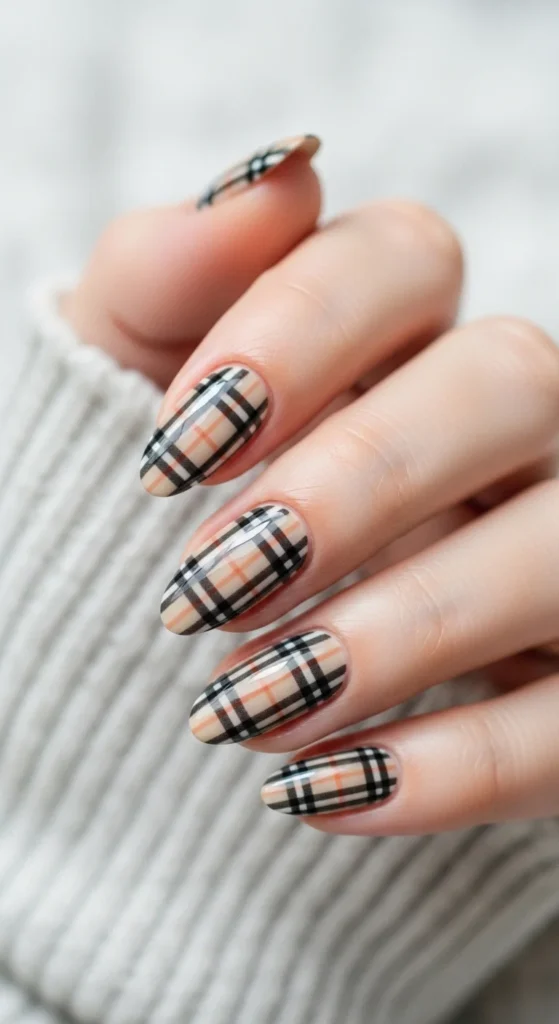
5. Preppy Plaid in Neutrals
Plaid looks detailed, yet it can stay wearable when the colors are soft. Gel is perfect for plaid because layers cure quickly, so lines stay crisp.
Simple method:
- Apply a beige base.
- Add thin crossing lines with a liner brush in black and cream.
- Place a few lines only, not a full grid, for a cleaner finish.
Budget tip: do plaid as accent nails (ring fingers) and keep the rest in glossy beige. That saves time and still looks planned.
If you want a school-prep vibe, try an argyle-inspired diagonal plaid on one nail and simple micro tips on the others.
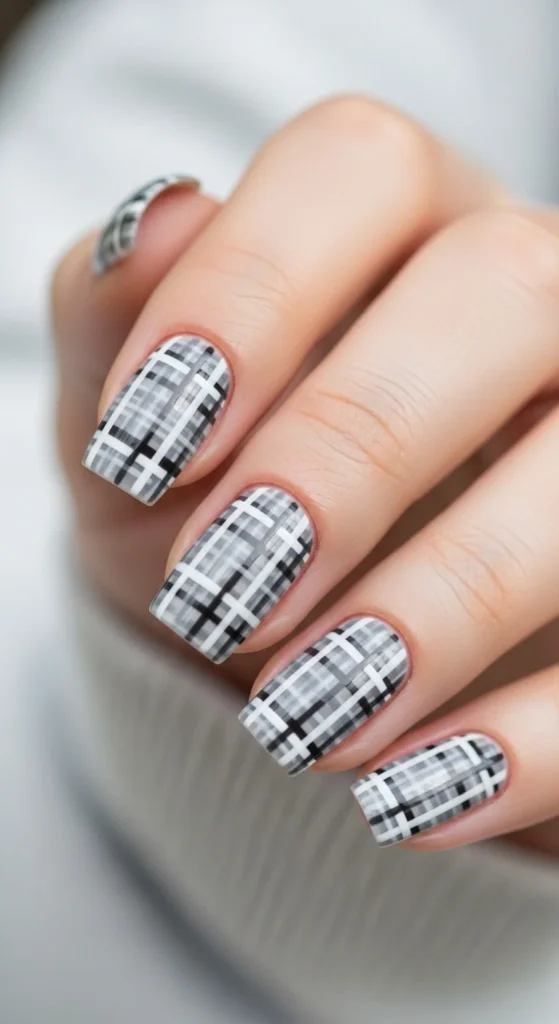
6. Tweed Texture Lines
Tweed nail art mimics fabric without bulky add-ons. It works best on short square or squoval shapes because the surface is flat and easy to line.
DIY idea:
- Start with a creamy base (light gray, ivory, or soft beige).
- Add thin crosshatch strokes in two tones.
- Keep lines slightly uneven so it feels like woven thread.
Budget tip: use the same two liner colors you already own for other designs. Tweed is mostly about placement, not special products.
Finish with a glossy top coat for a “polished fabric” look. For a calmer version, keep the pattern only on one nail per hand.
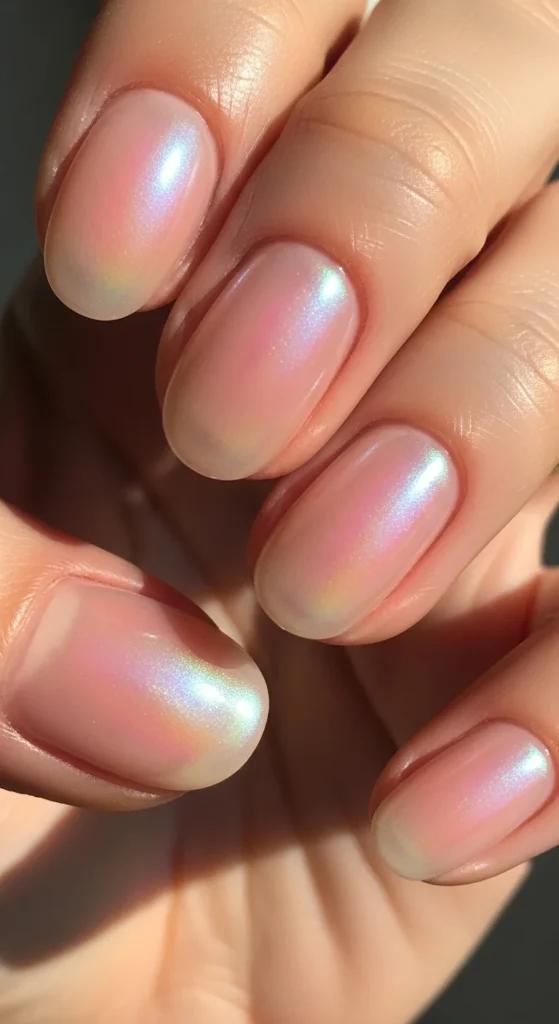
7. Pearly Glow Finish
Pearlescent gels give a soft glow that shifts gently in sunlight. It’s a great choice if you like glossy nails but want something more than plain nude.
How to wear it:
- Choose a pale pink or milky nude base.
- Add a pearl chrome or pearl gel layer.
- Seal with a high-gloss top coat.
Budget tip: pearl works beautifully as a topper, so you can use it over several base colors you already have.
Short oval nails look especially clean with this finish, and regrowth is less obvious when the base is sheer.
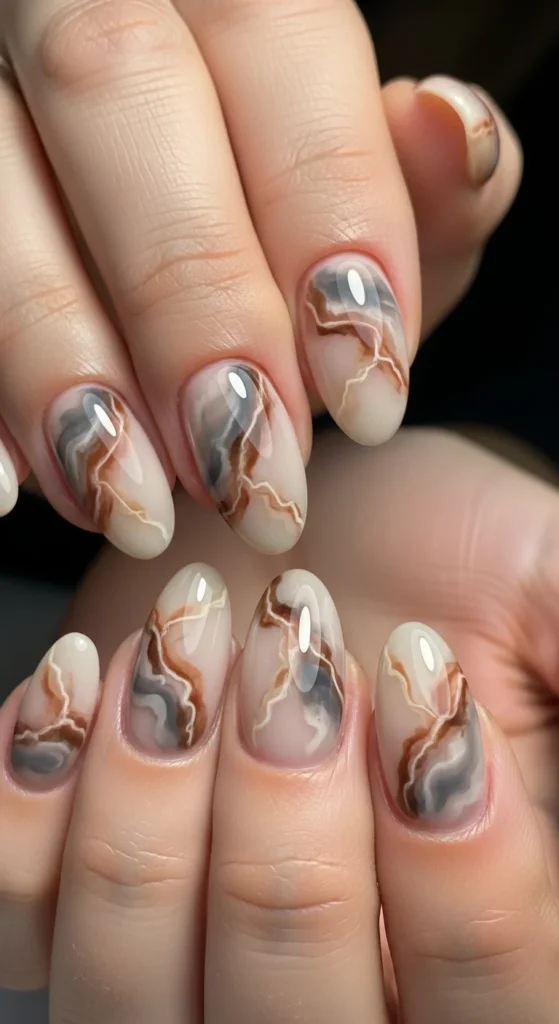
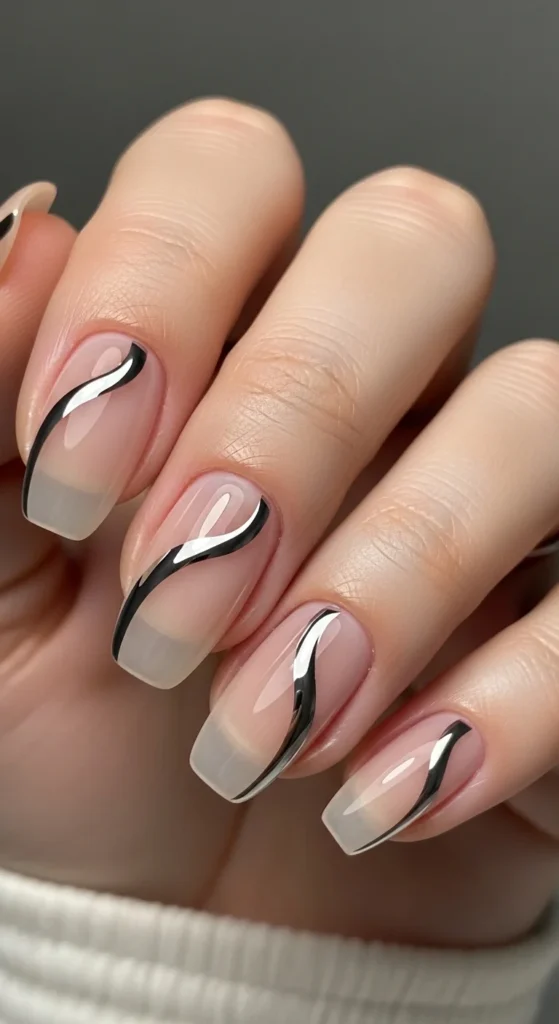
8. Quartz Earth Swirls
Earthy swirls look artistic while staying neutral. Quartz-style lines suit short almonds and short ovals because the pattern elongates the nail.
DIY steps:
- Apply a sheer beige base.
- Use a thin brush to draw soft brown curved lines.
- Add a touch of milky white in small patches for a stone-like effect.
- Top coat for a glassy surface.
Budget tip: use two colors only. The design still reads as “stone” without extra shades.
This style pairs well with gold rings and neutral outfits, and it stays office-friendly when tones remain muted.
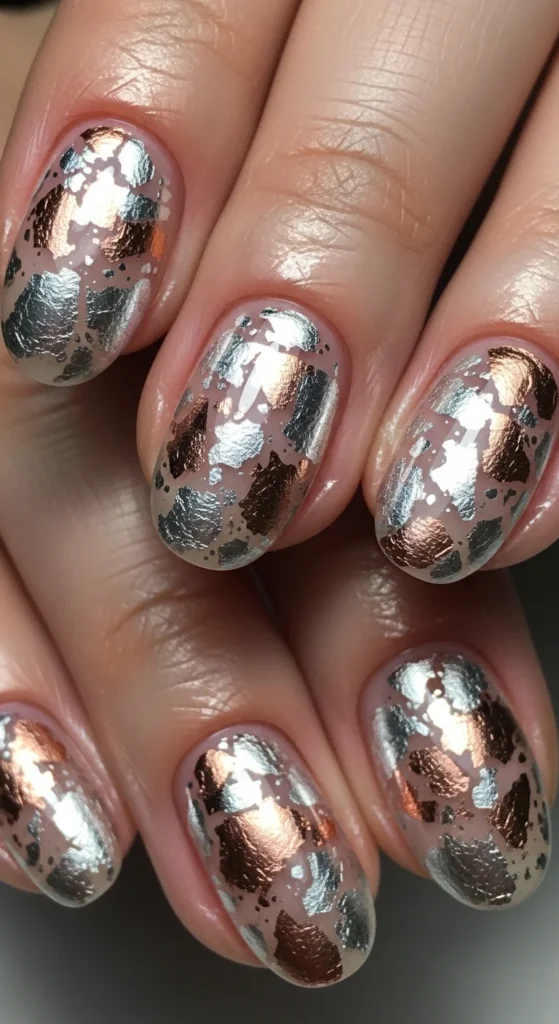
9. Mixed Metal Foil Accents
Mixed metals add sparkle without heavy gems. Foil flakes look expensive but cost very little.
Try this:
- Apply a glossy nude gel base.
- Place tiny foil pieces near the sides or at the cuticle area.
- Keep foil sparse so nails stay clean-looking.
- Seal with top coat so edges don’t catch.
Budget tip: use foil on two nails per hand only. It still looks styled, and removal is easier later.
If you like a calmer version, choose one metal tone and keep placement minimal.
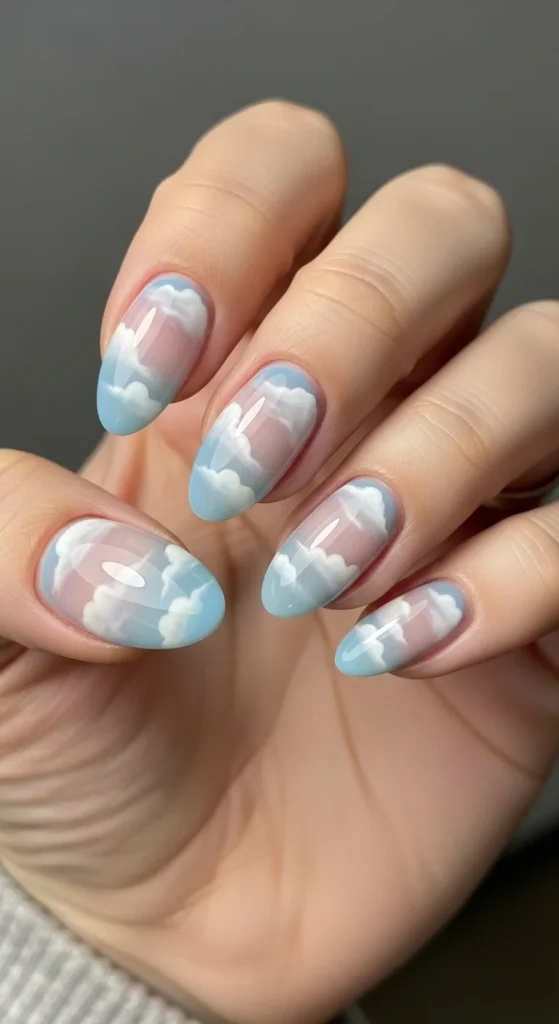
10. Dreamy Cloud Nails
Cloud nails look soft and playful. Gel makes them easy because you can build the effect in thin layers.
Simple way:
- Start with a sheer blue or sheer milky base.
- Dab white gel lightly with a sponge to form cloud edges.
- Add tiny dots for fluffy detail.
- Top coat for shine.
Budget tip: do clouds on accent nails, and keep the rest in matching sheer blue.
Add a tiny flower detail on one nail if you want a seasonal touch, but keep it small so the set stays clean.
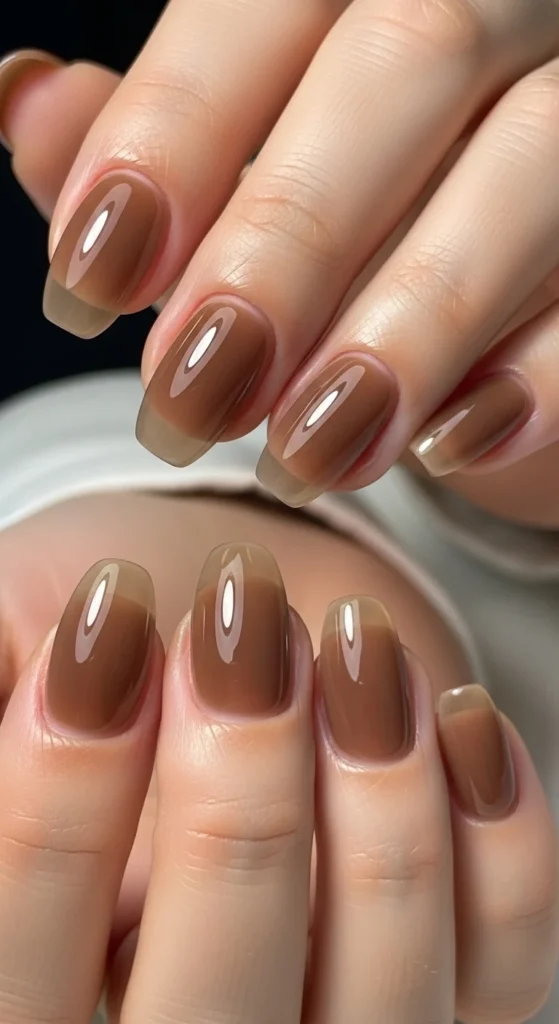
11. Sheer Glass Neutrals
Sheer brown or sheer nude gel gives a “glass” look that hides minor chips better than opaque colors. It’s a smart pick for busy hands.
How to get it:
- Choose a translucent nude, taupe, or cocoa jelly gel.
- Apply two thin coats.
- Add top coat and cap the free edge.
Budget tip: skip nail art and focus on prep and top coat. The shine makes the manicure look salon-done.
This style looks great on short ovals and short squovals, and it pairs easily with any wardrobe.
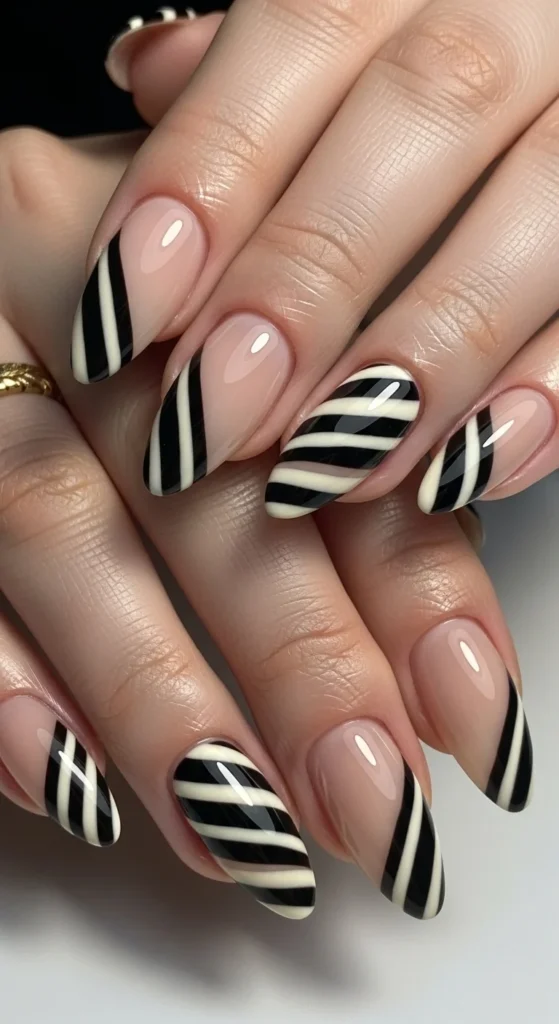
12. Bold Stripe Pattern
Stripes bring a graphic look that still suits short nails when spacing is clean.
DIY method:
- Use a nude base.
- Paint two or three thin stripes per nail with a liner brush.
- Keep stripes vertical for a lengthening effect.
Budget tip: do stripes only on two nails and keep the rest glossy nude.
If you want variety, alternate stripe directions on each hand while keeping the same colors.
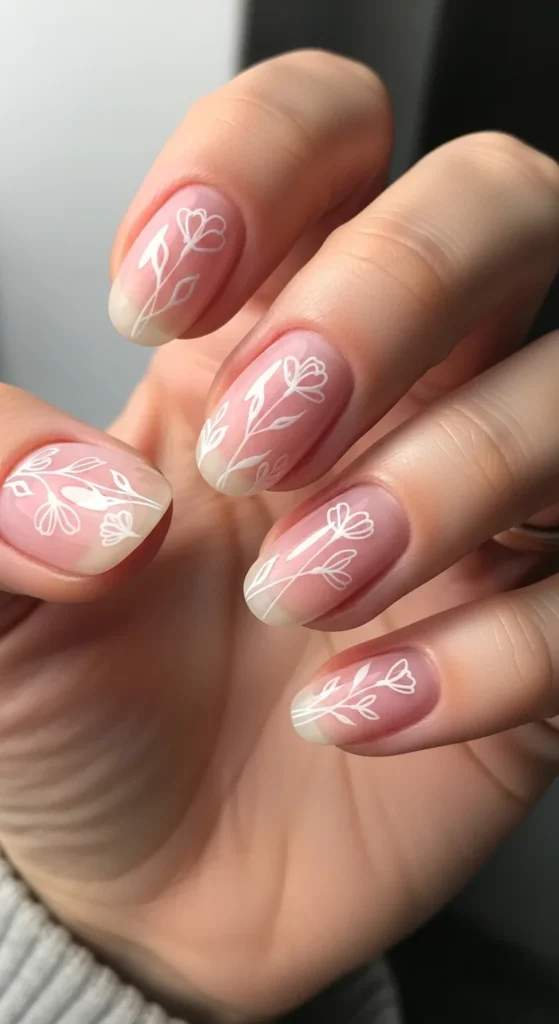
13. Minimal Floral Stems
Minimal florals look pretty without taking over the nail. Stems and tiny petals suit short lengths because they don’t crowd the surface.
Easy steps:
- Apply a sheer pink base.
- Draw a thin stem line with a liner brush.
- Add two or three tiny petals as dots.
- Top coat for shine.
Budget tip: keep florals to one or two accent nails.
This style looks especially clean when the base is sheer and the lines are thin.
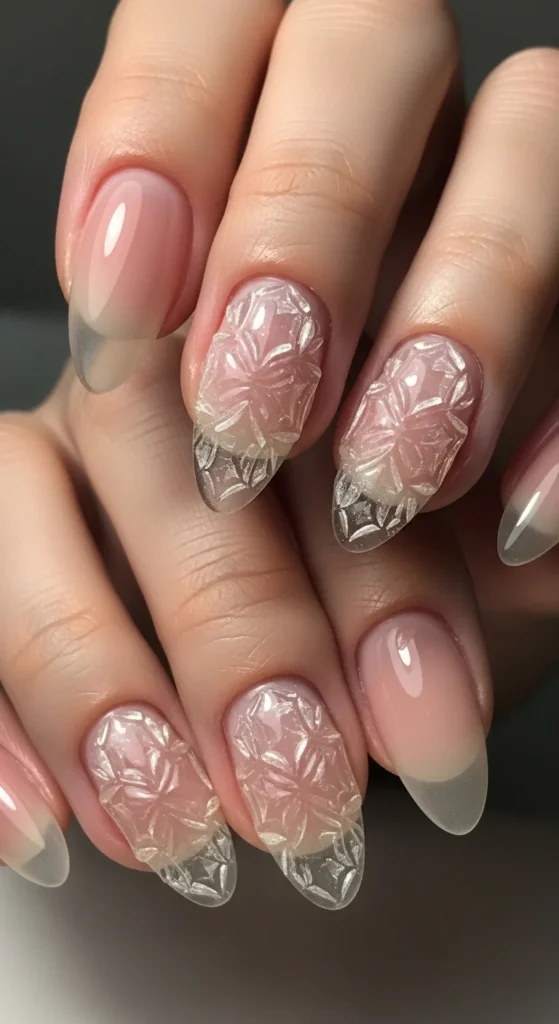
14. Raised Glass Texture
Raised clear gel texture adds a glassy dimension. It looks detailed without extra color.
How it works:
- Apply a sheer nude or jelly base.
- Use builder gel to add raised lines or small raised patches.
- Cure well, then top coat for smooth shine.
Budget tip: do the raised texture on two nails per hand.
This look pairs nicely with jelly tones and cat-eye gels, and it feels modern while staying minimal.
15. Jelly With Matte Top Twist
A matte top over a jelly base gives a soft-focus finish while still looking neat. It’s a fun change if you are tired of full gloss.
Try this:
- Apply a translucent jelly pink or jelly nude.
- Cure, then add matte top coat.
- Leave one accent nail glossy for contrast.
Budget tip: one matte top coat transforms many jelly shades you already own.
Short nails look tidy with this style, and the matte surface hides tiny scratches better than full gloss.
16. Neon Jelly With Soft Shimmer
Neon jelly can look stylish when it’s sheer, not opaque. A soft shimmer layer tones it down while keeping it fun.
DIY idea:
- Apply a sheer neon jelly (coral, lime, or pink).
- Add a thin shimmer gel on top.
- Seal with glossy top coat.
Budget tip: use neon on accent nails only if you want a calmer set.
This look is great for summer days and photos, especially on short almond nails.
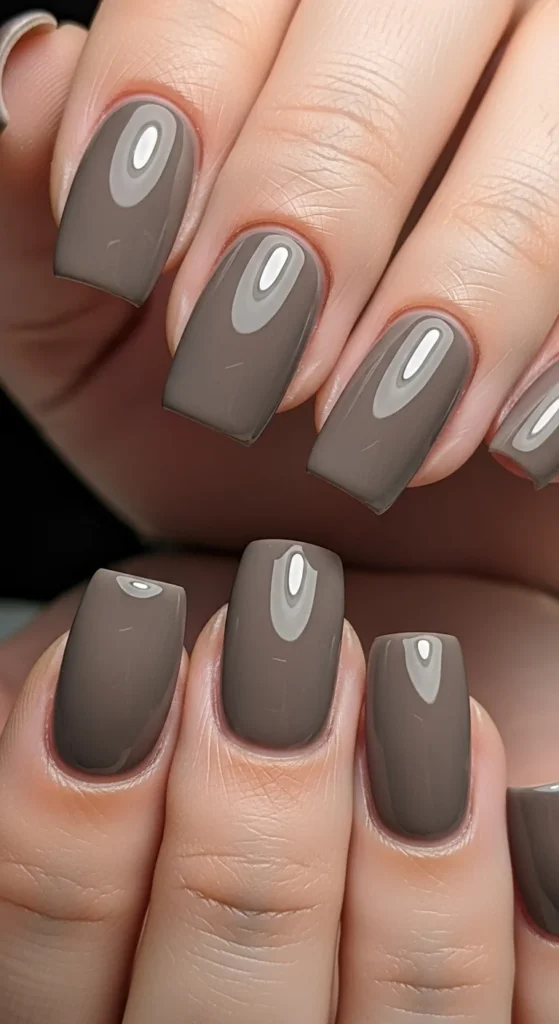
17. Moody Taupe Gloss
A deep taupe gel reads polished and modern. It’s a strong option for people who want darker shades without going full black.
How to wear it:
- Choose a taupe or espresso-leaning shade.
- Apply thin layers for a smooth finish.
- Top coat for shine and cap the edges.
Budget tip: one solid color set is the easiest “salon look” for DIY. Spend your time on cuticle cleanup and filing.
This style fits short squoval nails perfectly.
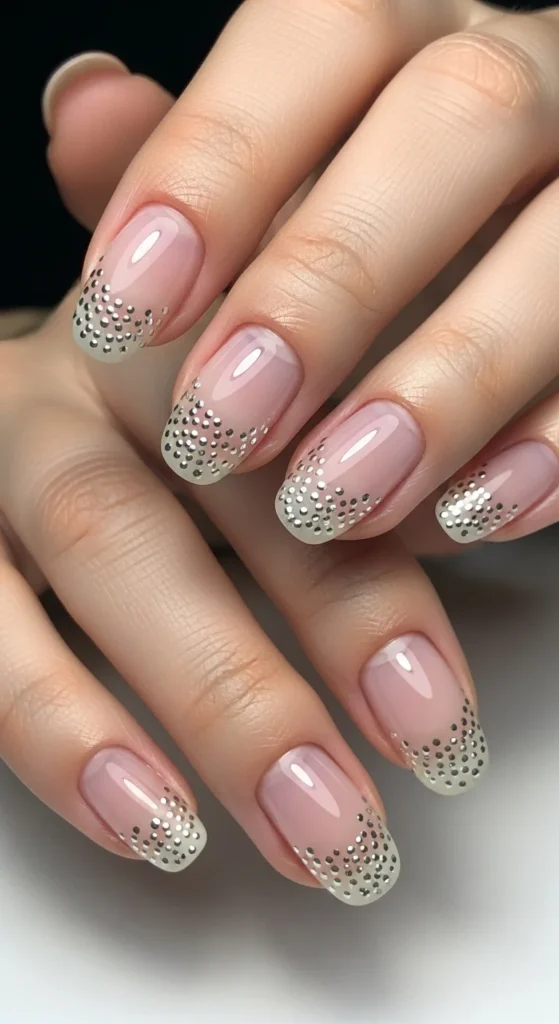
18. Micro Dot Minimal Art
Tiny dots add design without messy brushwork. It’s beginner-friendly and looks cute on short nails.
Simple steps:
- Apply a sheer base (pink or nude).
- Use a dotting tool to add 2–4 tiny dots near the tip or along one side.
- Top coat for a smooth finish.
Budget tip: use one metallic dot color only. The look still feels planned.
This design works well when you want something small but not plain.
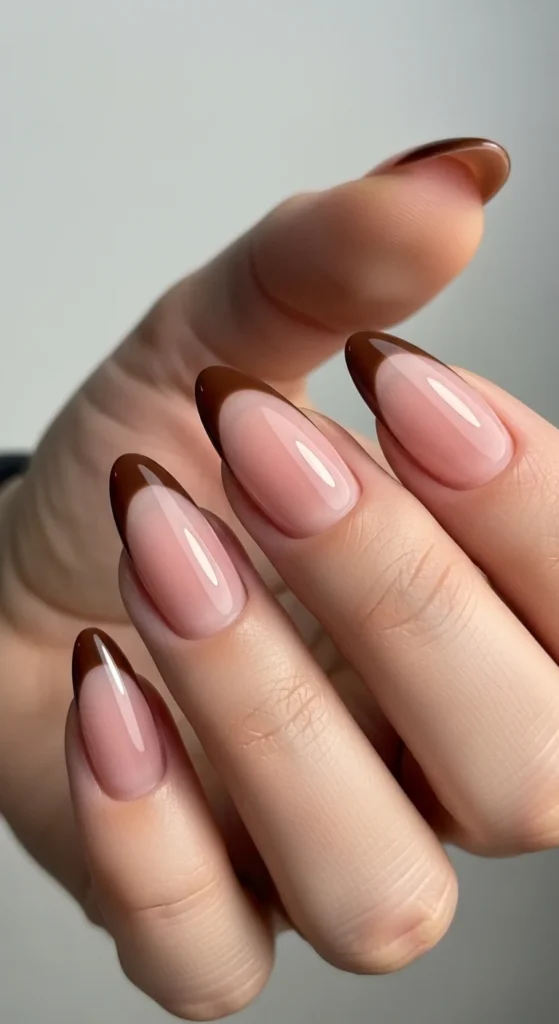
19. Espresso Micro French
Dark micro tips look sharp and modern. Espresso brown feels softer than black while still giving contrast.
DIY approach:
- Sheer nude base.
- Thin espresso line at the free edge using a liner brush.
- Top coat.
Budget tip: do espresso tips on both hands and skip accent art. The design already stands out.
This style suits office looks and casual outfits.
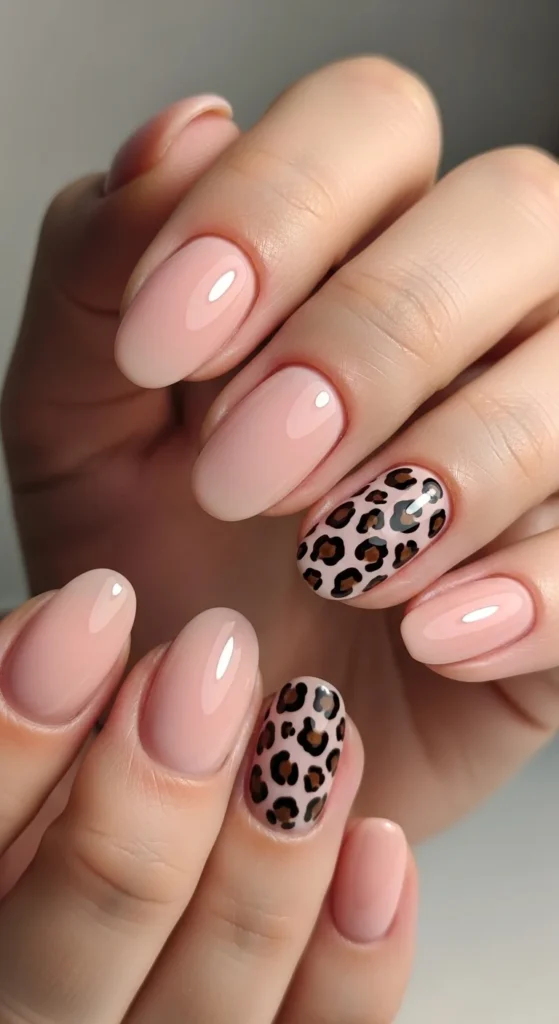
20. Leopard Accent Nails
Animal print looks best as an accent on short nails. Gel keeps the spots crisp and glossy.
Easy steps:
- Nude base on all nails.
- On two accent nails, add small brown blobs and outline parts of them with black.
- Seal with top coat.
Budget tip: keep the print on one nail per hand if you want a calmer style.
This is a simple design that still feels trendy.
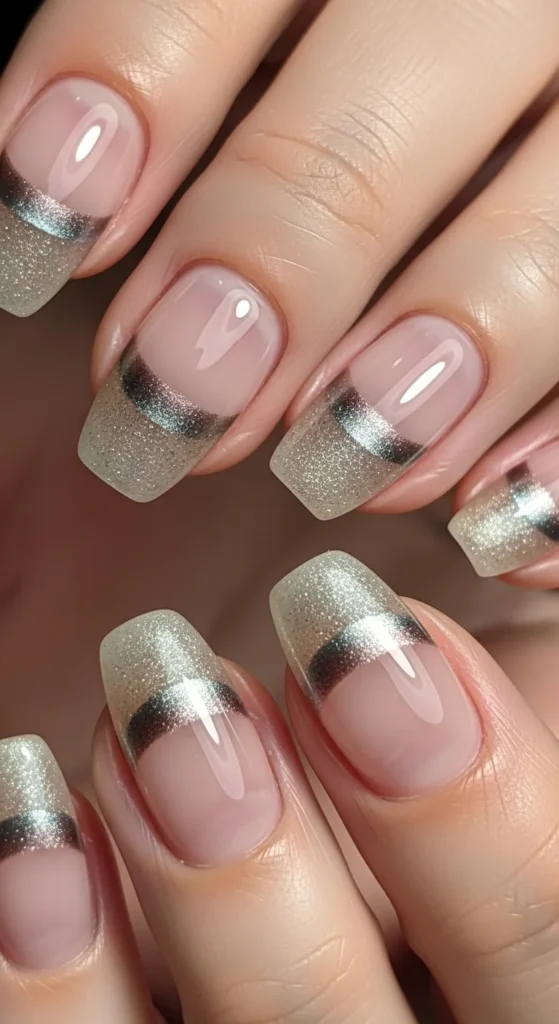
21. Pearl Tips
Pearl tips look soft and elegant. They also hide tip wear better than plain white.
Try this:
- Sheer pink base.
- Apply pearl chrome only at the tips.
- Top coat for shine.
Budget tip: pearl chrome as a tip is less product than a full nail layer.
This style pairs nicely with oval and almond shapes.

22. Cuticle Frame Detail
A thin metallic line near the cuticle adds a jewelry-like feel. It’s subtle and neat on short nails.
DIY method:
- Milky white or sheer nude base.
- Use a liner brush to paint a thin arc near the cuticle.
- Top coat to smooth it out.
Budget tip: do the frame detail only on two nails per hand.
This look feels tidy and modern, especially with simple outfits.
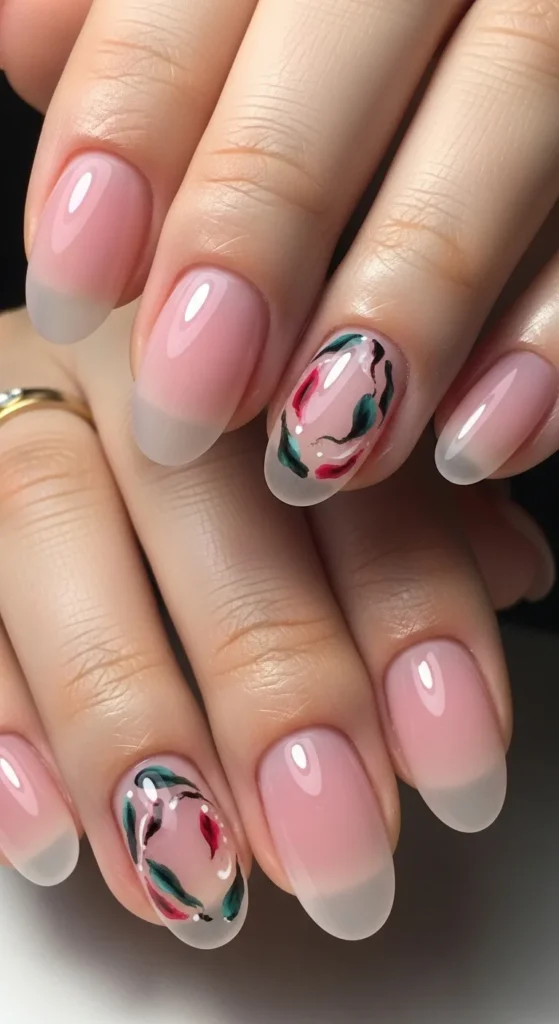
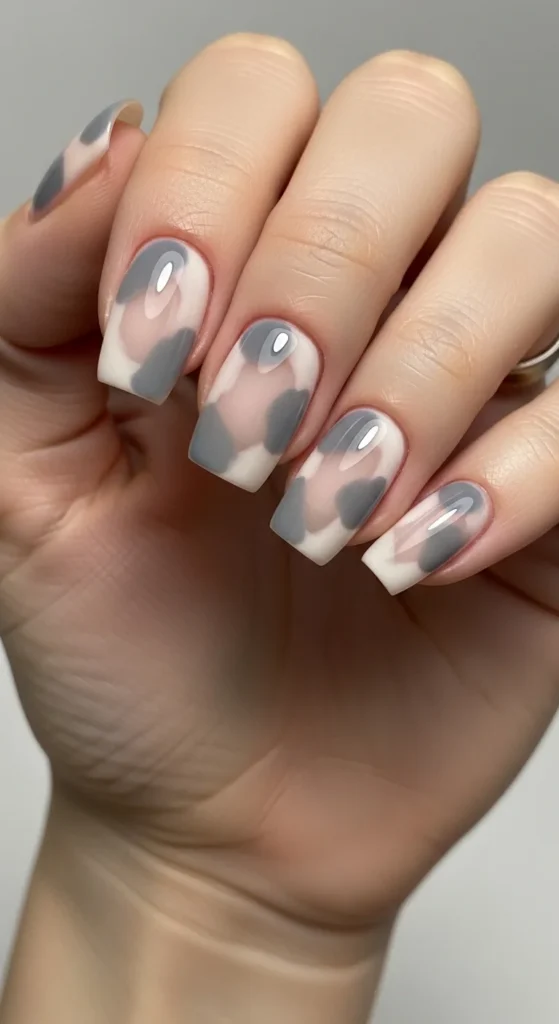
23. Japanese Nuance Layers
Nuance nails use soft layered patches for depth. It looks artistic without needing perfect lines.
How to do it:
- Apply a sheer milky base.
- Add small patches of a second shade (gray-beige, soft brown, or pale mauve).
- Keep edges slightly blurred.
- Glossy top coat for a smooth surface.
Budget tip: two shades are enough. The style relies on placement, not many colors.
Short squoval nails look especially clean with this approach.
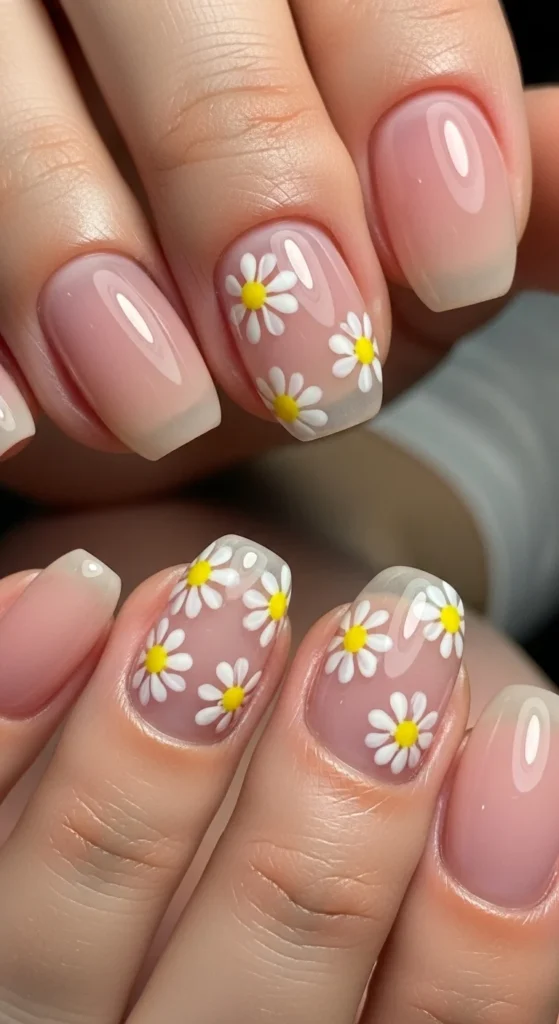
24. Tiny Daisy Accents
Daisies look cute and seasonal. On short nails, keep them tiny.
DIY steps:
- Sheer pink base.
- Add five small white dots in a circle.
- Place a yellow dot center.
- Top coat.
Budget tip: daisies on two nails per hand keep it quick.
This look photographs well and stays light.
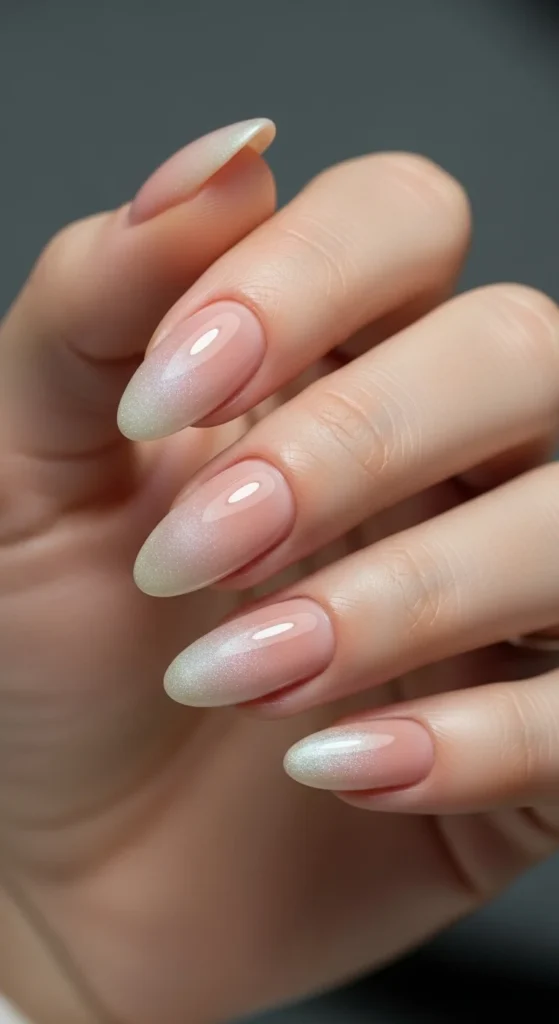
25. Nude-to-Pearl Gradient
A soft gradient looks polished and hides grow-out well.
How to do it:
- Nude base coat.
- Sponge a pearl shimmer lightly toward the tips.
- Build slowly with thin layers.
- Top coat for shine.
Budget tip: one shimmer topper creates many gradient looks over different nudes.
Short almond shapes show the fade nicely.
26. Chrome Line Accents
Chrome lines give a modern look without full chrome coverage. It’s great for minimal nail art lovers.
Try this:
- Nude base.
- Add one thin chrome line down the center or diagonally across the nail.
- Keep other nails plain glossy nude.
Budget tip: use chrome as detail only, so the same product lasts longer.
This is easy to request at a salon too: “nude gel with thin chrome line accents.”
27. Bare-Gloss Healthy Look
A clear glossy gel on natural nails looks clean and polished. It’s also a smart choice when you want low maintenance.
How to do it:
- Focus on prep: push back cuticles, lightly buff shine, clean nails well.
- Apply base coat, then clear gel, then glossy top coat.
- Cap the free edge every time.
Budget tip: this uses the least color product, so it’s cost-friendly.
If you want a tiny detail, add one micro dot or one thin tip line on a single nail per hand.
Conclusion
Glossy gel designs can look neat for days when prep is clean and the top coat is sealed at the tips. These 27 ideas cover everything from velvet chrome and cat-eye shimmer to jelly layers, plaid, tweed, clouds, and micro details that suit short ovals and short almonds. Save the designs you like, pick two or three that match your routine, and repeat them with new colors through the year. A small change in finish or accent placement can make the next gel set feel brand new while still staying tidy and long-wearing.

Leave a Reply