
French braid hairstyles stay popular because they look polished, hold well, and work on almost any length with a few small tweaks. If you’re a beginner, the key is simple hand rhythm and a little grip. If you’ve braided before, small changes—like texture, side placement, ribbons, or a low bun finish—can make the same technique feel brand new. Below are 23 elegant French braid ideas you can wear to work, weddings, school runs, or evenings out, with easy steps and low-cost tricks.
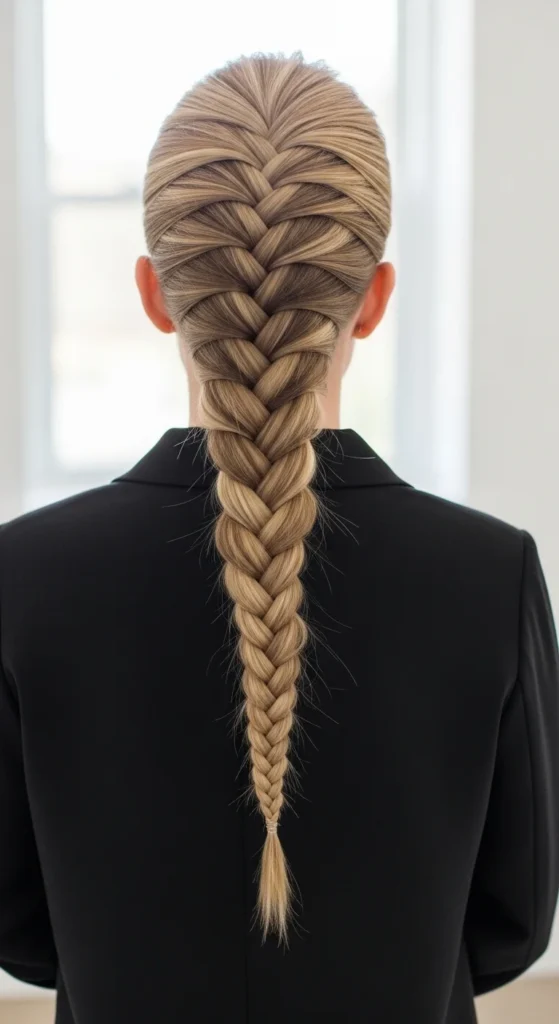
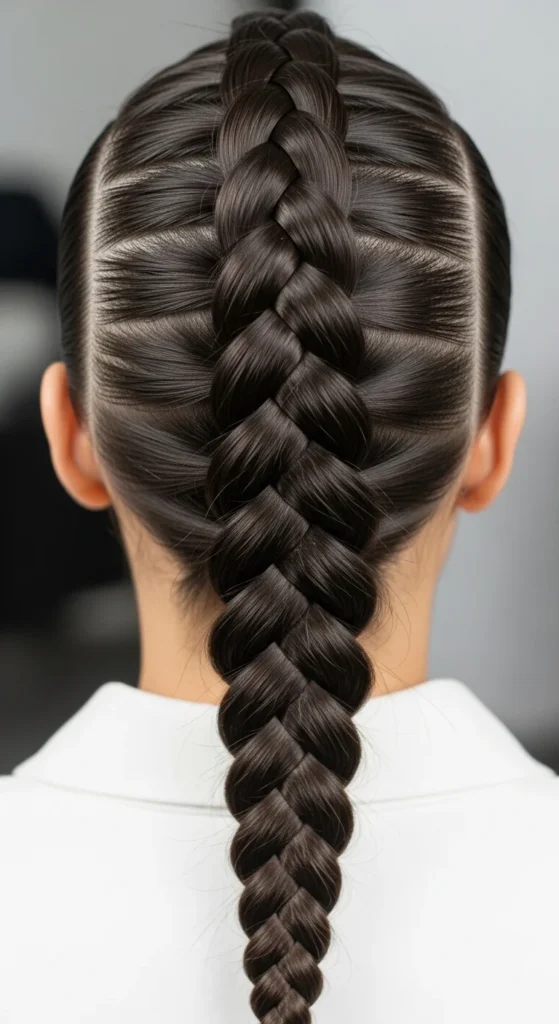
1. Classic Sleek French Braid
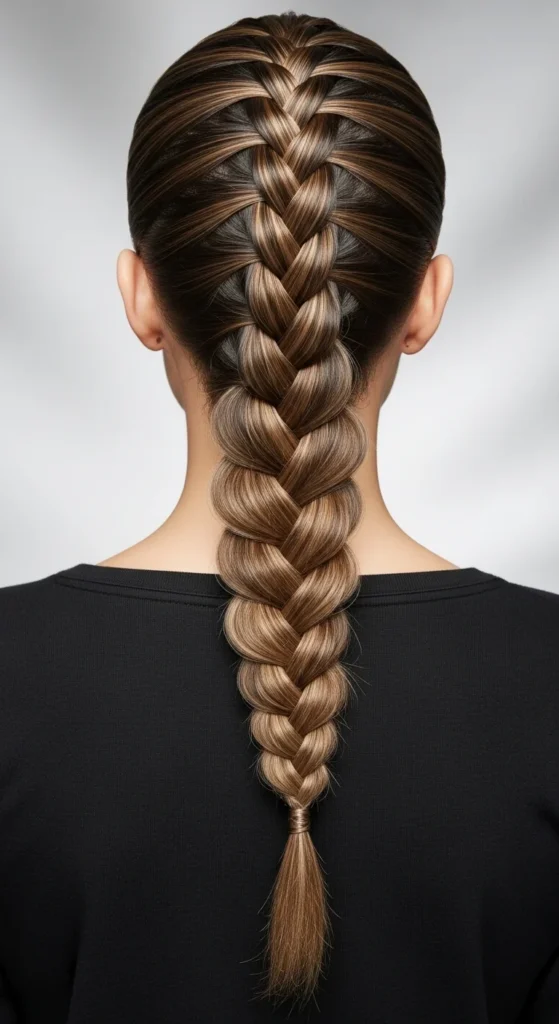
This is the timeless version that always looks neat. It’s perfect when you want hair controlled and smooth. Start by brushing your hair fully, especially at the crown. A clean base makes the braid look sharp.
Begin at the top of your head with three small sections. Cross side sections over the middle, then add a small piece of hair each time you cross. Keep the added pieces even so the braid stays straight.
Budget tip: If your hair is slippery, rub a tiny amount of hand lotion between palms and lightly smooth the top layer. It gives grip without buying anything.
If flyaways show up, spray hairspray onto a toothbrush and smooth the hairline gently. For a softer finish, tug the braid edges a millimeter or two after you tie it off.
This braid looks great with a middle part or no part at all. Pair it with simple earrings and you’re done.
2. Soft Loose French Braid (Pull-For-Volume Look)

A loose French braid looks romantic and relaxed while still feeling put-together. The trick is braiding normally, then widening it at the end.
Braid from the crown to the nape with light tension. Tie off. Then hold the braid end and gently pull on the outer loops, starting from the bottom and moving upward. Go slow. Small pulls look more elegant than big yanks.
Budget tip: Use a clear elastic. It hides easily and lets you adjust the braid without it popping loose.
If your top gets puffy, smooth it with your palms and a tiny amount of leave-in conditioner. If your hair is fine, add a little dry shampoo at the roots before you start. It helps the braid stay full.
This style works for casual days and photo moments. It also hides oily roots nicely on day-two hair.
3. Side French Braid with a Soft Blowout Finish
This style balances neat braiding with soft hair texture. Start the French braid on one side near the part. Braid diagonally toward the back of your head. Stop at the ear or nape, then secure and let the rest flow.
It looks especially pretty when the loose hair is smooth. If you have a blowout, this braid makes it feel more styled without redoing everything.
Budget tip: No blow dryer? Smooth the loose hair by wrapping it into a low bun for 20 minutes, then release. You’ll get a gentle bend and less frizz.
Pin the braid end under a top layer of hair so the elastic stays hidden. If you want extra softness, pull out a tiny face piece near the cheek.
Great for dinners, office days, and anytime you want hair off one side of your face.
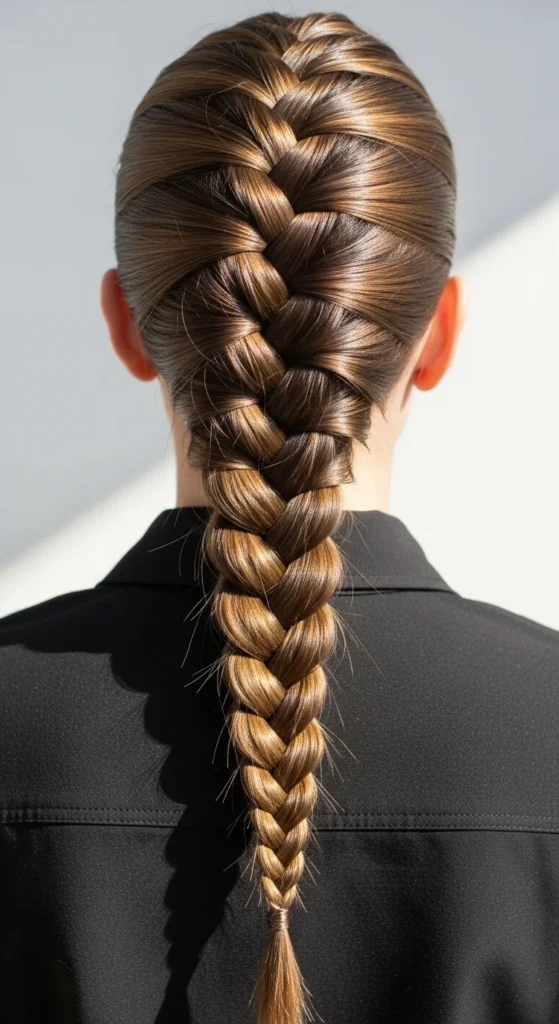
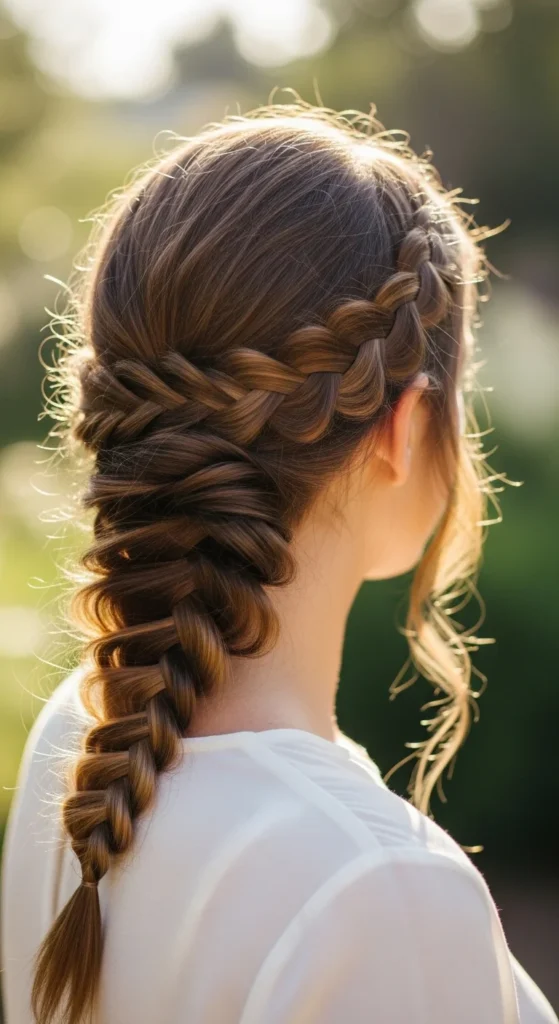
4. Double French Braids for Thick Hair
Two French braids make thick hair easier to manage. They also feel sporty and elegant at the same time.
Part hair down the middle. Work one side at a time. Start at the hairline and braid to the nape, adding hair evenly. Tie off, then repeat on the other side.
Budget tip: If your arms get tired, clip one side up while you braid the other. A cheap claw clip helps a lot.
To make them look softer, tug the outer loops slightly after both braids are finished. For a cleaner look, keep tension even and smooth the top with a small amount of gel.
This style lasts well and works for workouts, travel, and long days. At night, wrap with a satin scarf to reduce frizz.
5. French Braid into a Low Chignon
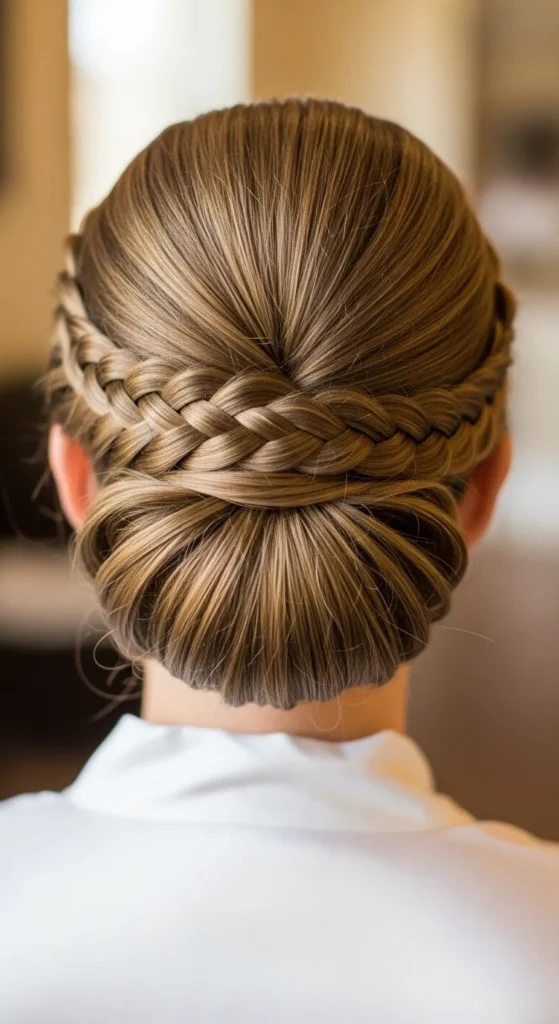
This is a simple event-ready style. Braid from the crown to the nape, then stop adding hair and braid the tail normally for a few inches. Wrap the braid into a low bun and pin.
It looks elegant and keeps hair off your neck. If you want a softer look, pull out two tiny face pieces and curl them lightly.
Budget tip: Use U-pins if you have them. They hold buns better than regular bobby pins and are inexpensive in packs.
If the bun feels small, wrap the braid around a small sock bun form. If it feels messy, pin the bun first, then tuck loose ends under and pin again.
Great for weddings, formal dinners, and work functions.
6. Diagonal French Braid Chignon (Asymmetrical)
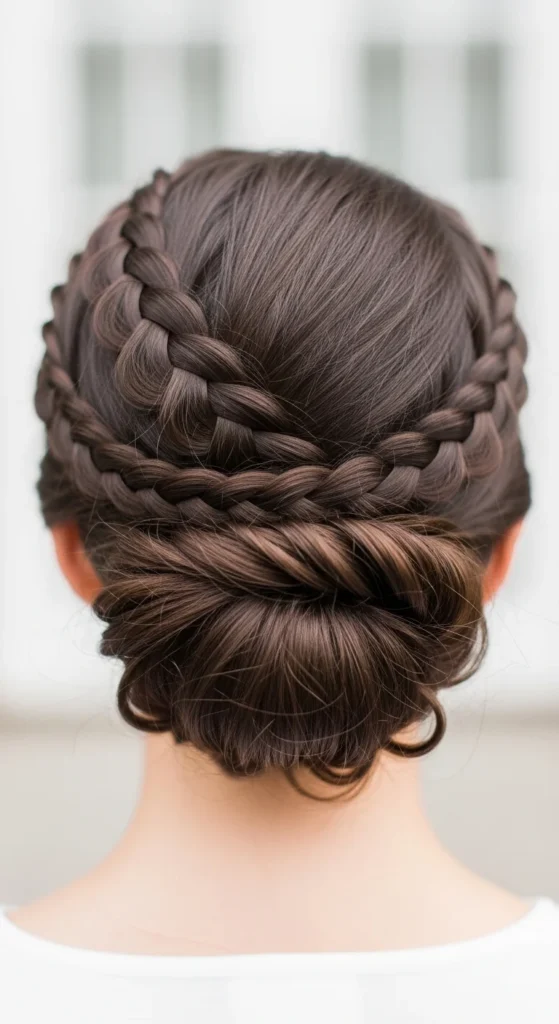
An off-center finish makes this look modern. Start braiding near one temple and angle the braid across the back of your head. When you reach the opposite side near the nape, tie off and wrap into a low bun.
This creates a pretty shape from every angle. It also looks impressive without complicated steps.
Budget tip: If you struggle with diagonal parts, use your finger to “guide” the braid instead of trying to part perfectly. The braid itself hides minor part lines.
Use a little mousse on your hands to smooth flyaways along the diagonal path. If you want extra softness, widen the braid slightly before forming the bun.
This style works best on medium to long hair and is great for photos.
7. Half-Up French Braid with Loose Waves

This is a great everyday option that looks pretty fast. Take the top half of your hair and French braid it from the front to the crown. Tie it off, then let the rest hang loose.
If you already have waves, this style shows them off. If your hair is straight, add a few quick bends with a flat iron to the loose section.
Budget tip: Heat-free waves work too. Braid the loose hair in one big braid for 30–60 minutes, undo, then do the half-up braid.
For a softer finish, tug the braid edges slightly. Hide the elastic by wrapping a small strand around it and pinning underneath.
Perfect for casual dates, brunch, and school runs.
8. French Braid Ponytail (Workday Favorite)
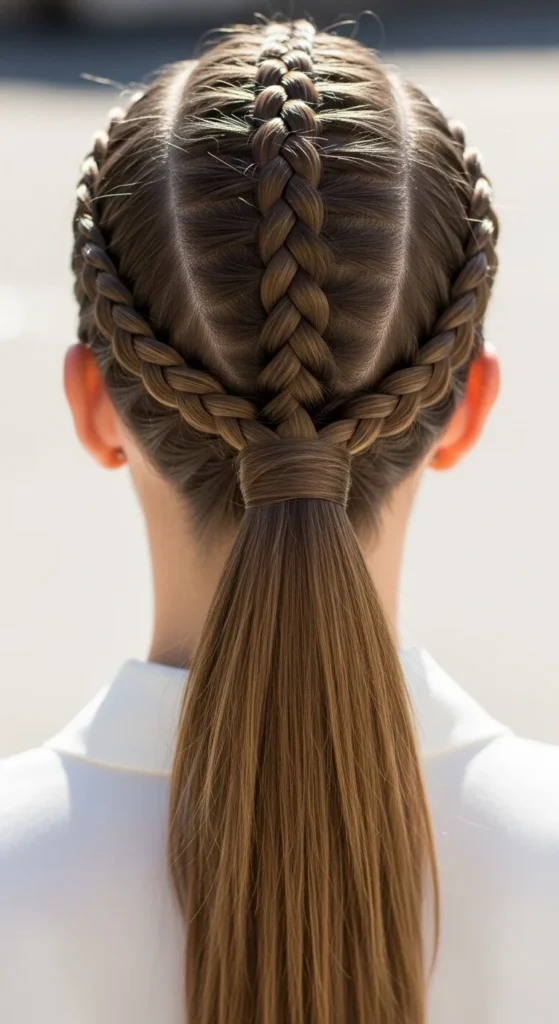
This style keeps the front neat and the back easy. Start a French braid at the forehead and braid toward the crown. Stop adding hair at the crown and tie everything into a ponytail.
You can leave the ponytail straight, wavy, or curled. For a softer look, curl only the ponytail ends.
Budget tip: Wrap one small strand around the ponytail elastic to hide it. It makes the style look more finished with zero extra cost.
If your braid looks flat, pinch and lift it slightly at the crown after tying the ponytail. If flyaways show up, smooth them with a little hairspray on your fingertips.
This works for all hair types and stays comfortable all day.
9. Curly French Braid for Added Depth
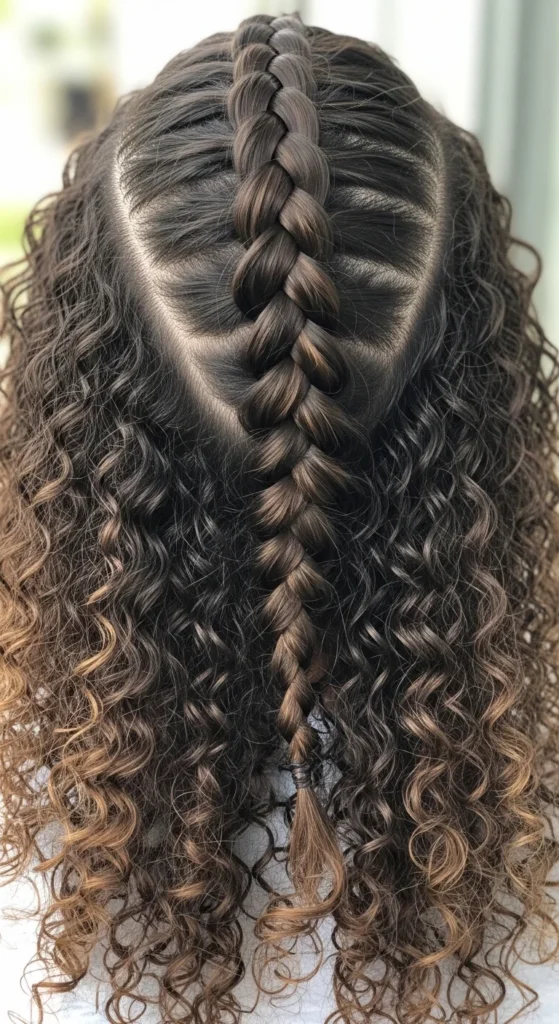
French braids on curly hair look rich and dimensional. The texture does a lot of the styling for you.
Start with damp hair and apply a little curl cream to reduce frizz. Use your fingers to section hair instead of a comb if you prefer a softer look. Braid gently and don’t pull too tight.
Budget tip: A spray bottle with water can help you smooth sections as you braid. You don’t have to buy extra styling products.
Once finished, tug the braid edges slightly to show more texture. If you want the hairline cleaner, smooth edges with a small amount of gel.
This braid is great for protective wear and looks even better the next day with a light refresh.
10. French Fishtail Hybrid (Sculpted Look)
A French fishtail looks fancy but follows a repeat pattern. Instead of three sections, you use two. Add small pieces as you go, like a French braid.
Start with two sections at the crown. Take a thin piece from the outer edge of the left section and move it to the right. Then do the opposite, adding small hair pieces each time.
Budget tip: Start with a ponytail at the crown to practice. Once you get the motion, try it loose without a ponytail.
Keep pieces small for a neat look. Keep them bigger for a softer look. When you tie it off, tug lightly on the edges to widen.
This is a great event braid and looks amazing in photos.
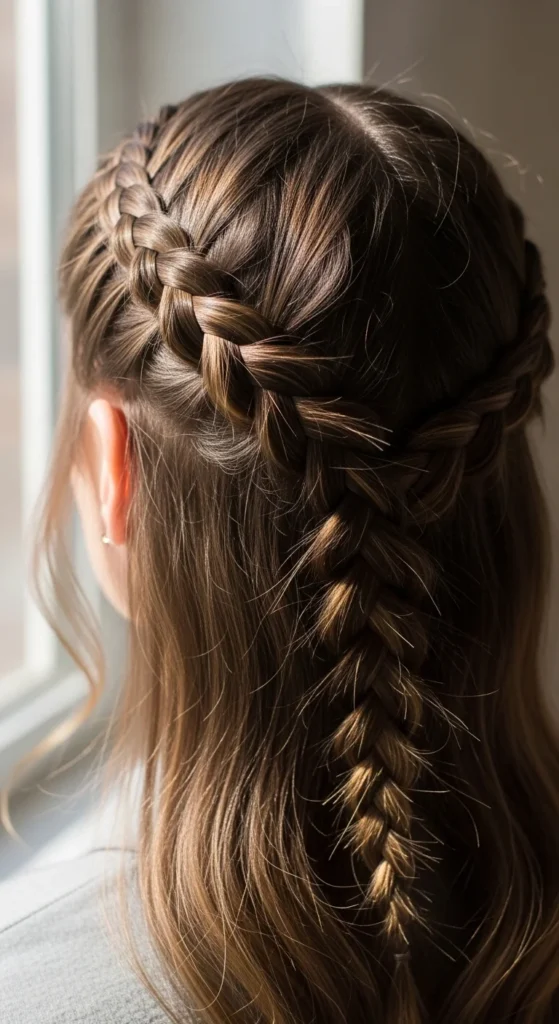
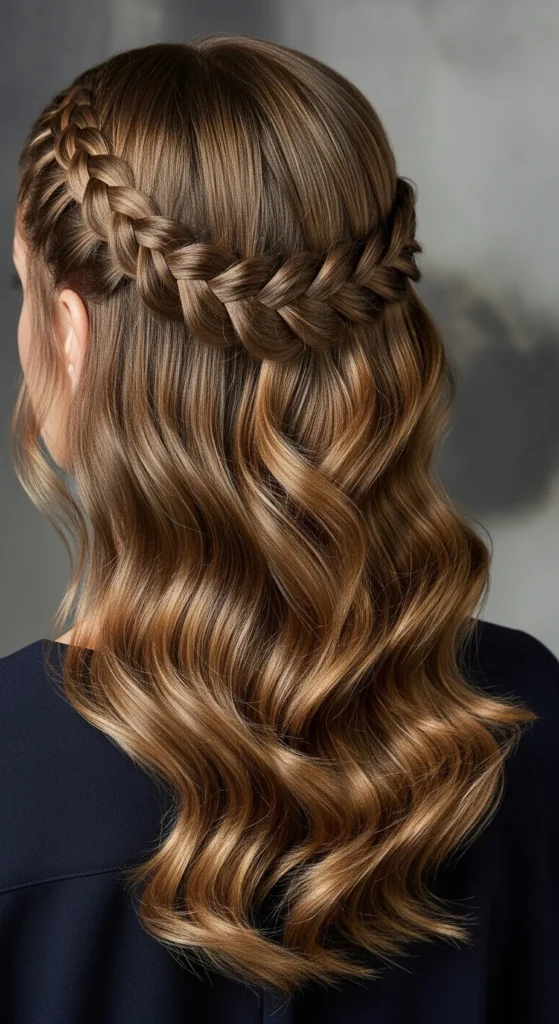
11. Hair Halo French Braid (Horizontal Crown)
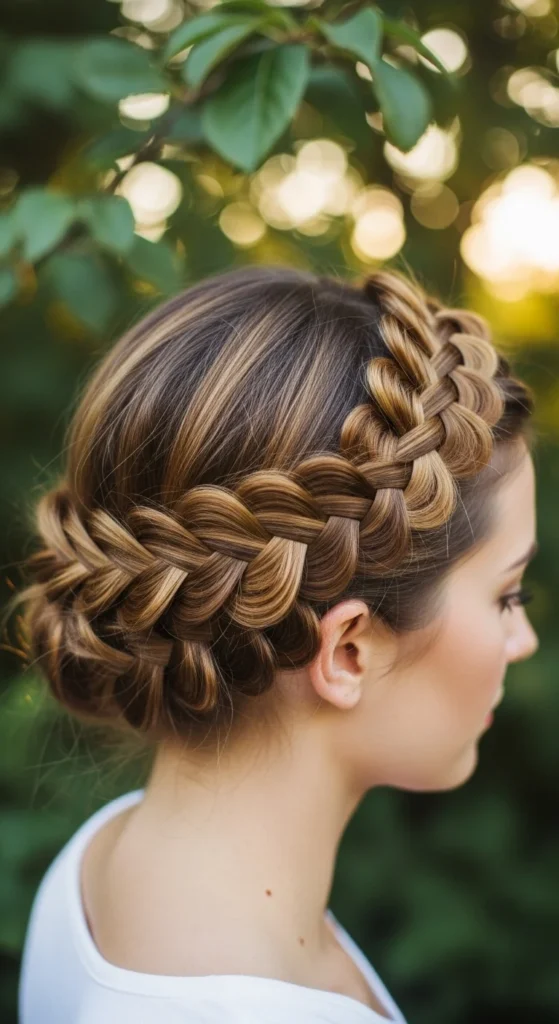
A halo braid looks elegant and keeps hair off your face. Start braiding near one ear and work across the back of your head, wrapping around.
This is easiest on longer hair. If your hair is medium length, you can still do it with more pins.
Budget tip: Use bobby pins that match your hair color. It makes the pin work invisible.
Keep the braid slightly loose so it doesn’t feel tight. If you want a softer look, pull out a few small face pieces near the temples.
If the halo slips, anchor it with a pin every few inches as you go. You don’t have to wait until the end.
Great for warm weather, weddings, and days when you want a no-hair-in-your-face style.
12. French Braid with Ribbon Woven In
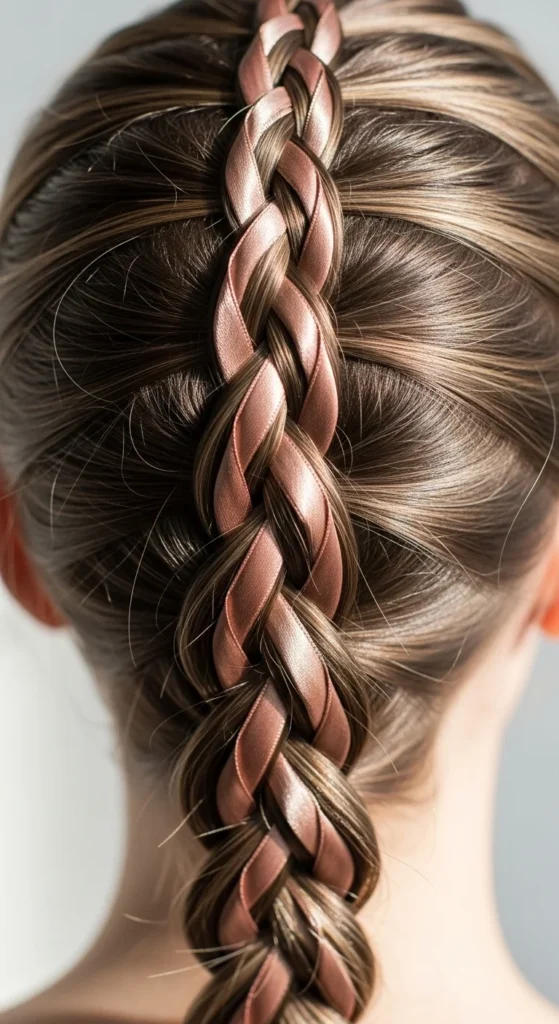
A ribbon turns a basic braid into a styled look fast. Pick a ribbon that matches your outfit. Tie it at the crown under a small section of hair, then braid it in as one of the strands.
Keep the ribbon tension gentle so it lies flat. Tie a small bow at the end.
Budget tip: Craft ribbon works perfectly. You don’t have to buy hair-specific accessories.
If you want it subtle, use a thin ribbon close to your hair color. If you want it bold, choose a contrasting shade.
This style is great for parties, holidays, and photos. It also hides frizz because the ribbon draws the eye.
13. French Braid with a Scarf Accent
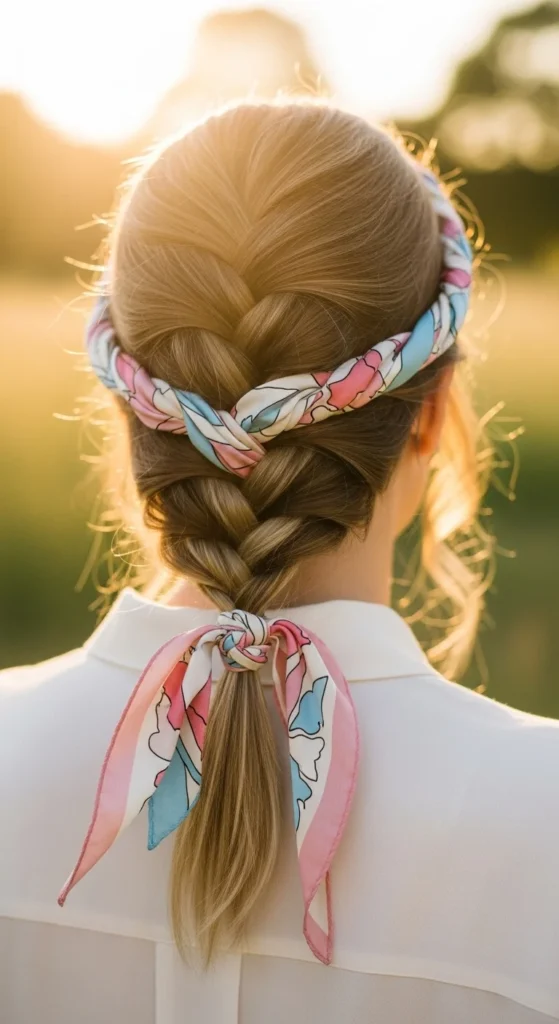
A scarf braid looks modern and fun, and it’s beginner-friendly. Fold a scarf into a long strip. Tie it near the crown and braid it in with your hair.
Let the scarf ends hang or tie them in a knot at the end of the braid.
Budget tip: Use a thrifted scarf. Even a small square scarf can work when folded into a strip.
This style works best on medium to long hair. If your hair is shorter, do a half-up French braid with the scarf just in the top section.
If the scarf feels slippery, knot it tighter at the start or pin it at the crown.
Perfect for sunny days and travel.
14. French Braid with Pearl Pins
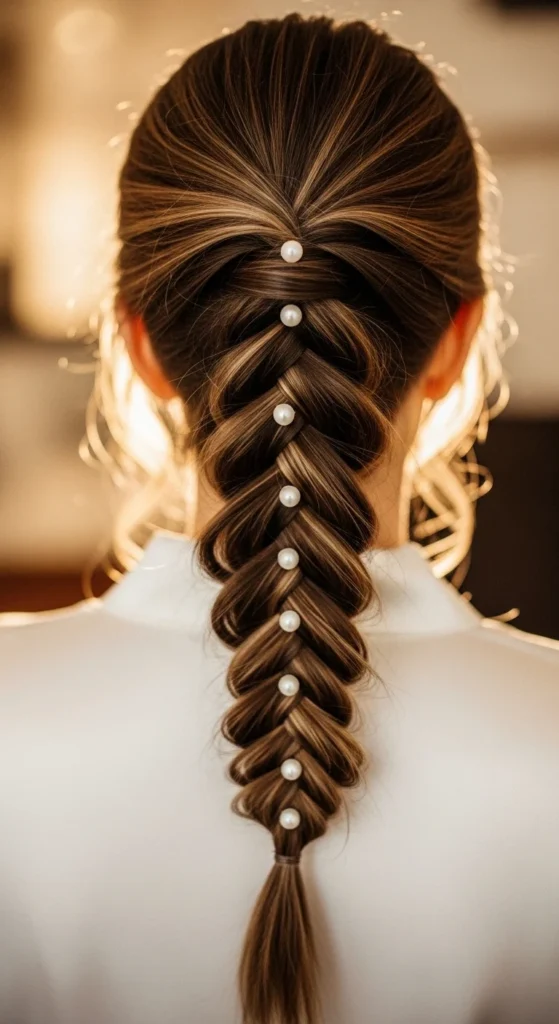
Pearl pins make a French braid look event-ready in minutes. Do a classic braid first, then slide pearl pins into the braid edges.
Place pins evenly for a neat look. Or cluster them near the top for a softer, modern look.
Budget tip: Buy a small set of pearl pins online. They’re reusable and instantly dress up many hairstyles.
If pins slide, spray a little hairspray onto the pin before inserting. It helps grip.
This style is great for weddings, formal dinners, and festive outfits. Keep the rest of your look simple so the braid stands out.
15. French Braid Topknot (Upward Weave)
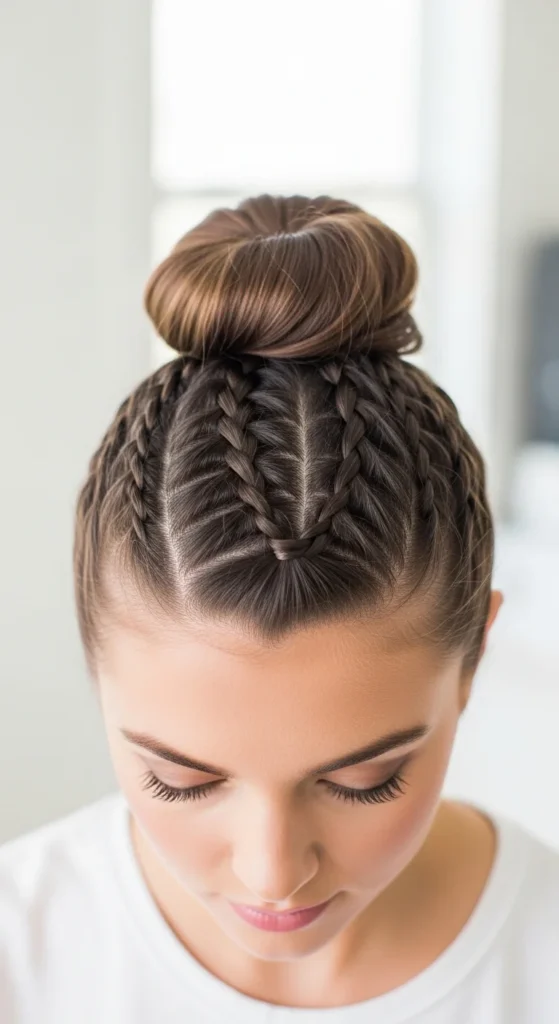
This is a polished way to wear a bun. French braid from the forehead to the crown. Then gather all hair into a topknot and wrap into a bun.
It keeps the front smooth and adds detail on top. It’s also great for second-day hair.
Budget tip: If the bun looks small, use a hair donut or even a rolled sock. Wrap hair around it and pin.
To make it softer, widen the braid slightly before forming the bun. If flyaways show up, smooth them with mousse on your hands.
This works well for busy days and looks neat from every angle.
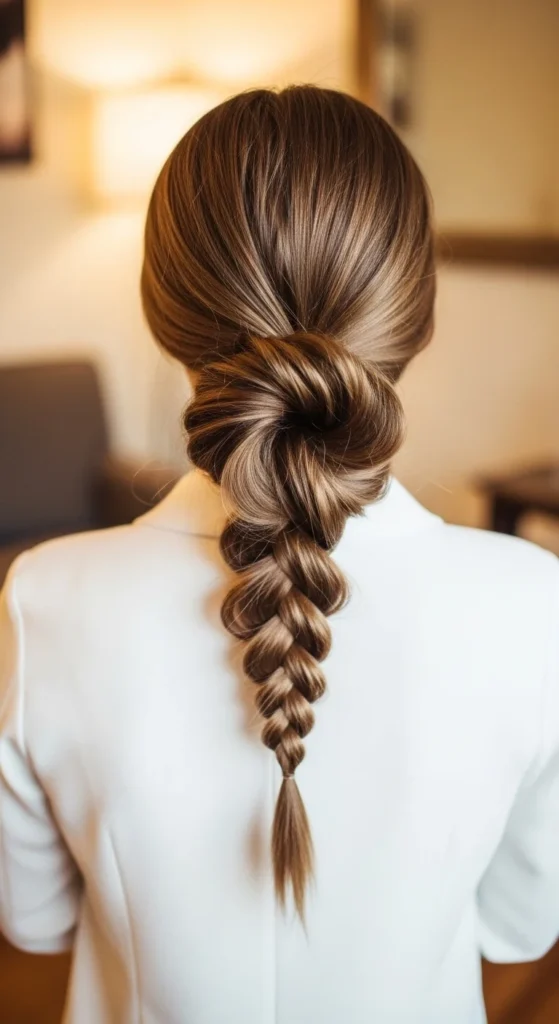
16. Upside-Down French Braid into a Bun
This braid starts at the nape and goes upward. Flip your head forward to make it easier. Start at the neck with three small sections and braid toward the crown, adding hair as you go.
When you reach the crown, gather the remaining hair into a bun.
Budget tip: Use a mirror behind you or your phone camera on selfie mode to check the back as you go.
This style is great for hot weather and workouts because it keeps everything up. It also looks fun and different without extra tools.
If it feels too tight at the nape, redo the first few stitches with lighter tension. Comfort matters for long wear.
17. French Braid with a Mini Braid Frame
This adds detail without much extra time. Create a tiny braid near the temple first. Pin it back. Then do your main French braid down the center.
The small braid acts like a soft frame and makes the whole style look more designed.
Budget tip: If you don’t have pins, tuck the mini braid under the start of the main braid and catch it in the first few stitches.
This works for medium and long hair. It also looks great with loose face pieces.
If you want it cleaner, smooth the hairline with a little gel. If you want it softer, keep it slightly messy and widen the braid edges.
18. French Braid with a Low Side Finish
This is a flattering option when you want hair to one side. Start at the crown and braid diagonally toward one side of the nape. Then continue with a regular braid and bring it over one shoulder.
Budget tip: Tie the end with a clear elastic, then wrap a small strand around it to hide the tie.
This style looks pretty with soft waves in the loose tail. If you want extra texture, gently tug the braid edges.
If your hair is layered, don’t worry about small pieces escaping. Smooth them with a tiny amount of cream on your fingertips.
Great for dinners and casual events.
19. Chunky French Braid (Big Sections)
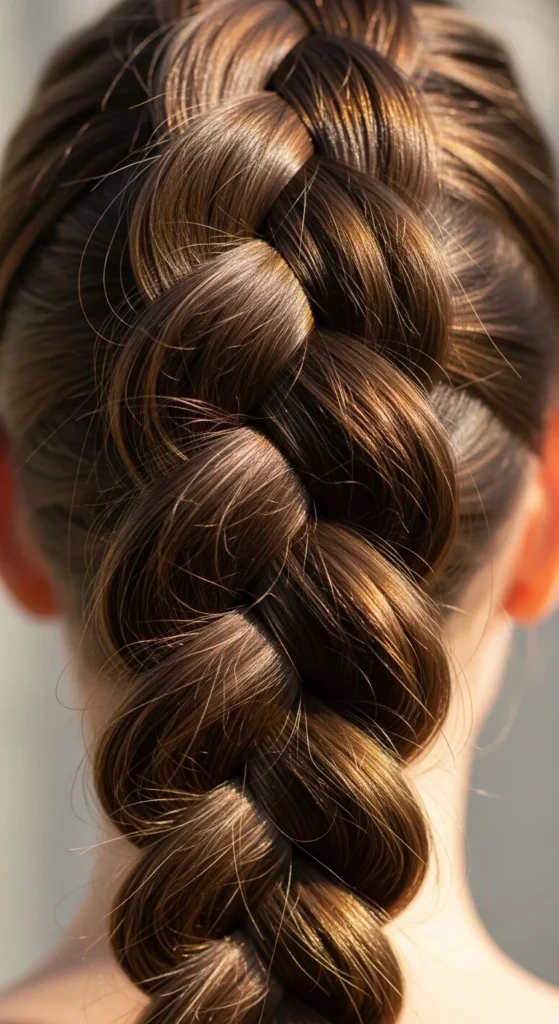
Chunky braids look bold and modern. Use bigger sections as you add hair, and keep tension moderate so it stays soft.
After tying off, widen the braid gently by pulling the outer loops. This gives that “full plait” look.
Budget tip: If your hair is fine, add a little dry shampoo before you start. It gives grip and makes the braid look thicker.
This style looks great with simple outfits and minimal accessories. It also works well on long hair for a dramatic back view.
If the top looks bumpy, smooth it with your palms and a little leave-in conditioner. Keep it light so the braid stays airy.
20. French Braid with Extensions for Length
If you want a longer braid, you can add a small amount of extension hair as you braid. The key is adding it gradually so it blends.
Start braiding normally. When you reach a point where you want more length, add a small piece of extension hair into one section and keep braiding.
Budget tip: You can buy one pack and cut it into small pieces yourself instead of buying pre-sectioned bundles.
Keep the braid smooth with a little mousse. Tie off securely and wrap hair around the elastic to hide it.
This look is great for photos and events. If you’re new to extensions, practice once with cheap synthetic hair before doing it for a real outing.
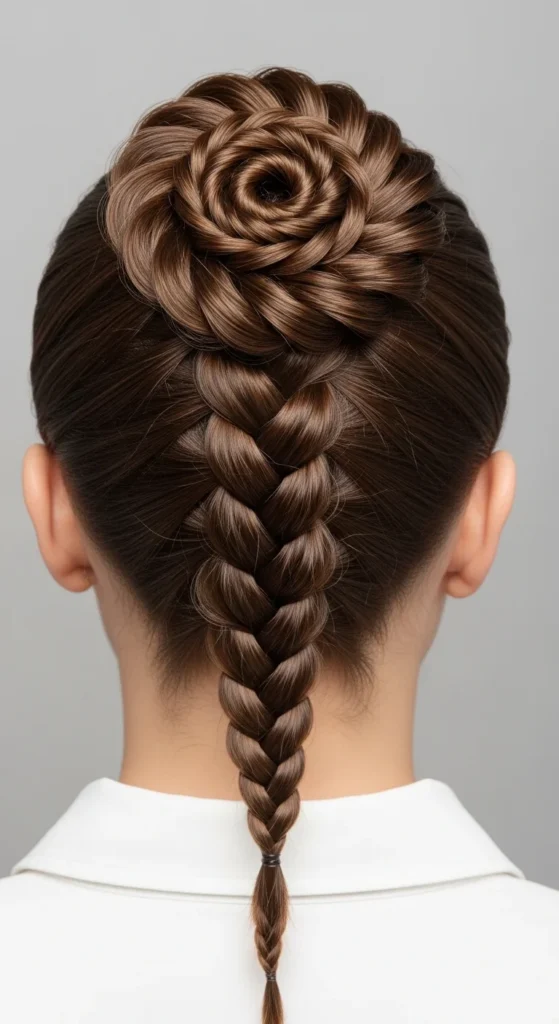
21. French Braid into a Mermaid-Inspired Updo
This is a fun updo that still feels elegant. Braid from the crown to the nape, then twist the tail into a loose bun with a slightly elongated shape.
Pin the bun in place and let a few pieces sit softly around the bun edge.
Budget tip: If you want more volume, gently backcomb the tail before twisting it into the bun. A basic comb works.
For a softer look, widen the braid a little before forming the bun. Add a couple of decorative pins if you want.
This style works well for formal events and also looks great in photos because the bun shape is more interesting than a standard round bun.
22. French Braid with Hollywood-Wave Side Sweep
This is a glam mix of braid and waves. Start a French braid on one side and braid back, stopping behind the ear. Pin it in place. Let the rest of your hair fall in loose waves.
Budget tip: If you don’t have a curling iron, braid the loose hair for an hour, undo, then smooth with a little oil on the ends.
The braid keeps one side neat and the waves add softness. This looks great with a deep side part and a little shine.
Use hairspray lightly so the waves stay touchable. If flyaways show up near the braid, smooth them with a tiny bit of gel on your fingertips.
Great for parties and evening photos.
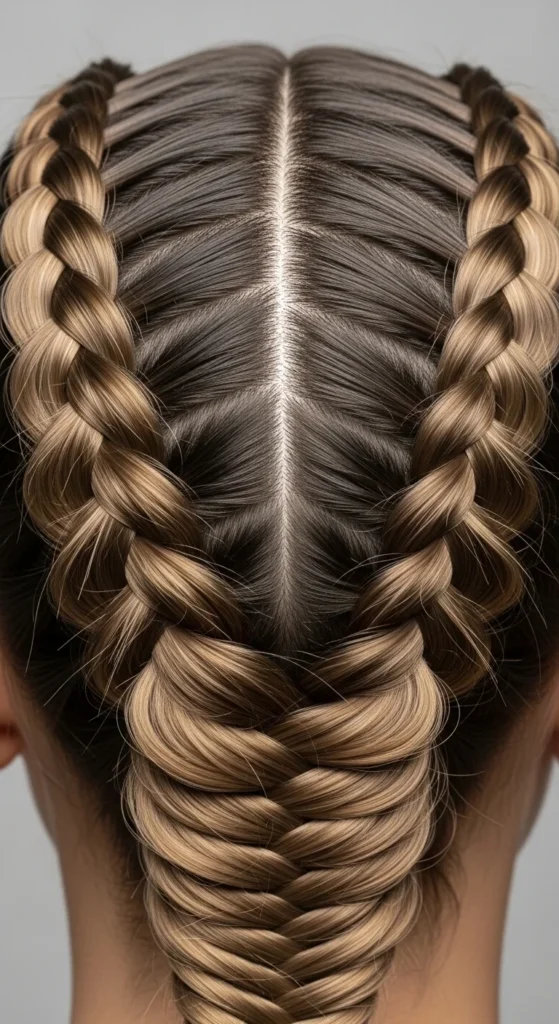
23. Futuristic Sleek French Braid with Clean Parting
This version is all about clean lines. Start with a precise middle part or a sharp side part. Smooth the hair with a light gel and brush it tight before braiding.
Braid evenly down the back. Keep added sections uniform so the braid looks crisp.
Budget tip: A cheap boar-bristle brush helps smooth the top and reduces bumps. If you don’t have one, a toothbrush works for small areas.
Finish with a small amount of shine serum on the surface, not the roots. If you want it extra sleek, tie a satin scarf over the top for 10 minutes after styling.
This look is perfect for fashion-forward outfits and nights out.
Conclusion
French braid hairstyles work because one technique can create dozens of looks. You can keep it classic and sleek, go soft and textured, add ribbons or pins, or turn the braid into buns and ponytails for different occasions. Pick one style from this list, practice it twice, and keep your tools simple: a brush, a few elastics, and pins. Once your hands learn the rhythm, French braids become one of the easiest ways to look polished fast.

Leave a Reply