
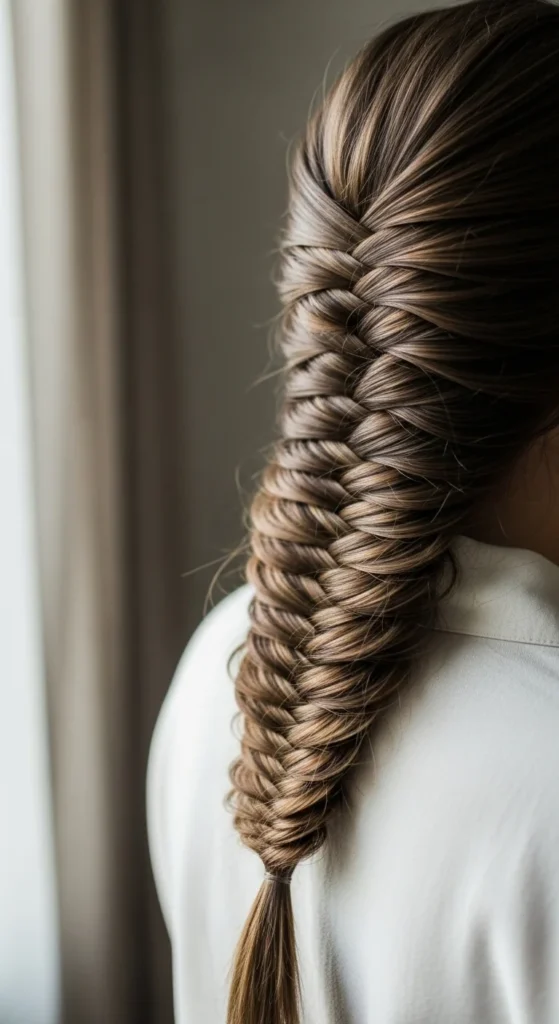
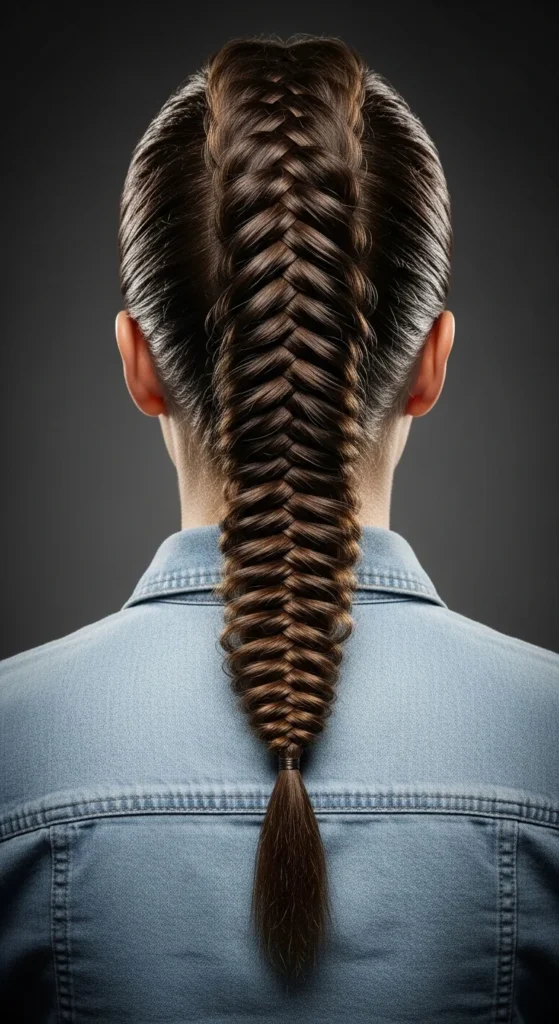
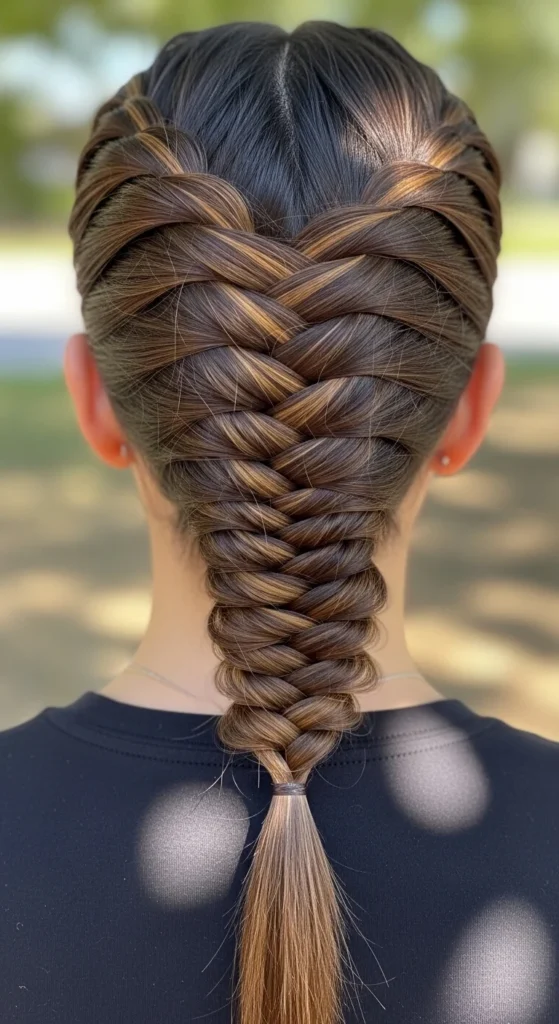
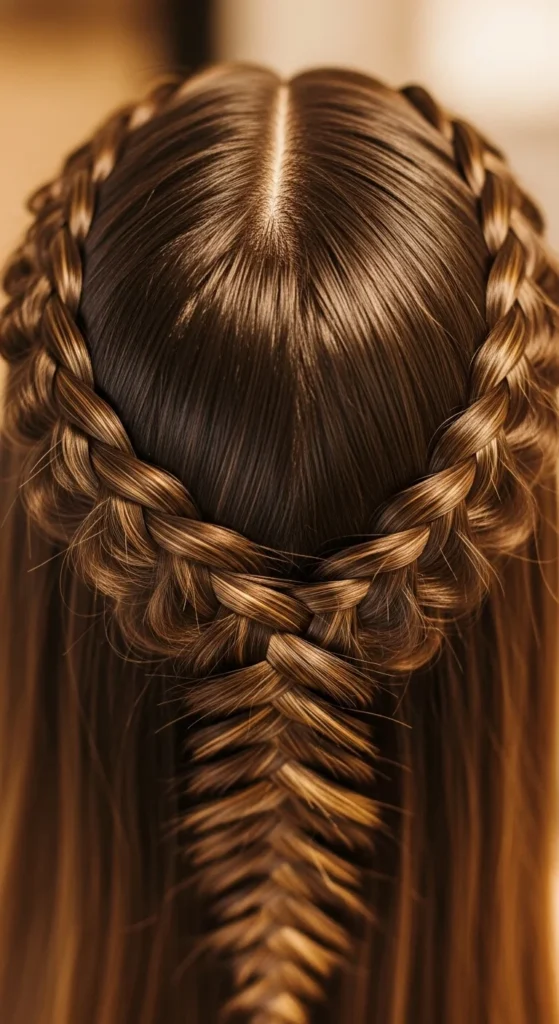
Fishtail braids look fancy, but the technique is simple once your hands find the rhythm. You only work with two sections, then keep borrowing a thin piece from the outside and crossing it over. The secret is deciding your vibe first: tight and clean for events, or loose and messy for everyday. If you’re new, start with a ponytail fishtail so your hair stays controlled. Then try the styles below to make the same braid feel totally different.
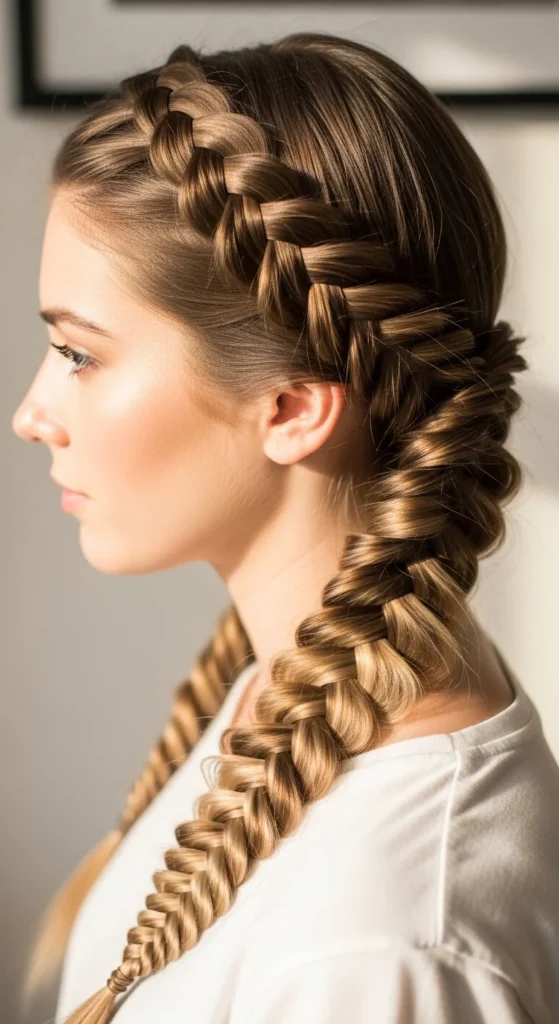
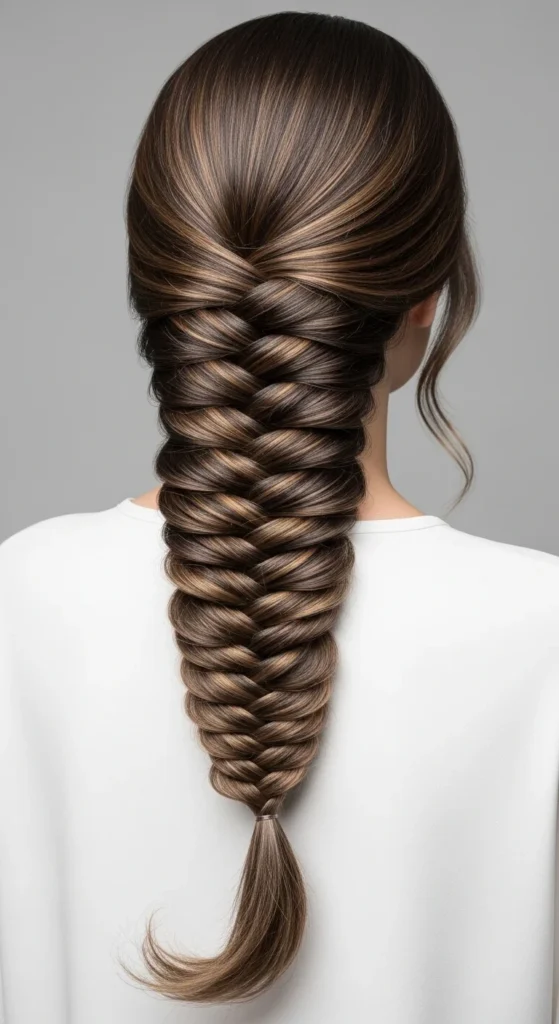
1. Classic Side Fishtail Braid
This is the fishtail everyone recognizes. It looks detailed but is beginner-friendly if you keep it simple. Sweep hair over one shoulder. Split it into two equal sections. Take a thin piece from the outside of the left section and cross it into the right. Then take a thin piece from the outside of the right section and cross it into the left. Repeat until you reach the ends.
Budget tip: Tie a low side ponytail first, then fishtail the ponytail. It keeps everything steady while you learn.
For a softer feel, gently tug the braid edges after you tie it off. Pull tiny bits, not big chunks. If flyaways pop up, smooth them with a little leave-in conditioner on your fingertips.
This braid looks great on straight, wavy, or lightly curled hair. Add small earrings and you’re ready for casual plans or photos.
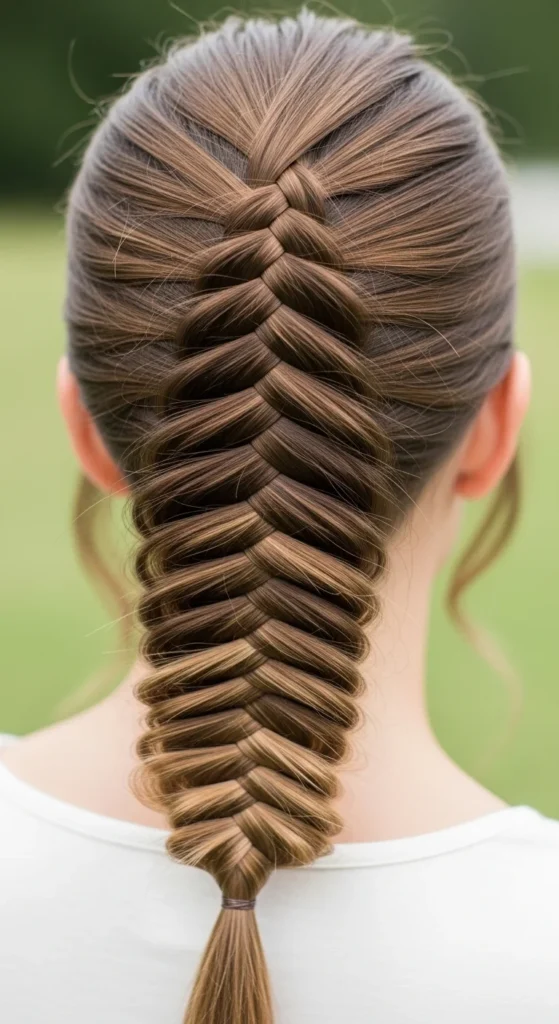
2. Ponytail-to-Fishtail “Training Wheels” Hack
If fishtails confuse you, start here. Make a low ponytail first. Smooth the top with a brush. Split the ponytail into two. Now you only focus on the weave.
Take small outer pieces and cross them over, switching sides each time. Keep your pieces similar size so the pattern stays even. When you reach the bottom, secure with a clear elastic.
Budget tip: Use two elastics. One for the ponytail base and one at the end. It stops the braid from loosening while you work.
Want it fuller? Gently pull the outer loops after you finish. Want it cleaner? Keep tension steady and use slightly smaller pieces.
This style works for workdays, travel, and quick errands. It also hides oily roots because the ponytail base looks neat.
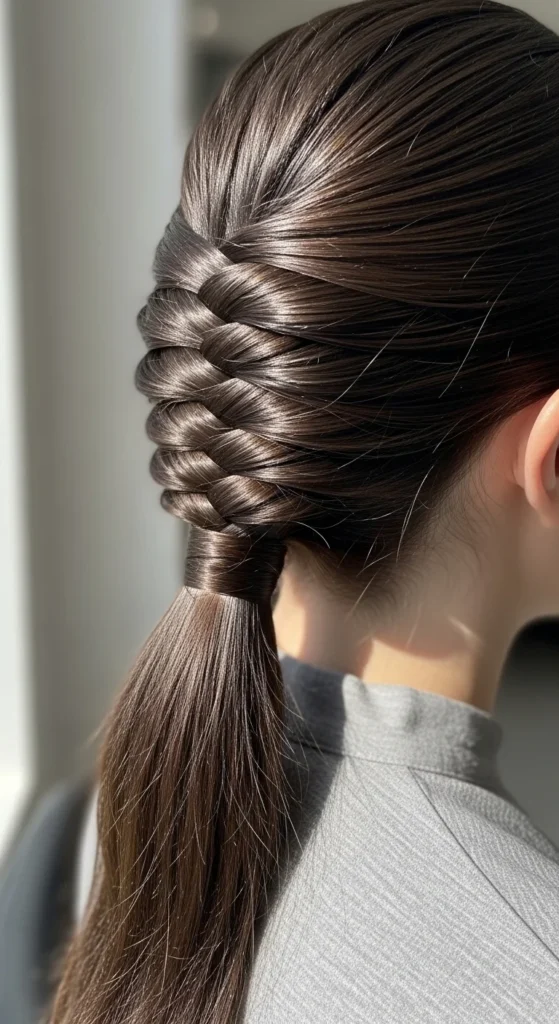
3. Tight Fishtail for Formal Days
A tight fishtail looks polished and event-ready. Brush hair smooth. If your hair frizzes, apply a tiny amount of smoothing cream before you start. Keep your crossed pieces small and even. The smaller the pieces, the sharper the herringbone pattern.
Budget tip: Use a cheap toothbrush sprayed with hairspray to smooth the hairline. It makes the top look clean without buying fancy tools.
When you tie it off, don’t tug the braid edges. Leave it compact. If you want extra shine, smooth a tiny amount of oil on the surface only, not the roots.
This fishtail pairs well with a simple dress, a blazer, or traditional outfits. It also stays in place longer because the weave is tighter. Great for long events and photos.
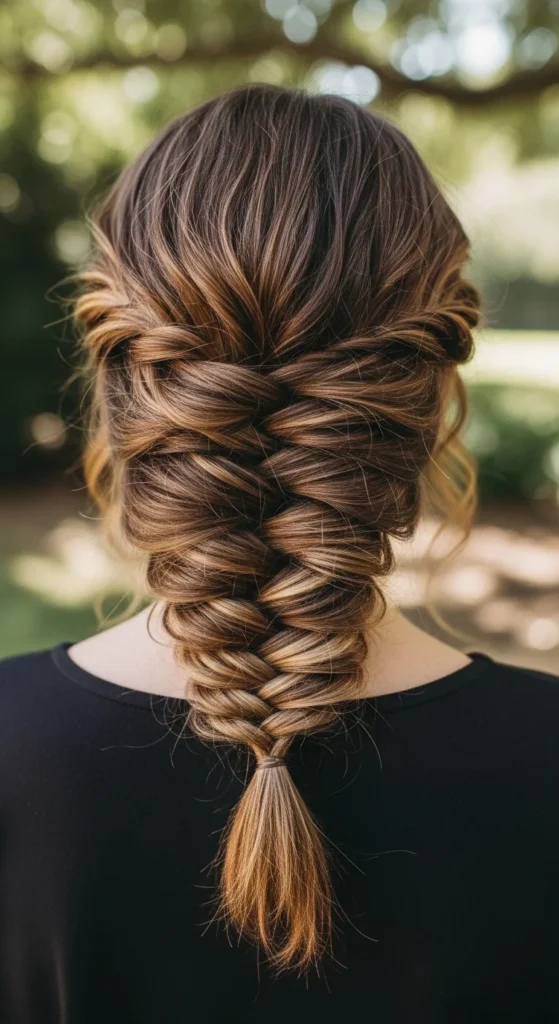
4. Loose “Mermaid” Fishtail
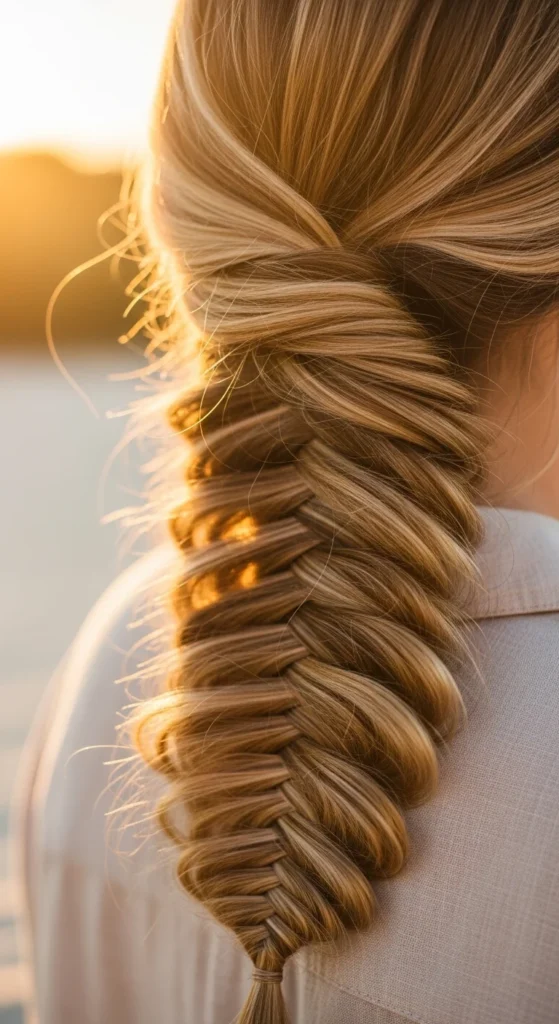
This style looks relaxed and soft. Start with a normal fishtail, but don’t aim for perfection. After you tie it off, hold the braid tail and gently pull at the outer loops all the way up.
Budget tip: If you want extra texture, braid on day-two hair or sprinkle a little dry shampoo before you start.
Keep a few face-framing pieces out. If you want soft waves, do a quick braid in your loose hair for 30–60 minutes, undo it, then fishtail.
This braid looks great for casual dinners, festivals, and weekend photos. If your braid gets messy during the day, that actually helps the vibe. Just tighten the elastic and re-tug the loops lightly.
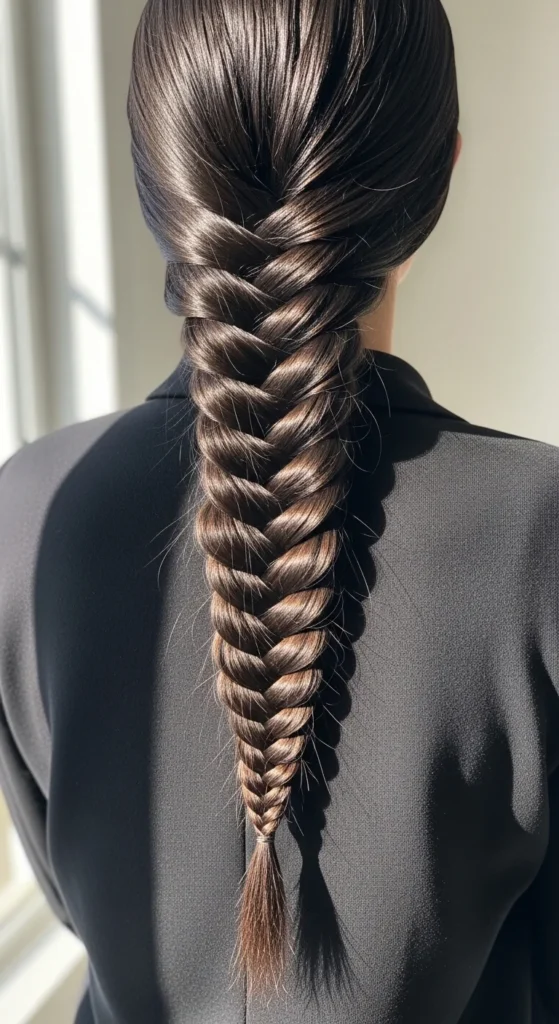
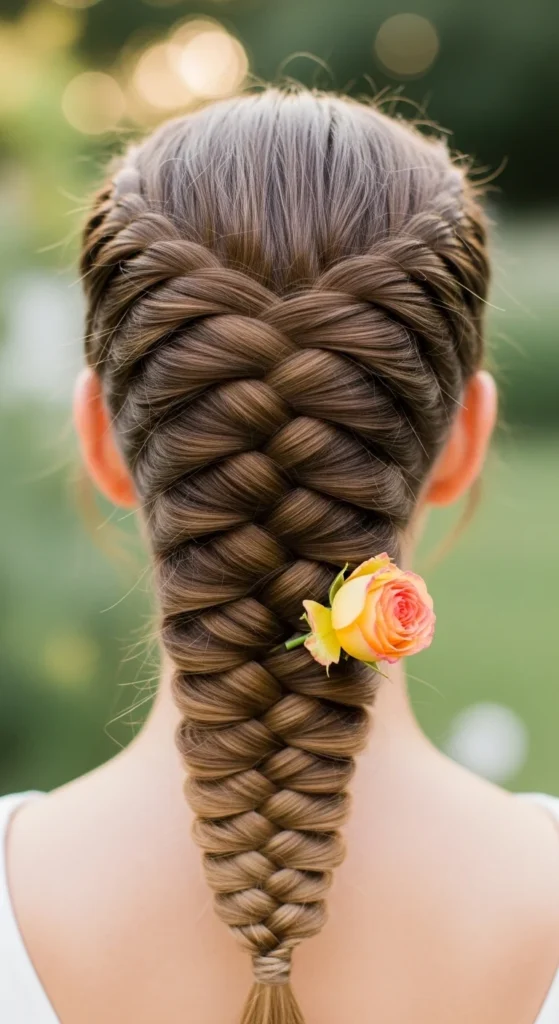
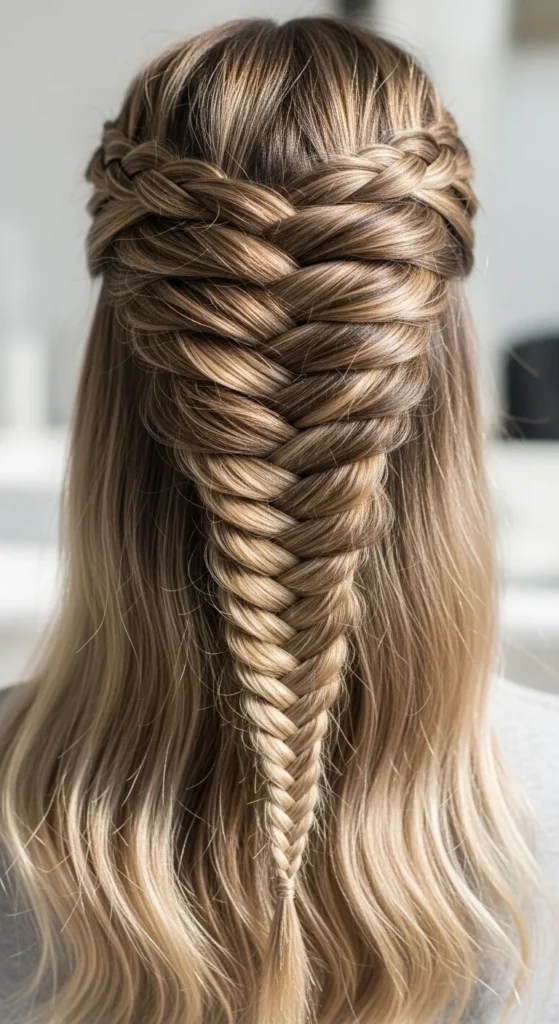
5. French Fishtail Braid (Starts High)
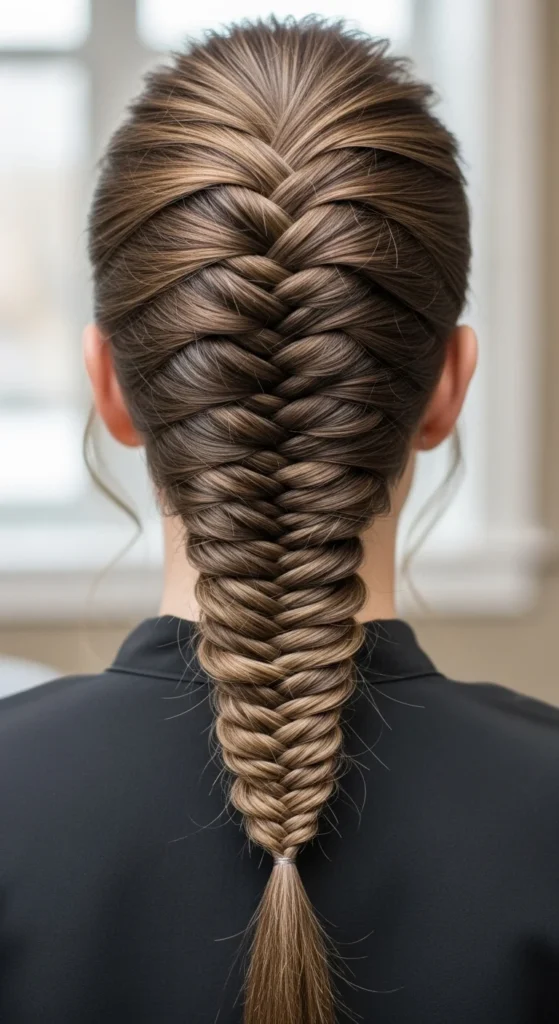
A French fishtail adds volume because it starts at the crown and gathers hair as you go. Begin with two sections at the top. Take a thin piece from the outside of the left section, add a little hair from the left side, then cross it into the right. Repeat on the other side.
Budget tip: If this feels hard, do a regular fishtail for a few inches first, then start adding hair. It’s an easier learning step.
Keep your added sections tidy. If your hands get tired, clip the loose hair away in sections so it’s easier to grab.
This braid looks romantic and works well for long hair. It also looks amazing with highlights because the pattern shows color shifts clearly.
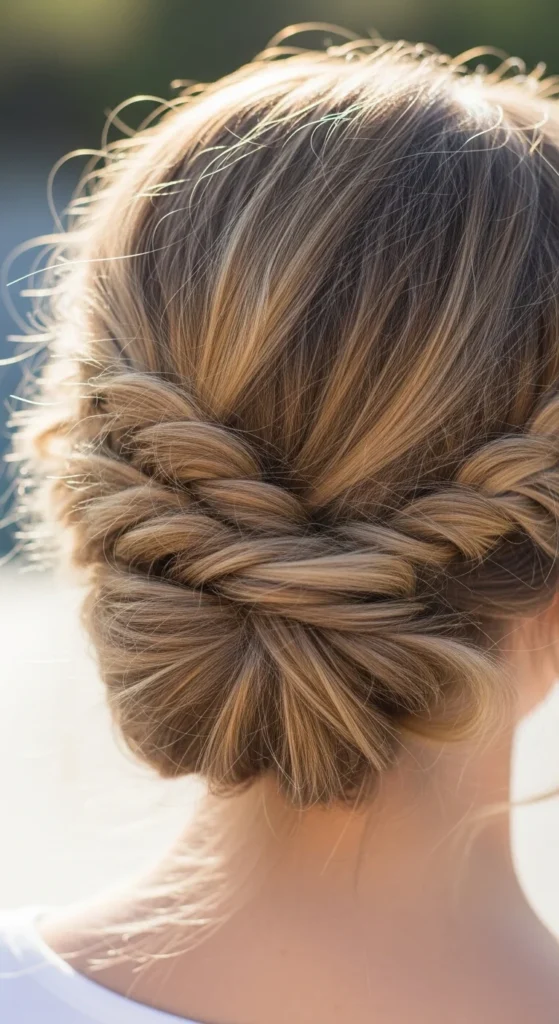
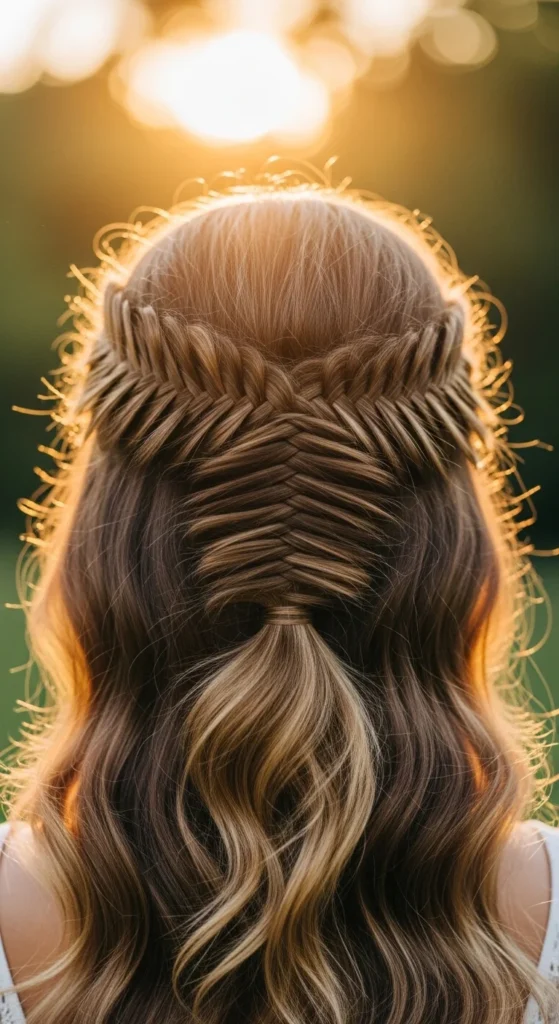
6. Half-Up Half-Down Fishtail
This is a sweet everyday style. Take the top half of your hair (from temple to temple). Tie a small ponytail or hold it tight and fishtail just that section. Secure with a small elastic and let the rest of your hair fall.
Budget tip: If your hair is slippery, start with a tiny elastic first, then fishtail the ponytail. It stays controlled.
To make it softer, tug the fishtail edges gently. Leave two small face pieces out. The bottom hair can be straight, wavy, or curled.
This is great when you want your hair off your face but still want length showing. It works for school, casual days, and quick content photos.
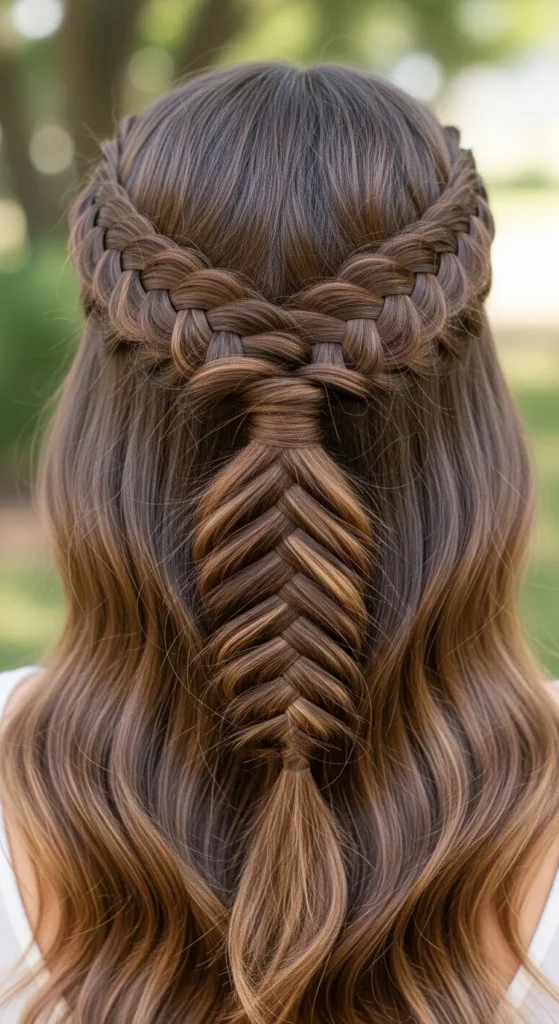
7. Waterfall Fishtail Crown
This looks fancy, but you can keep it simple. Create a fishtail along the side of your head while letting small pieces fall through to mimic a waterfall effect. Pin as you go so it stays in place.
Budget tip: Use bobby pins that match your hair color so the crown looks seamless.
If you want extra softness, curl the loose hair lightly first. If you want it more casual, keep the crown a bit loose and tug the braid edges.
This is beautiful for events, photos, and outfits with open necklines. It also works well with wavy hair because the loose strands blend naturally.
8. Milkmaid Fishtail Wrap
This style is great for warm weather and formal outfits. Make two fishtail braids (one on each side or two low braids). Then wrap them over the top of your head like a crown and pin.
Budget tip: If you have shorter layers, braid low first. Low braids help you capture more hair and reduce loose pieces.
Pin the first braid across the crown. Then pin the second braid over it. Hide the ends under the opposite side braid and pin again.
For a softer look, pull out tiny pieces near the temples. For a cleaner look, smooth the top with a small amount of mousse.
9. Fishtail Bun at the Nape
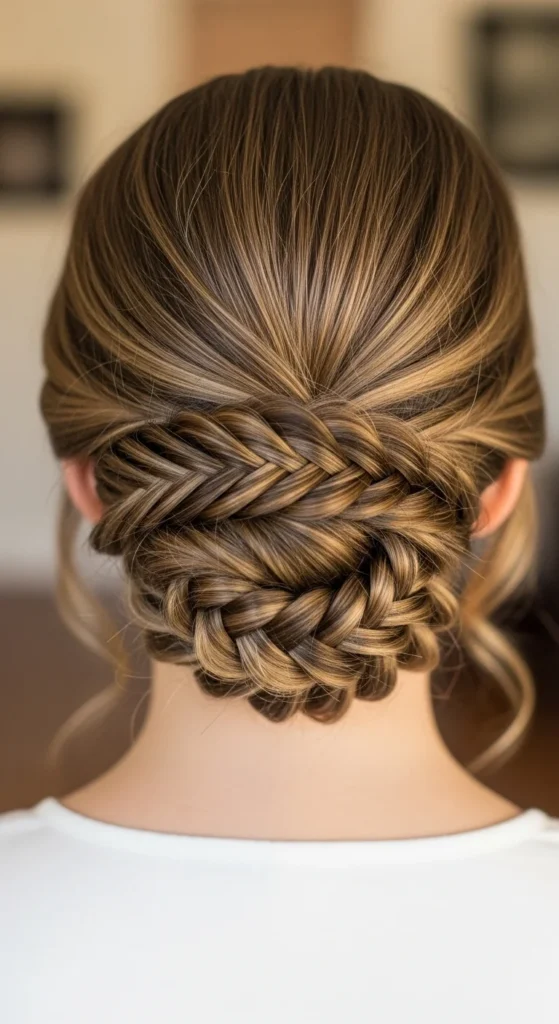
This is a quick way to turn a braid into an updo. Make a fishtail braid (ponytail hack works great). Then wrap the braid into a low bun and pin.
Budget tip: Use U-pins if you have them. They hold buns better than regular bobby pins and are usually inexpensive.
If you want more volume, tug the braid edges before wrapping. If you want a sleek look, keep it tight and smooth.
This style works for events and also for busy days when you want hair up. Add a simple hairpin and it looks dressed up fast.
10. Side Fishtail into a Low Side Bun
Start a fishtail on one side and braid toward the back. When you reach the area behind your ear, stop and wrap the braid into a side bun.
Budget tip: If the bun feels loose, use two elastics—one at the braid end and one around the bun base before pinning.
Leave a small face-framing strand for softness. This style looks great with traditional outfits and formal dresses. It also stays comfortable because the bun sits low and doesn’t pull.
If you want extra detail, add a small clip or pin above the bun. Keep it simple so the braid texture stays the focus.
11. Fishtail Faux Hawk (Pinned Up the Center)
This is the bold option. Create a fishtail braid down the back. Then lift sections of the braid upward and pin them along the center line, creating height.
Budget tip: You can do this with regular bobby pins. Use more pins than you think you need, and push them into the braid base for grip.
Keep the sides smooth if you want a cleaner look. Or leave them slightly textured for a softer feel.
This style is great for parties and photos because it looks complex. Start with a slightly loose fishtail so you have more braid “body” to pin upward.
12. Messy Fishtail with a Deep Side Part
A deep side part changes the whole vibe. Part your hair deeply. Sweep it to one side and fishtail loosely. Tug the braid edges a little as you go or after you finish.
Budget tip: If your hair is too clean, add a touch of dry shampoo at the roots and mid-lengths to stop slipping.
Leave a few wispy pieces at the front. If you want soft movement, twist those front pieces and pin them back lightly.
This style looks great with casual outfits and feels easy. If the braid loosens during the day, tighten the elastic and re-tug the loops.
13. Fishtail with Ombré “Color Pop”
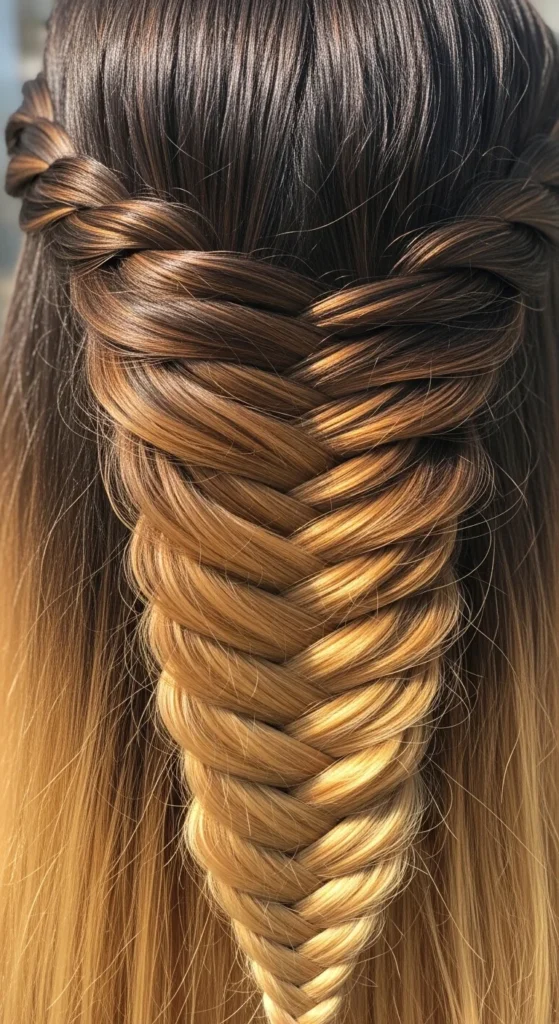
Fishtails show color shifts beautifully. If you have ombré or balayage, keep the braid slightly loose so more color shows through.
Budget tip: No color? Try a temporary hair chalk on a few strands underneath. It can create a photo-friendly contrast without permanent dye.
Use medium-sized sections for the weave. Too tiny can hide the color. After tying off, widen the braid a bit to show more dimension.
This is perfect for photos, events, and vacations. Keep accessories minimal so the braid and color stand out.
14. Two-Tone Fishtail with Mixed Extensions
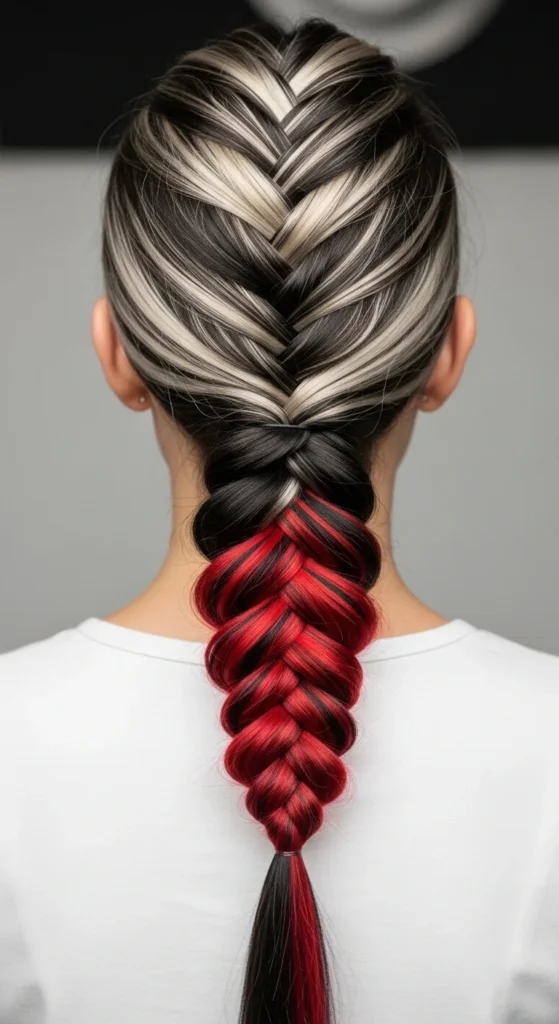
If you want drama, add two-tone extensions. Split your hair into two sections, and blend one color into each side. Then fishtail normally.
Budget tip: One pack of extensions can be cut into smaller pieces and reused for multiple braids. Store them in a zip bag.
Keep the weave even so the two colors alternate cleanly. Tie off securely and wrap hair around the elastic to hide it.
This style is great for content photos and festivals. If you want subtle contrast, choose two shades close together.
15. Princess Triple Fishtail Rows
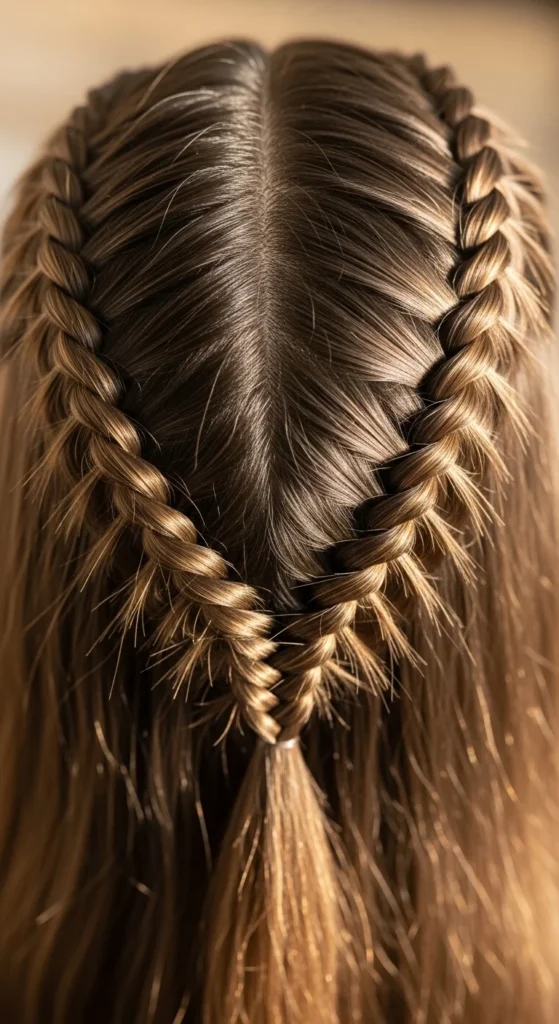
This looks complex but is just repetition. Create three small fishtail braids (two sides and one center). Then join them into a single low ponytail or bun.
Budget tip: If doing full fishtails is slow, do regular three-strand braids for the side ones and keep the center as a fishtail. It still looks detailed.
Pin the side braids neatly so the top looks clean. Then gather everything together.
This is a sweet event style and works well for long hair. It also looks great with hair accessories like small pearls.
16. Zig-Zag Fishtail Accent
Create a zig-zag part line and braid along it. The fishtail texture plus the zig-zag shape looks bold and fun.
Budget tip: Use the end of a comb or even a pencil tip to draw the zig-zag part. Go slow and fix it as you go.
Pin the braid in place along the pattern. Leave the rest of the hair down in waves.
This style is great for festivals, photos, and playful outfits.
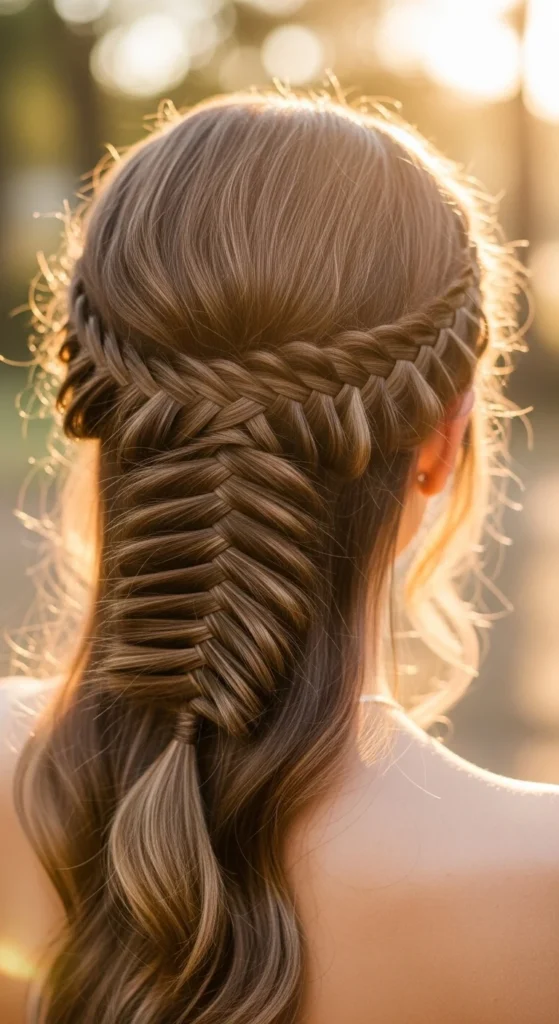
17. Fishtail Crown with Loose Waves
Do a fishtail on one side and wrap it across the back like a crown. Pin it above the ear on the other side.
Budget tip: If your hair is shorter, do two smaller fishtails and meet them at the back. Pin where they connect.
Curl or wave the remaining hair lightly for a soft finish. Tug the crown braid edges slightly so it looks fuller.
This style feels romantic and works well for events.
18. Low Fishtail with Hair Clip Finish
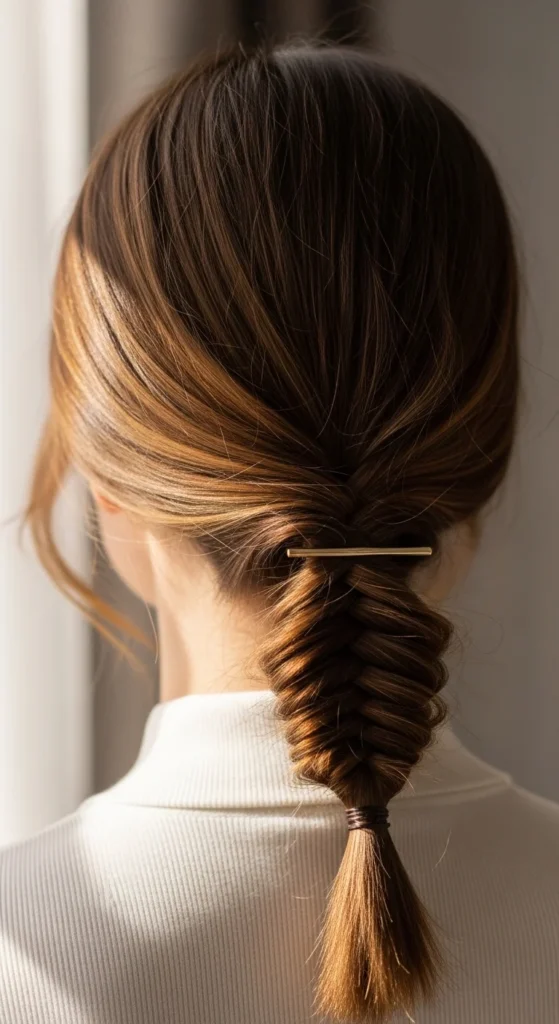
A clip makes a fishtail feel modern. Do a low ponytail fishtail. Then add a simple barrette or claw clip at the base.
Budget tip: A basic clip from a local shop works. Choose one close to your hair color for a clean look.
This style is fast and great for workdays. It also helps hide the ponytail elastic.
19. Fishtail Braid with Soft Front Twists

Twist two front pieces away from the face and pin them back. Then do a fishtail braid down the back or to one side.
Budget tip: Use two bobby pins crossed in an X for each twist. It holds better and costs nothing extra.
This is a simple way to make a fishtail feel more styled. It’s also great for beginners because the twists hide small mistakes near the hairline.
20. Fishtail Braid with Wavy Hair Prep
Fishtails look fuller on wavy hair. If your hair is straight, add quick waves first. If your hair is wavy already, scrunch with a little mousse and let it dry.
Budget tip: For waves without heat, braid your hair for an hour and undo it before fishtailing.
Then fishtail loosely so the texture shows through. Tug the edges slightly after tying off.
This is an easy everyday option that looks rich without trying too hard.
21. Fishtail Braid with Extensions for Length
If your hair is thin or short, extensions can help. Clip in extensions first, then do a ponytail fishtail. It’s easier than adding extensions mid-braid.
Budget tip: Use fewer extension pieces than you think. A little volume goes a long way in a fishtail because the pattern stacks.
Keep your weave pieces medium so it doesn’t take forever. Tie off securely.
This is great for events and photos.
22. Sleek Dinner-Ready Fishtail
For a clean dinner look, brush hair smooth and use a tiny amount of smoothing cream. Keep the fishtail tight and neat. Secure the end with a clear elastic.
Budget tip: A dab of hand lotion can help smooth flyaways in a pinch. Use the smallest amount.
Keep everything compact. No tugging the loops. This style looks polished and stays in place.
23. Fishtail Braid with a Small Flower Tuck
A small flower makes a fishtail feel special fast. Do a side fishtail or crown fishtail. Then tuck a small flower near the elastic or pin it along the braid.
Budget tip: Use one simple flower from a local market. You don’t need a full set.
Keep the flower placement off to one side for a modern look. This is lovely for outdoor events and photos.
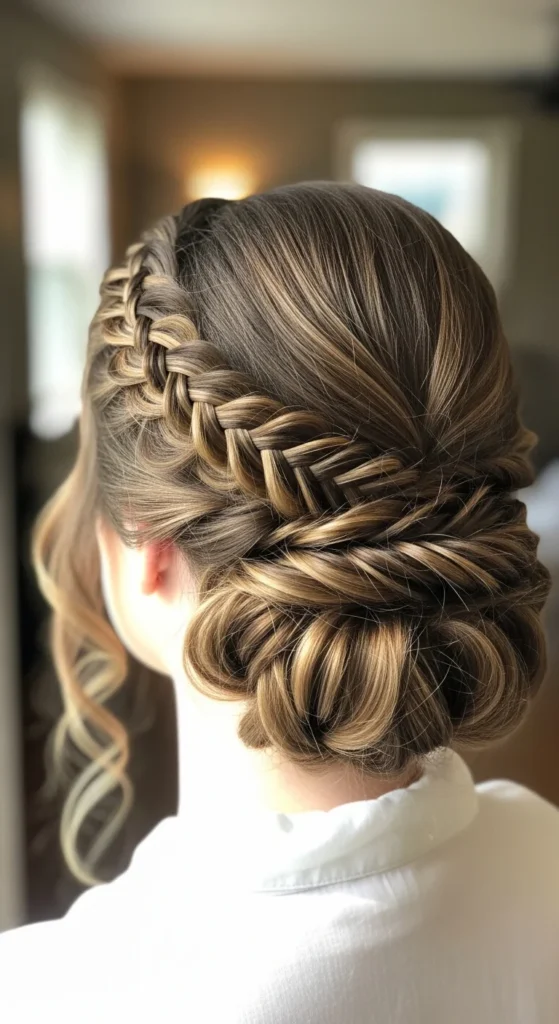
24. Fishtail into a Seashell-Style French Bun
Make a fishtail braid first. Then wrap and twist it into a bun with a slightly layered, shell-like shape. Pin carefully.
Budget tip: Build the bun in small steps. Pin once, adjust, pin again. You’ll use fewer pins overall.
This style looks boho and works for events. Keep a few soft pieces around the face if you want it less strict.
25. Quick Modern Clean Fishtail (Fast Sections)
If you want a fishtail that doesn’t take forever, use slightly thicker pieces. The pattern is still visible, just bigger.
Start with the ponytail hack for control. Cross outer pieces over, but don’t make them tiny. Keep your hands close to the braid so it stays tight.
Budget tip: Set a timer for 5 minutes and see how far you get. Most people finish faster once they stop aiming for perfect tiny pieces.
This is great for daily wear and quick styling when you still want that “fancy braid” effect.
Conclusion
Fishtail braids look detailed because the herringbone pattern catches light and texture, but the steps stay simple: two sections, borrow a piece, cross it over, repeat. Start with the ponytail fishtail to learn the motion, then switch the vibe by pulling it loose, wrapping it into a crown, or turning it into a bun. Pick one style from this list, practice it twice, and you’ll have an easy go-to braid that looks like it took much longer than it did.

Leave a Reply