
Dutch braids stand out because the braid sits raised on top of the hair, creating a clean, structured look that works for workouts, festivals, and formal events. If you’re a beginner, the main trick is simple: you braid under instead of over. From there, small tweaks—like a side placement, a crown wrap, loose edges, or a bun finish—can turn one technique into many styles. Below are 24 trendy Dutch braid ideas with easy, budget-friendly ways to try them at home.
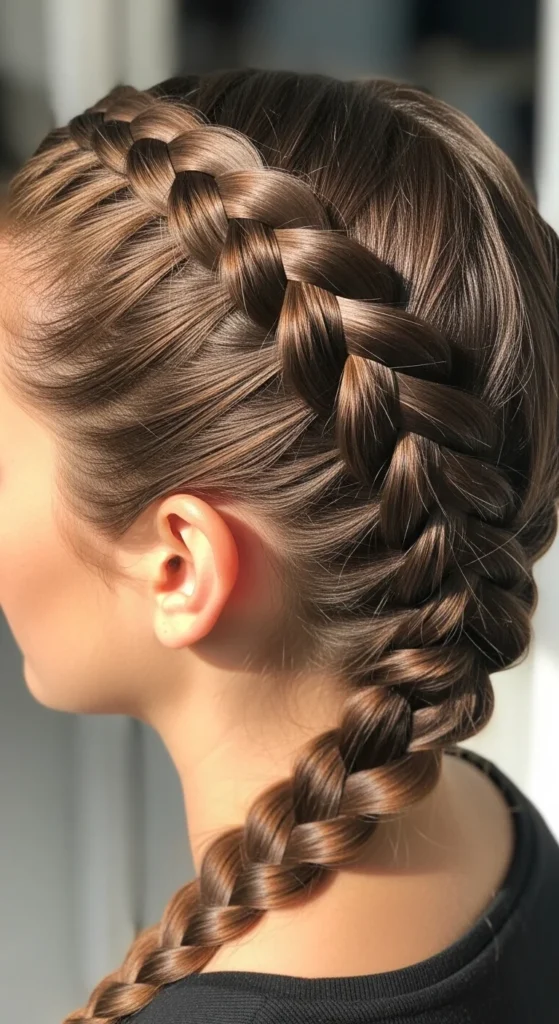
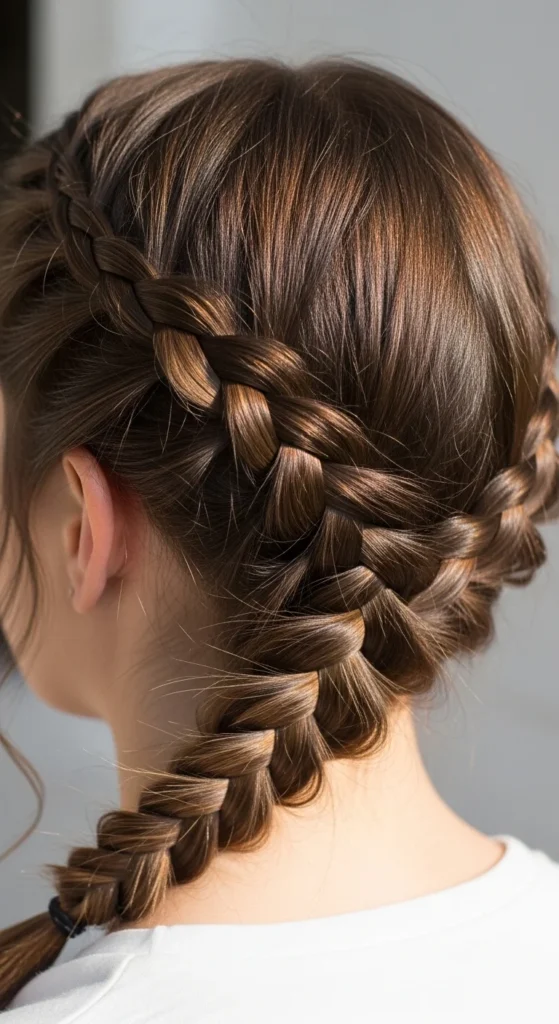
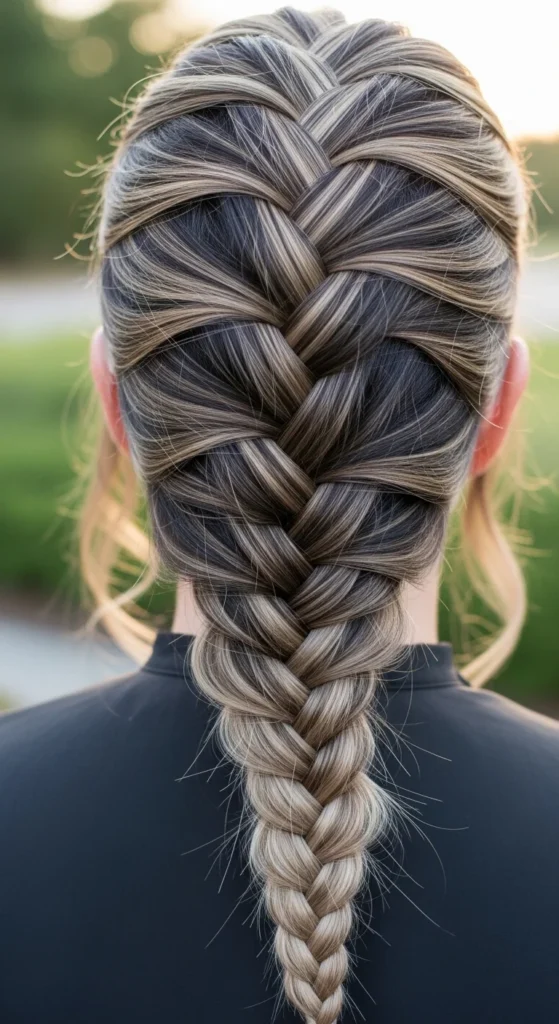
1. Classic Single Dutch Braid Down the Back
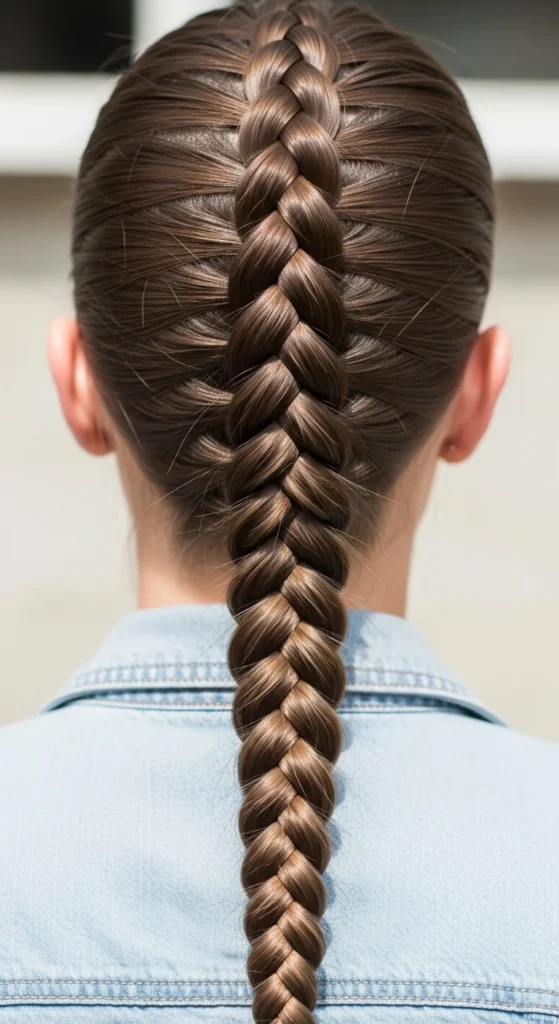
This is the best place to start if you’re learning. The raised pattern shows your work clearly, so you can spot uneven sections fast. Brush hair well, then take a top triangle section at the crown and split into three.
Braid by crossing the side pieces under the middle. Each time you cross, add a small piece of hair from that side. Keep your added pieces similar size for a straight braid.
Budget tip: If your hair slips, dust a little dry shampoo at the roots. It adds grip and makes sectioning easier.
To make it look softer, gently tug the outer loops after you tie it off. Go little by little. If flyaways pop up, smooth them with a tiny amount of mousse on your hands.
This style works for errands, school, and days when you want hair fully controlled.
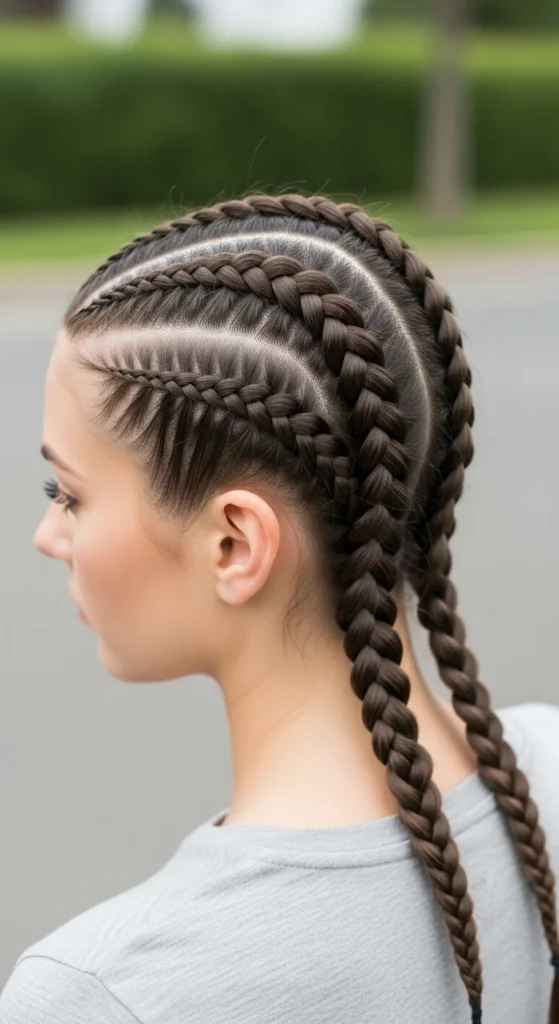
2. Double Dutch Braids (Workout-Ready Twins)
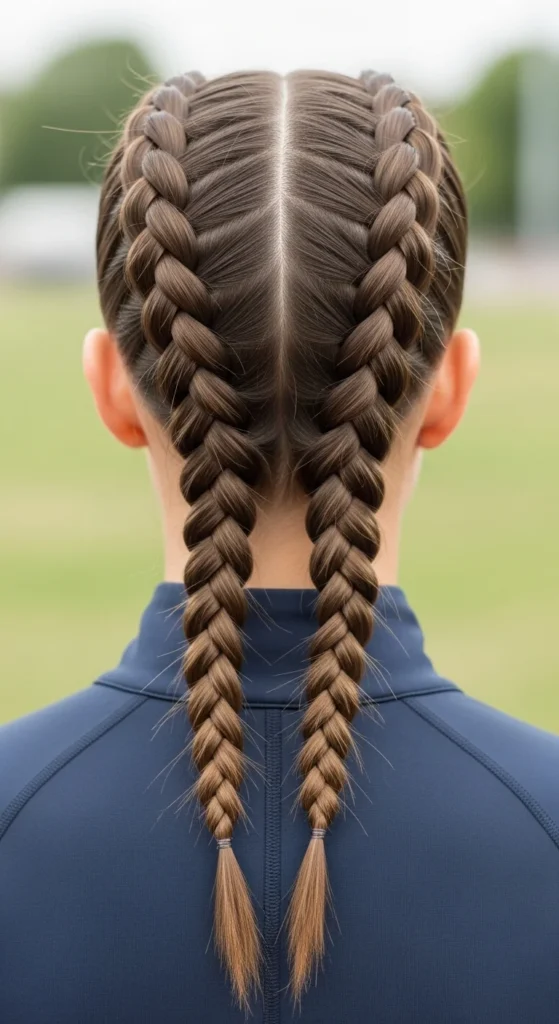
Double Dutch braids hold well and keep hair off your face. Part your hair down the middle. Clip one side out of the way. Start braiding the other side at the hairline.
Cross side pieces under the middle and add hair each time. Tie off at the nape. Repeat on the other side.
Budget tip: Use two cheap claw clips while you work. One holds the loose side, one holds your braid tail when you pause.
For a tighter sporty look, keep tension firm. For a softer everyday look, widen the braid slightly after finishing. If your hairline gets frizzy, smooth it with a dab of gel on your fingertips.
This is also great for travel because it stays neat longer than many loose styles.
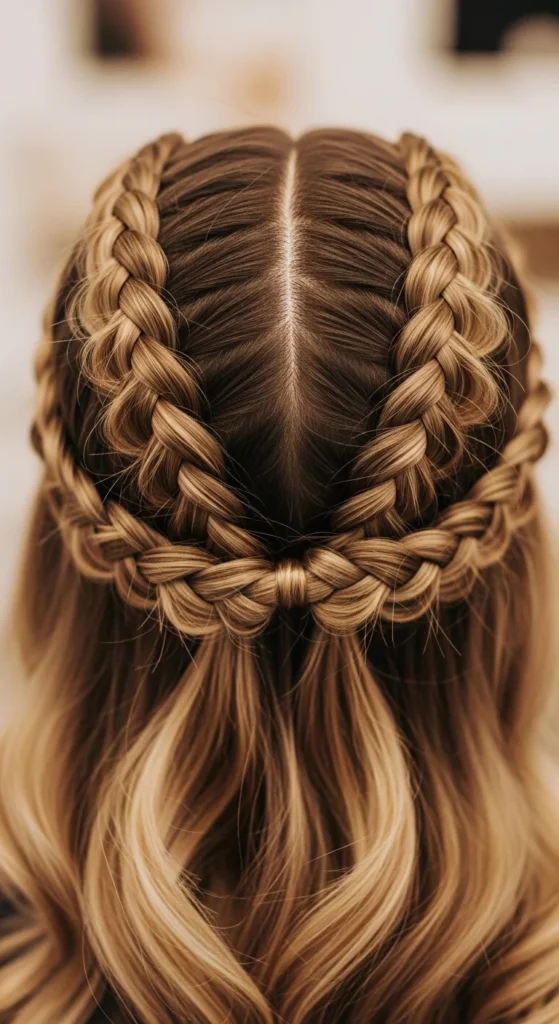
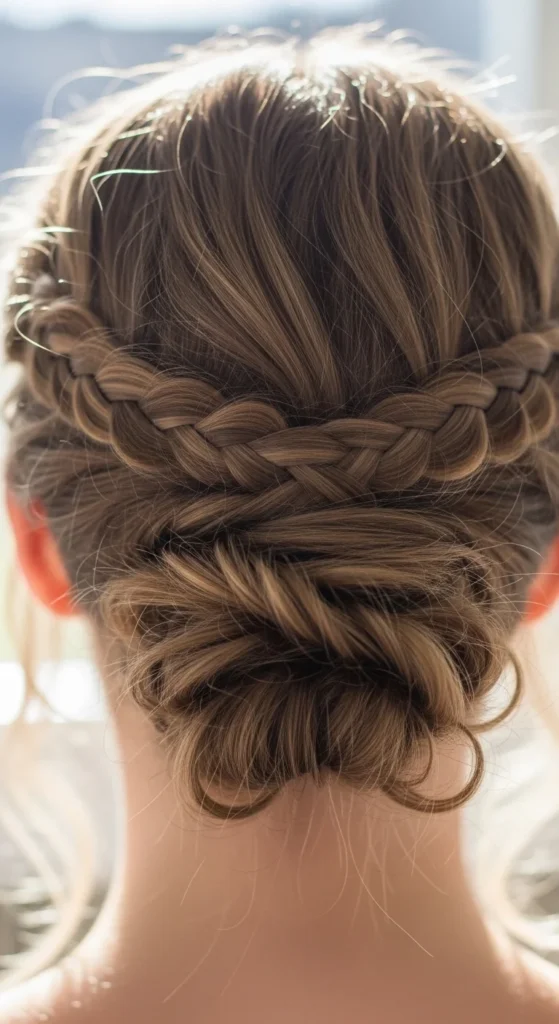
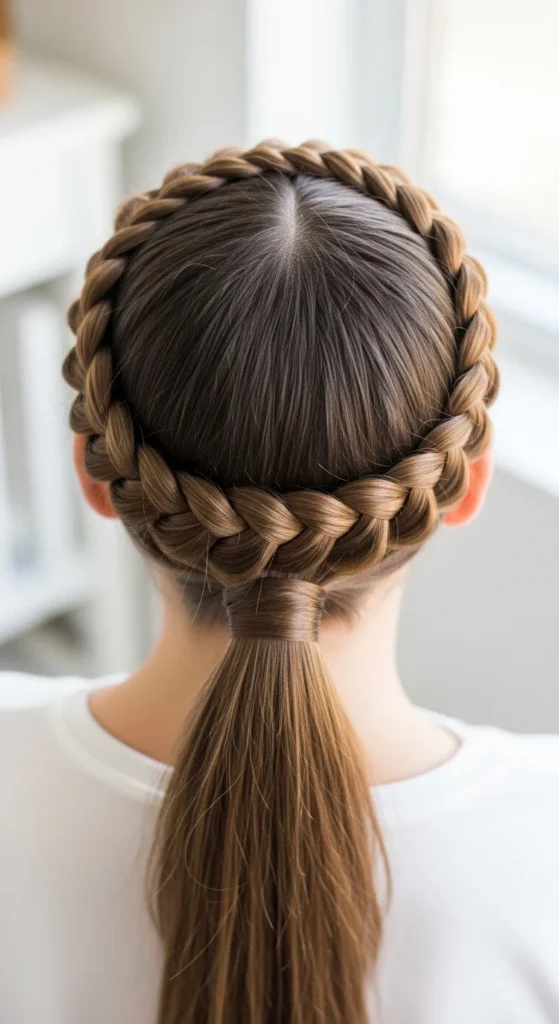
3. Dutch Crown Braid (Boho Halo)
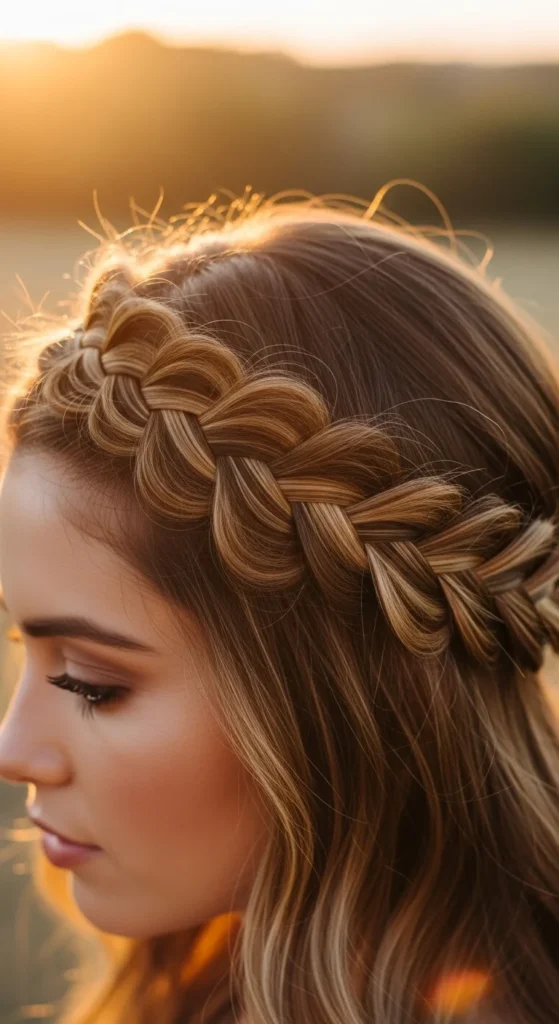
A Dutch crown braid looks romantic and keeps your neck clear. Start near one ear and braid around the head, adding hair as you go. Because it’s Dutch, the braid sits raised and shows beautifully.
Budget tip: If you struggle to braid all the way around, do two Dutch braids (one from each side) and pin them into a crown. It looks the same in photos and feels easier.
To make it softer, tug the crown braid loops gently. Pull out a tiny face piece near the temples.
Use bobby pins that match your hair color so pins disappear. If the crown feels tight, loosen the first few stitches and re-pin. Comfort matters for long wear.
This style is perfect for events and also works on day-two hair.
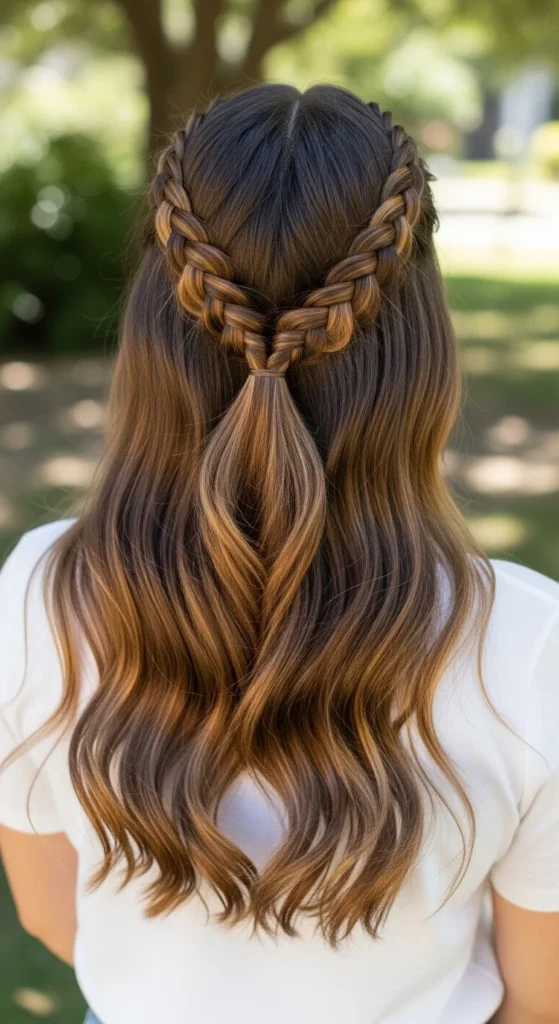
4. Half-Up Dutch Braid with Loose Waves
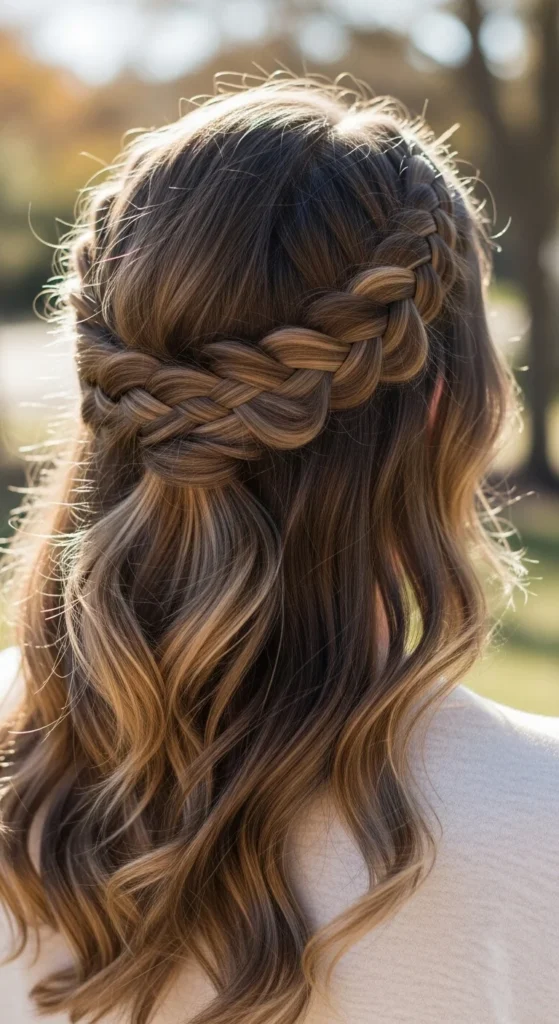
This look gives you structure on top and movement in the back. Take the top half of your hair and Dutch braid from the forehead to the crown. Tie it off and let the rest fall.
Budget tip: Heat-free waves are easy. Braid the loose hair in one big braid for 30–60 minutes, undo it, then do the half-up braid.
Hide the elastic by wrapping a small strand around it and pinning underneath. For softness, widen the top braid slightly and leave two small face-framing strands.
If your hair is fine, dry shampoo at the crown helps the braid look fuller. If your hair is thick, keep your sections clean and smaller so the braid doesn’t feel bulky.
Great for casual days, photos, and quick “done” hair.
5. Side Dutch Braid Statement
A side Dutch braid is an instant style change. Start at a deep side part. Braid along the hairline and sweep it back behind the ear. You can stop there and pin, or keep braiding down.
Budget tip: Use a clear elastic and pin it under a top layer of hair. It makes the finish look cleaner without buying accessories.
This works especially well if you have highlights because the raised weave shows color dimension. For a softer look, widen the braid slightly and pull out a small piece near the cheek.
If your braid slides, add a little dry shampoo along the part line. It gives grip and keeps the braid anchored.
Perfect for dinners, office days, and anytime you want one side neat.
6. Diagonal Dutch Braid for Weddings
This braid looks fancy but the steps are simple. Start near one temple and braid diagonally across the back of the head. When you reach the opposite nape area, tie off and finish as a braid or bun.
Budget tip: Add small flowers from a local market or a simple hairpin set. You don’t need expensive accessories to make it event-ready.
If you want a softer look, widen the braid before adding pins. If you want it polished, keep tension even and smooth flyaways with mousse.
This style stays secure for long events and looks great from every angle.
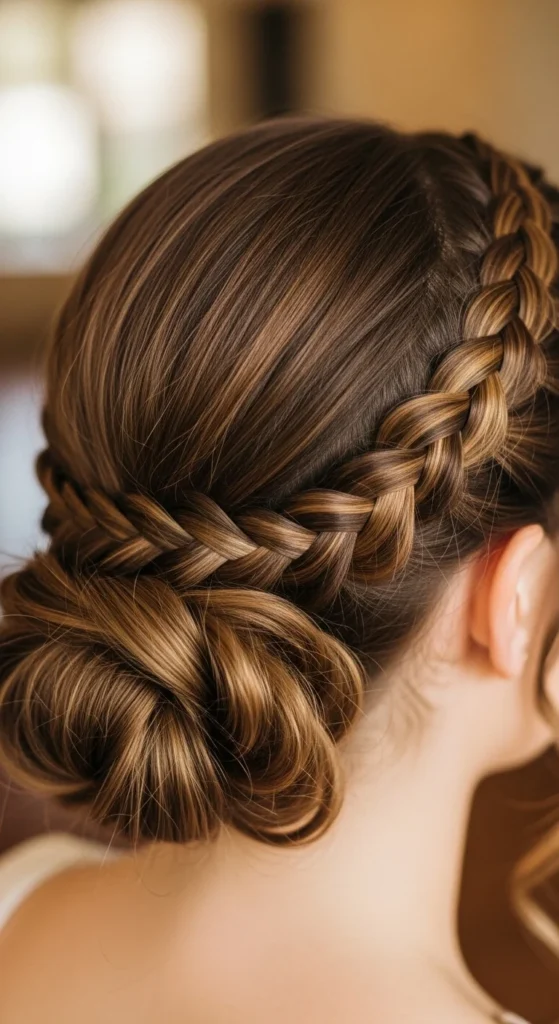
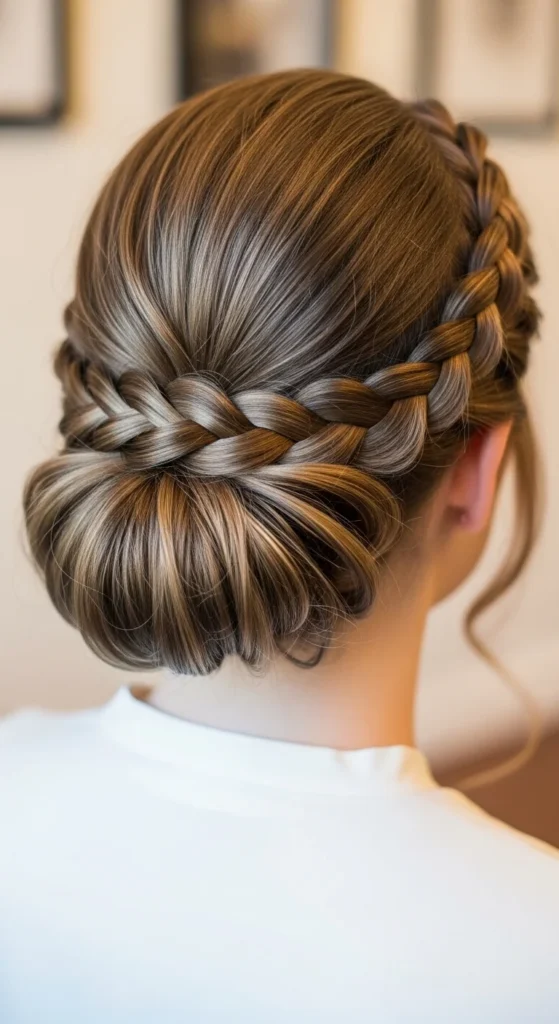
7. Dutch Braid into a Low Bun

This is a clean, office-friendly updo. Dutch braid from the crown to the nape. Then gather the remaining hair and twist it into a low bun. Pin it in place.
Budget tip: If the bun looks small, use a rolled sock as a bun form. Wrap hair around it and pin. Cheap and effective.
For softness, pull out two tiny face pieces. For a neater finish, smooth the bun surface with a little mousse.
If your hair is thick, braid with smaller added sections so the braid doesn’t feel heavy. If your hair is fine, widen the braid slightly after tying off.
This style looks elegant without being complicated.
8. Dutch Braided Top Knot
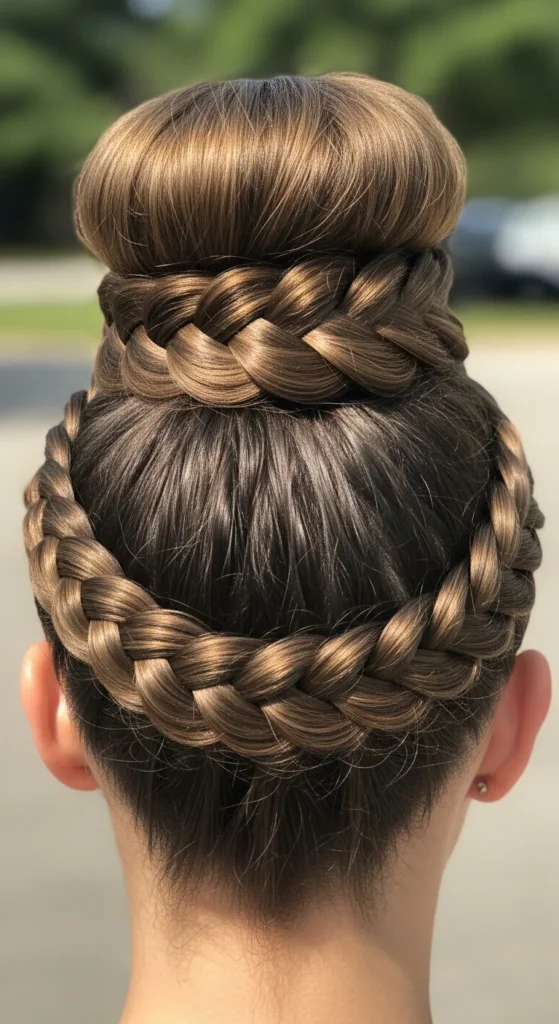
A top knot feels casual but the Dutch braid detail makes it look styled. Dutch braid from the forehead to the crown. Gather the rest into a high bun.
Budget tip: A hair donut can help create a fuller bun shape, but you can also fluff your bun by pinning it loosely instead of tightly wrapping.
If you want a softer vibe, widen the braid slightly and leave one small strand near the ear. If you want a sporty vibe, keep the braid tight and smooth.
This is great for hot weather and busy mornings.
9. Upside-Down Double Dutch Braids
This style starts at the nape and goes up, which adds a cool shape. Flip your head forward and begin Dutch braiding upward on each side. Stop near the crown and form buns or ponytails.
Budget tip: Use your phone camera as a mirror. It helps you check the back without special tools.
If you’re new, start with bigger sections. It’s easier to control. If you want a softer finish, widen the braid loops slightly after you tie the buns.
This is fun with hoodies and jackets because the braid pattern stays visible.
10. Dutch Braid Ponytail (Raised Crown Detail)

This keeps the front tidy while the ponytail stays easy. Dutch braid from the hairline to the crown, then tie everything into a ponytail.
Budget tip: Wrap one small strand around the elastic to hide it. Pin underneath. Simple and free.
Add texture to the ponytail by doing a loose braid and undoing it, or by curling the ends. For a softer look, widen the top braid and pull out a tiny face piece.
Great for work, school, and quick errands.
11. Fishtail + Dutch Hybrid
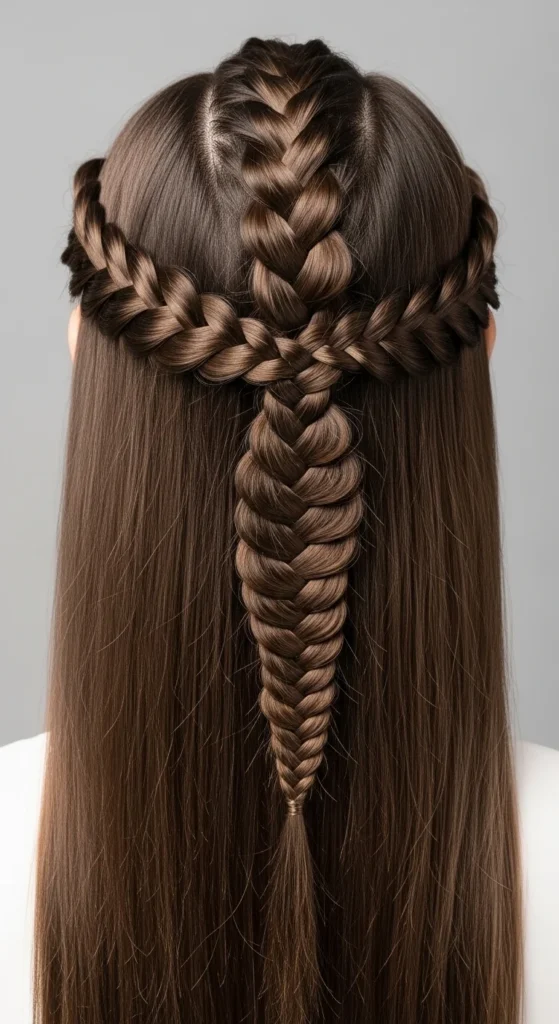
This combo looks detailed without extra tools. Start with a Dutch braid from the crown to the nape. Then split the tail into two and fishtail the rest.
Budget tip: Practice fishtail using a ponytail first. It’s easier on your arms and helps you learn the motion.
Keep fishtail pieces small for a neat look. Keep them bigger for a relaxed look. Tug the braid edges gently to widen the whole style.
This is great for parties and photos because the texture changes down the length.
12. Four-Braid Cooling Style (Hot Weather Helper)
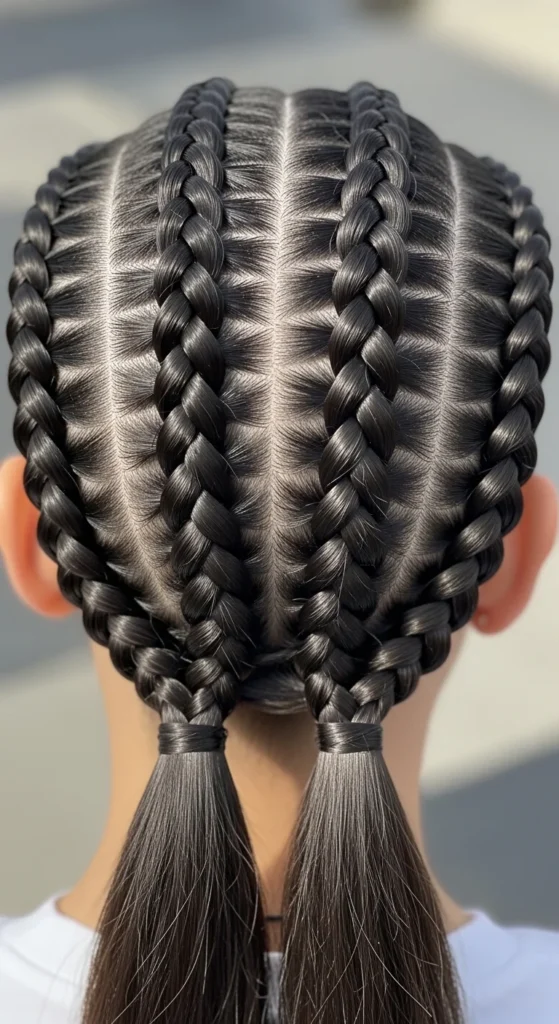
Four Dutch braids keep hair controlled and feel cooler in hot weather. Part hair into four sections. Dutch braid each section to the nape.
Budget tip: Use a rat-tail comb for clean parts. A cheap comb makes the biggest difference here.
Tie off each braid. You can leave them down or wrap them into two buns. For softness, widen the braids slightly. For a neat look, keep tension firm.
This style also works well for long hair that feels heavy.
13. Office-Ready Double Dutch Pull-Back
This style keeps hair out of your face but still lets your length show. Do a small Dutch braid on each side near the temples. Pull them back and pin together.
Budget tip: Cross two bobby pins in an X shape for stronger hold. It’s a simple trick that stops slipping.
Leave the rest of your hair down, straight or wavy. Hide pins under a small top layer for a clean finish.
Great for office days and meetings when you want hair controlled but not fully up.
14. Pixie/Short Hair Mini Dutch Braid
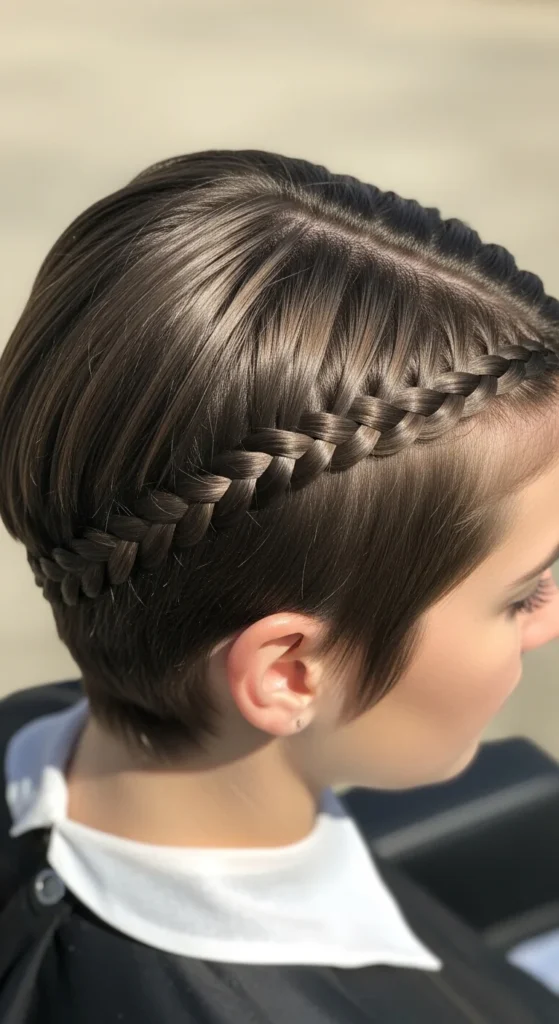
Yes, Dutch braids can work on short hair. The key is braiding a small section along the hairline or side part.
Use a little gel to keep small pieces together. Start near the forehead and braid toward the back. Pin the end discreetly.
Budget tip: Use tiny clear elastics and one bobby pin. That’s usually enough for short hair.
This style looks especially cool if you have color or highlights because the raised weave shows contrast.
15. Dutch Braid with Flower Pins
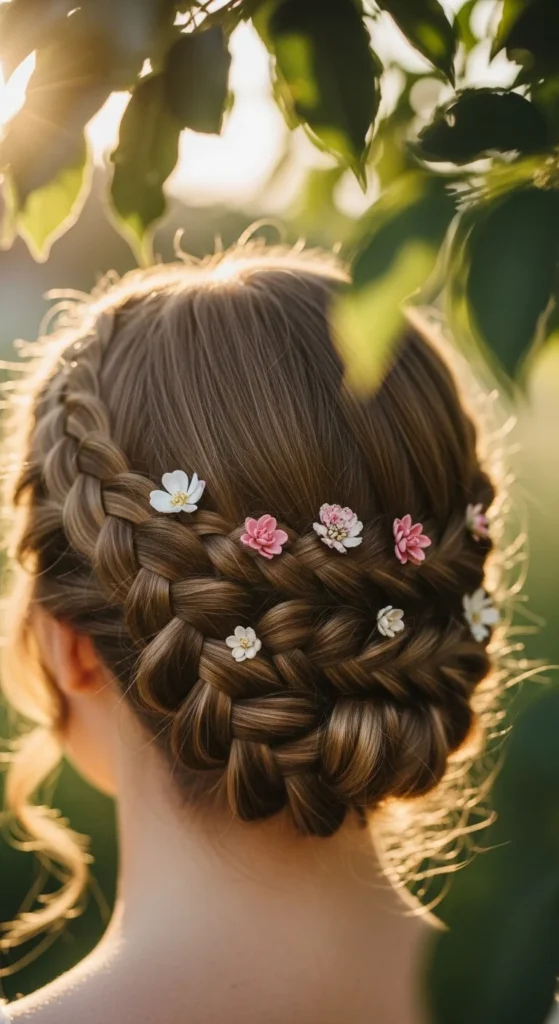
A few flower pins can change the whole look. Do a side or crown Dutch braid. Then tuck small flowers or pins into the braid edges.
Budget tip: Use small flowers from a market or even a simple pin set. You don’t have to buy a full bridal kit.
Keep flowers on one side for a modern look. Or place them evenly for symmetry.
This is perfect for weddings, outdoor events, and photo moments.
16. Rapunzel-Style Dutch Braid (Extra Long Look)
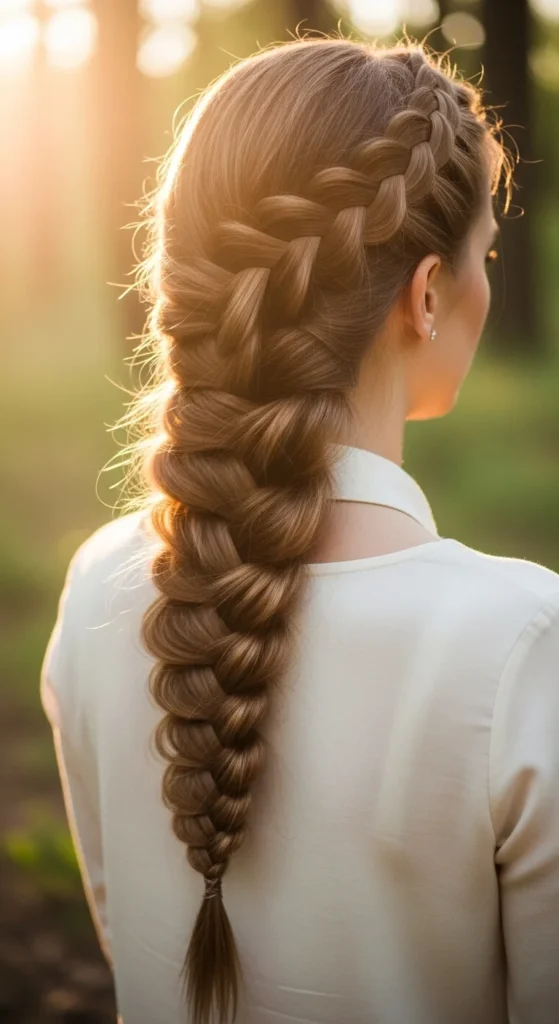
This is the dramatic long braid look. Start with a Dutch braid at the crown and keep adding hair evenly. Widen the braid slightly after tying off.
Budget tip: If you want more length, add a small amount of extension hair gradually as you braid. One pack can go far if you split it into small pieces.
Use mousse to smooth flyaways. Keep the braid soft, not tight, so it looks full.
Great for long hair and special occasions.
17. Exaggerated Side Dutch with Big Volume
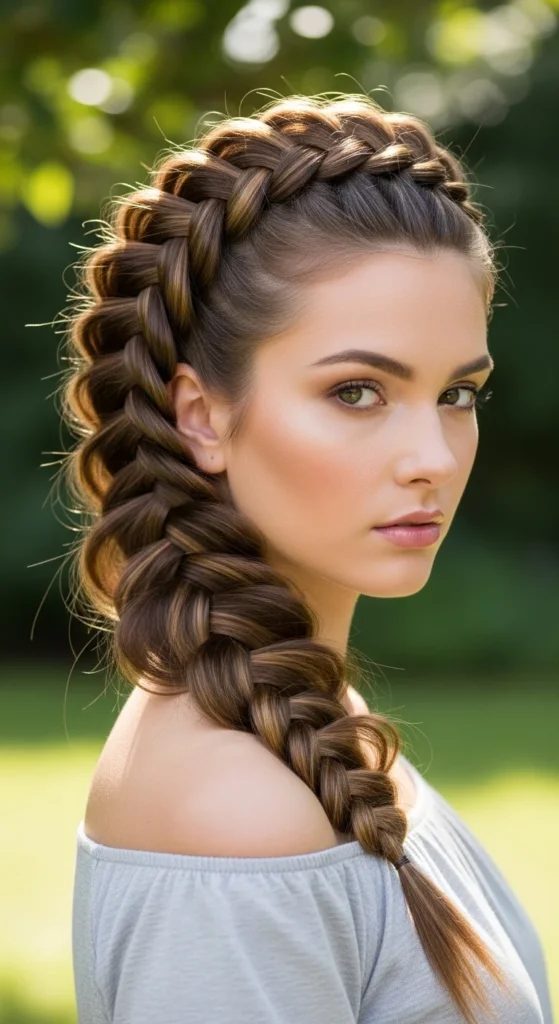
This is the “big braid” version. Start a side Dutch braid and intentionally widen the loops after finishing. The raised pattern looks bold and photo-ready.
Budget tip: If you have fine hair, dry shampoo at the roots helps the braid look thicker and stay in place.
Pull loops gently and evenly so it doesn’t look uneven. Keep the base secure with a firm elastic.
This works great for festivals and casual photos.
18. Beginner 5-Minute Side Dutch Braid
If you want quick, start with a small side Dutch braid. Take a section near your part line and braid it back a few inches. Tie it off and pin it under your hair.
Budget tip: Use one elastic and one pin. That’s it.
This style keeps hair out of your face and looks cute with ponytails or loose waves. It’s also a great practice braid before you try full-head styles.
19. Dutch Braid into a Side Low Bun
Start a Dutch braid on one side and braid toward the opposite nape. Tie off and wrap the tail into a low side bun. Pin securely.
Budget tip: A small hair net over the bun makes it look cleaner and helps control frizz.
Leave a tiny face piece out for softness. Add a pin if you want a dressed-up finish.
Great for dinners and formal events.
20. Knotted Messy Dutch Updo
This is a relaxed updo that still looks fancy. Do a Dutch braid and stop at the nape. Twist the tail into loose knots and pin them into place.
Budget tip: You don’t need perfect knots. The messy texture is the point. Use fewer pins and let it look soft.
If you have bangs, blend them by curling or lightly twisting them back.
This is great for events when you want a softer updo style.
21. Dutch Braid with Balayage “Weave Display”
Dutch braids show color beautifully because the raised sections catch the light. Any highlights, balayage, or ombre will stand out more.
Budget tip: Even temporary hair chalk on a few strands can create a similar effect for photos. Test on a small section first.
Keep the braid neat and even so the color pattern looks clean. Widen the braid slightly to show more of the color.
Perfect for photos and special outings.
22. Circular Crown into a Ponytail
Do a Dutch braid around the crown and finish by gathering hair into a ponytail. It looks polished but still easy to wear.
Budget tip: If you can’t braid in a full circle, do two side Dutch braids and pin them into a crown shape, then tie the ponytail.
Hide the elastic with a wrapped strand for a cleaner look.
This is great for office days and events.
23. Multi-Technique Half-Up Dutch Combo
Do two small Dutch braids from each side and tie them together at the back. Leave the rest down. It’s simple but looks styled.
Budget tip: Add texture by braiding the loose hair for an hour, undo, and lightly smooth the ends.
Pull out face-framing pieces for softness. Hide the elastic by wrapping a small strand around it.
Great for daily wear and photos.
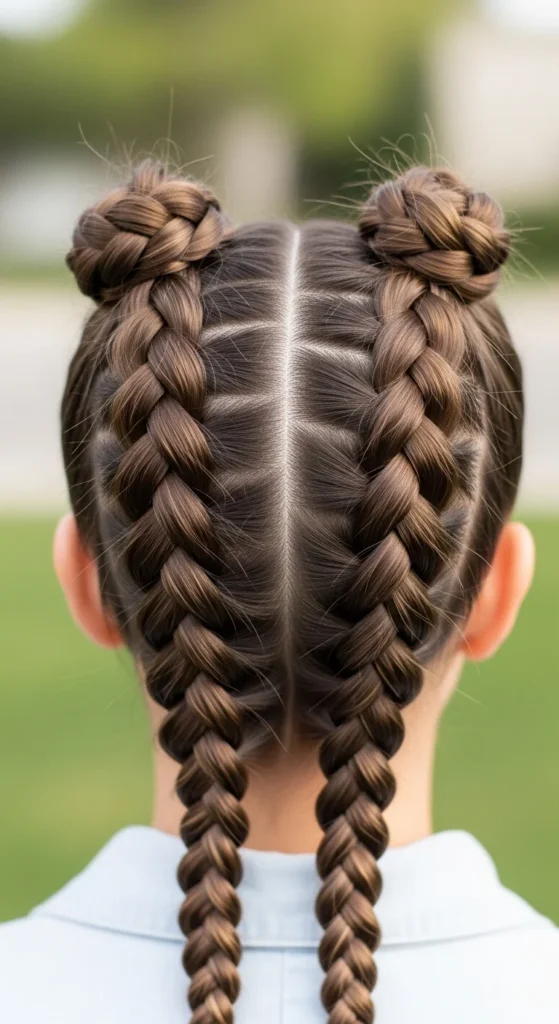
24. Double Dutch Braids into Space Buns
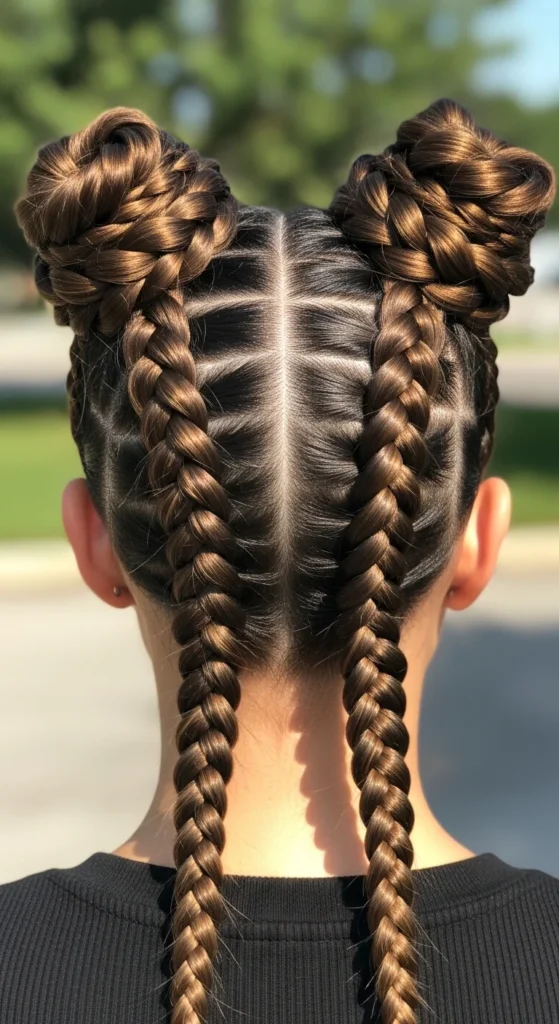
This style is playful and trendy. Do double Dutch braids to the crown. Then twist each tail into a bun and pin.
Budget tip: If your buns are small, tease the tails slightly before wrapping. It makes buns look fuller without extra hair.
Keep buns comfortable, not tight. If the hairline feels sore, redo the first few stitches with lighter tension.
Great for festivals, casual weekends, and fun photos.
Conclusion
Dutch braids stand out because the raised weave looks structured and stylish on any hair type. Once you remember “braid under,” you can do sporty twins, soft crowns, diagonal event looks, and quick half-up styles without buying expensive tools. Pick one easy option to practice this week—like double Dutch or a half-up braid—then add one detail such as widened loops, wrapped elastics, or a simple pin. Small touches make a braid look brand new fast.

Leave a Reply