
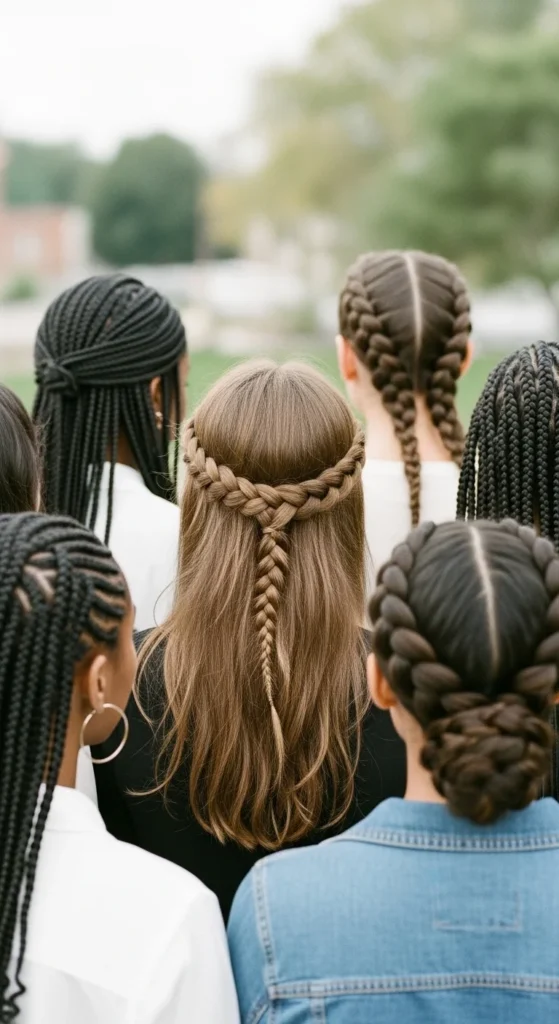
Braided hairstyles are trending in 2026 because they look stylish while also being practical. Some braids are quick, beginner-friendly, and perfect for busy mornings. Others double as protective styling, especially for textured and Black hair, with options like knotless braids, box braids, and cornrows. The best part is you can keep it simple or get creative with patterns, ribbons, buns, and mixed braid combos. Below are 27 braided hairstyles that look amazing, with easy steps and budget-friendly tips you can use right away.
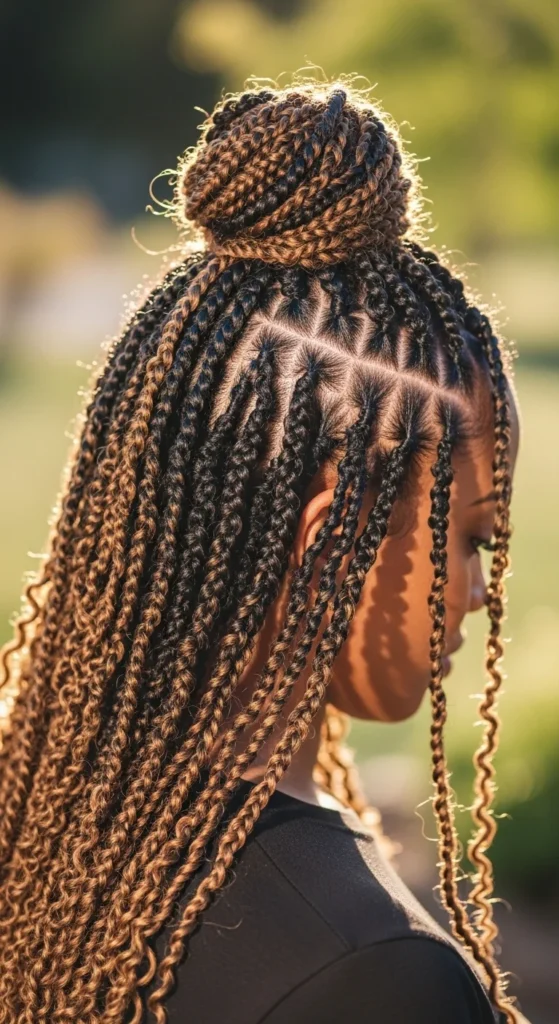
1. Medium Box Braids Half-Up, Half-Down
This style makes box braids feel light and cute without doing too much. Pull the top third of your braids into a ponytail and leave the rest down. It’s great for hot weather and also keeps hair off your face.
DIY steps are simple. Gather the top section. Tie with a soft scrunchie. Wrap one braid around the elastic to hide it and pin underneath. If you want extra softness, leave two braids out near your temples.
Budget tip: A satin scrunchie from a multipack helps reduce frizz and snagging. If you only have a regular hair tie, double it up so it feels more secure.
If your scalp feels tight, avoid pulling the top section too hard. This is one of those looks that still works when it’s a little loose. At night, use a satin bonnet or scarf to keep the top neat. In the morning, shake it out and you’re done.
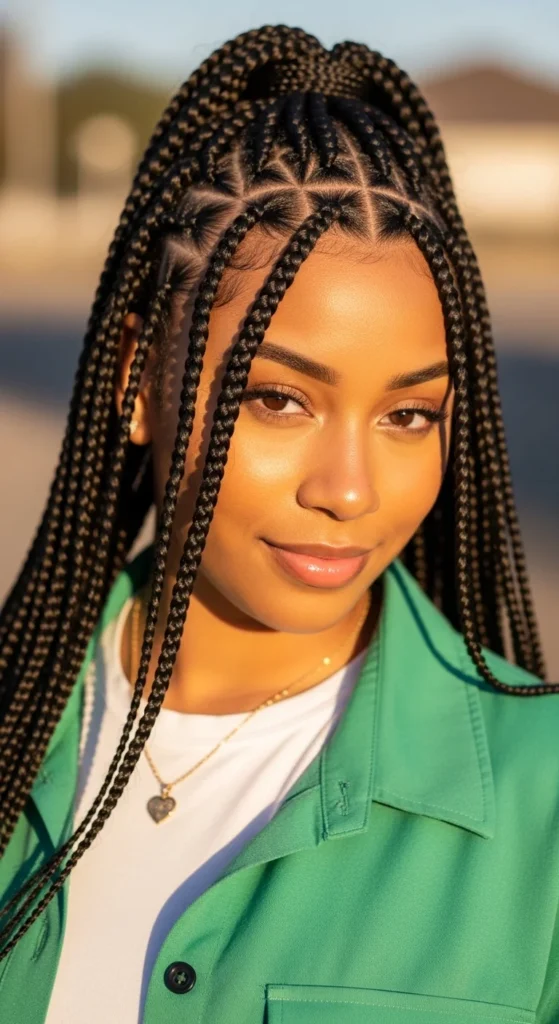
2. Knotless Box Braids in a Low Pony
Knotless braids are popular because the start feels lighter and the braids move naturally. A low ponytail is an easy everyday style that looks neat for errands or work.
To style, gather braids at the nape. Use a thick elastic. Wrap one braid around the base and pin it to hide the tie. Keep the ponytail loose so it doesn’t tug at the hairline.
Budget tip: If you don’t have a thick elastic, use two normal ones. It helps hold weight without slipping.
For a smoother look, apply a little mousse to your hands and glide it over the ponytail length. If you deal with itch, keep scalp care simple. Use a nozzle bottle with diluted shampoo, then pat dry. Avoid heavy oils on the scalp if you’re prone to buildup. This style also looks cute with a middle part and two small face braids left out.
3. Jumbo Box Braids Top Knot
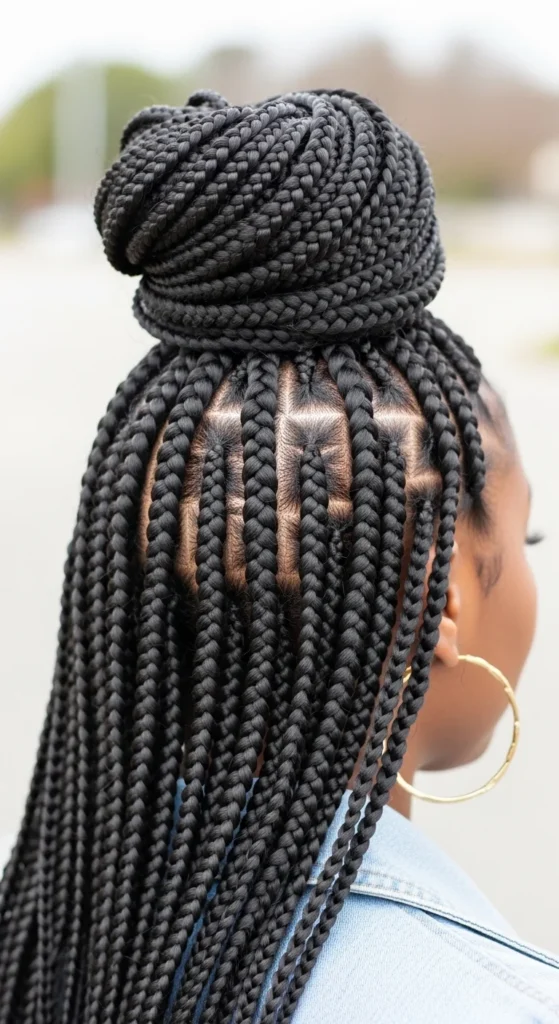
Jumbo box braids make a big style statement and are quick to throw into a bun. A top knot keeps everything up and out of the way, which is perfect on warm days.
To do it, gather braids high on your head. Twist them into a coil and wrap into a bun. Pin the bun with a few bobby pins so it stays secure. If you want it softer, let a few braids fall near the ears.
Budget tip: Hair nets are cheap and can make the bun look extra neat. Slip one over the bun and pin the edges.
If the bun feels heavy, place it slightly lower. High buns can pull if they sit too close to your hairline. At night, wrap the bun with a scarf so it doesn’t flatten. In the morning, fluff the bun lightly with your fingers and smooth flyaways with mousse.
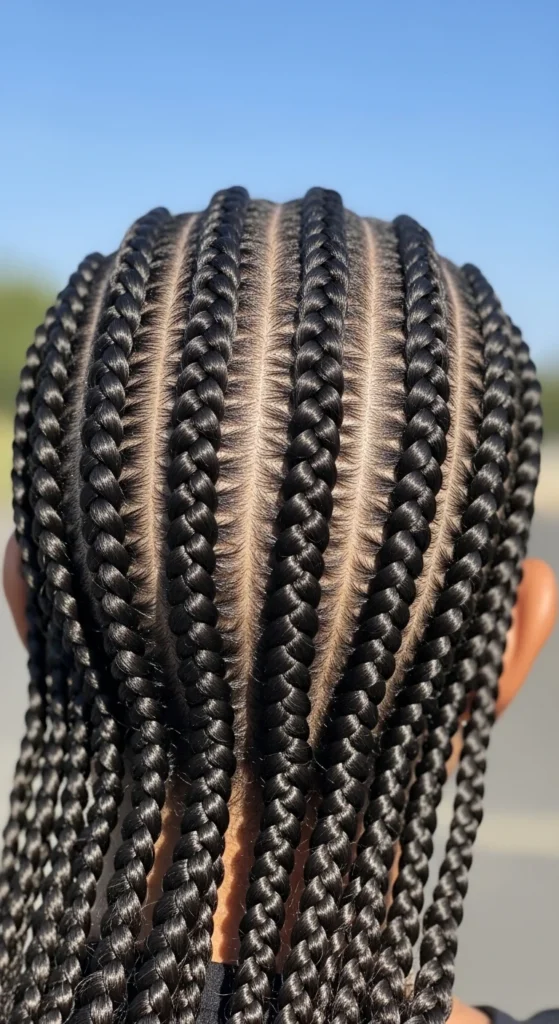
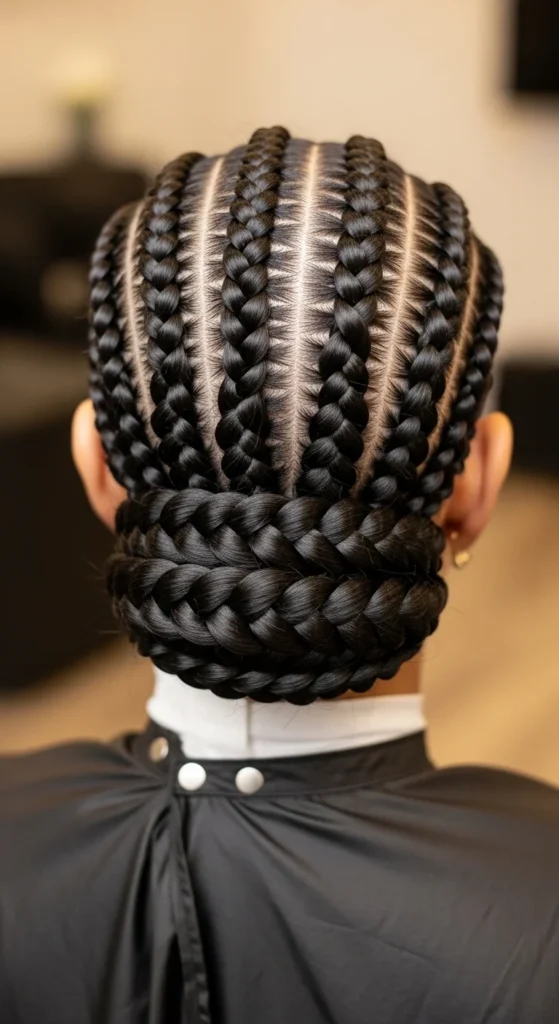
4. Straight-Back Cornrows (Clean and Simple)
Straight-back cornrows are a classic because they work for everyday wear and also act as a base for other styles. They look neat, last well, and keep hair contained.
If you’re new to braiding, start with fewer rows, like 4 to 6. It’s easier to control. Use a rat-tail comb for parts and apply a small amount of gel along each line. Braid close to the scalp, adding hair as you go.
Budget tip: Two mirrors help more than fancy tools. Use one in front and one behind so you can see your parts.
For styling, you can leave the ends down, put them into a low bun, or tie them into a ponytail. If your scalp feels dry, use a tiny amount of light oil between rows. If it feels sore, loosen styles and avoid tight ponytails. Comfort matters for long wear.
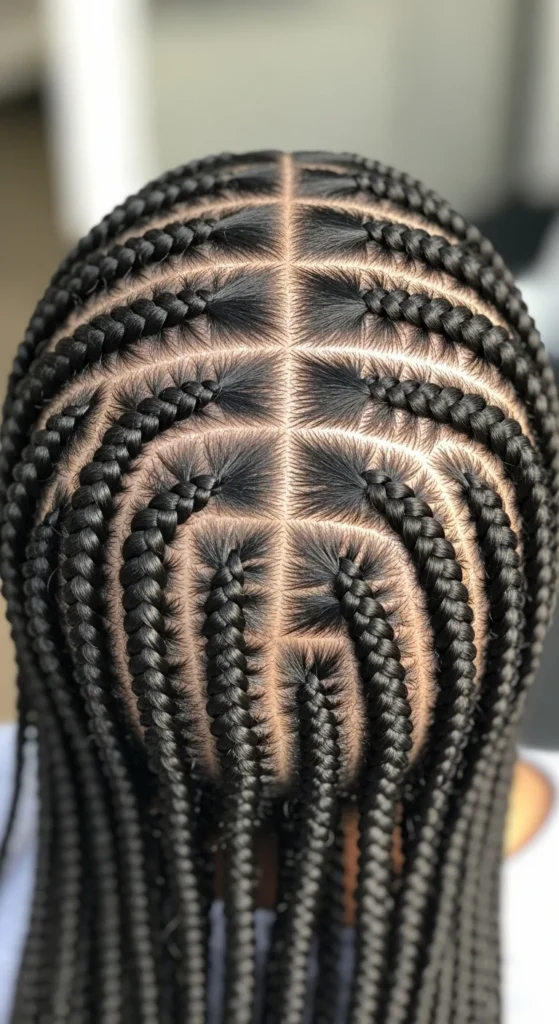
5. Feed-In Cornrows with Mixed Thickness
Feed-in cornrows look smooth because the braids start small and gradually get thicker. Mixing thick and thin rows makes the pattern look more detailed without being too complicated.
To plan it, decide your pattern first. Alternate a thin row, then a thicker row. Keep parts clean and consistent. When braiding, add tiny pieces of hair little by little so the braid grows naturally.
Budget tip: If you’re using extension hair, buy one pack and cut it into smaller pieces yourself. It’s cheaper than buying pre-divided bundles.
This style looks great with the ends left long, tied into a ponytail, or wrapped into a bun. Use mousse to calm flyaways. If you wear it for several days, wrap at night with a satin scarf. For scalp refresh, use a light spray bottle and gently wipe between parts instead of scratching.
6. Criss-Cross Goddess Braids
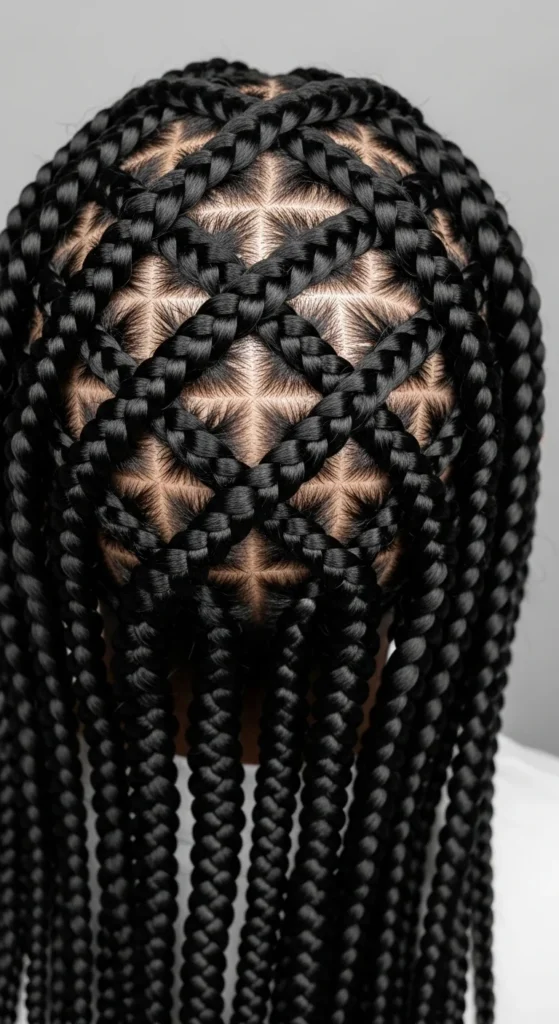
Goddess braids are bold and sculpted. A criss-cross pattern makes them look even more creative, like a design. This style is great for events and photos, but it can also be worn casually with a simple bun finish.
Try an easier version at home. Part two diagonal sections on top. Create two large Dutch braids that cross at the back. Pin the ends under the braids so the finish looks clean.
Budget tip: You can add a small amount of braid hair only to the top braids for thickness. You don’t have to use a lot of extension hair to get a full look.
To keep it neat, smooth with mousse and tie down with a scarf for 10 minutes. If it feels tight, loosen the braid edges gently. Thick braids can pull if the start is too tight, so keep your grip firm but not painful.
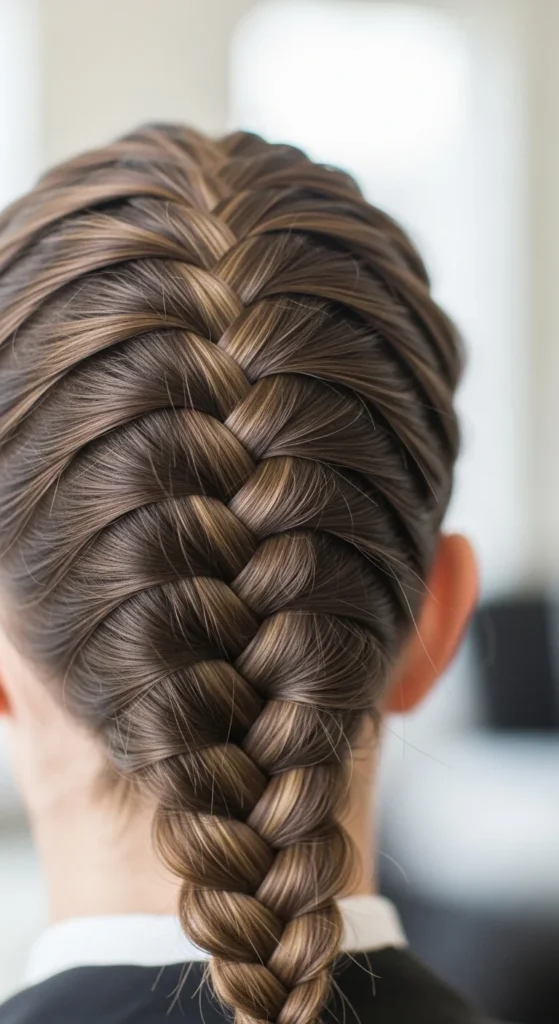
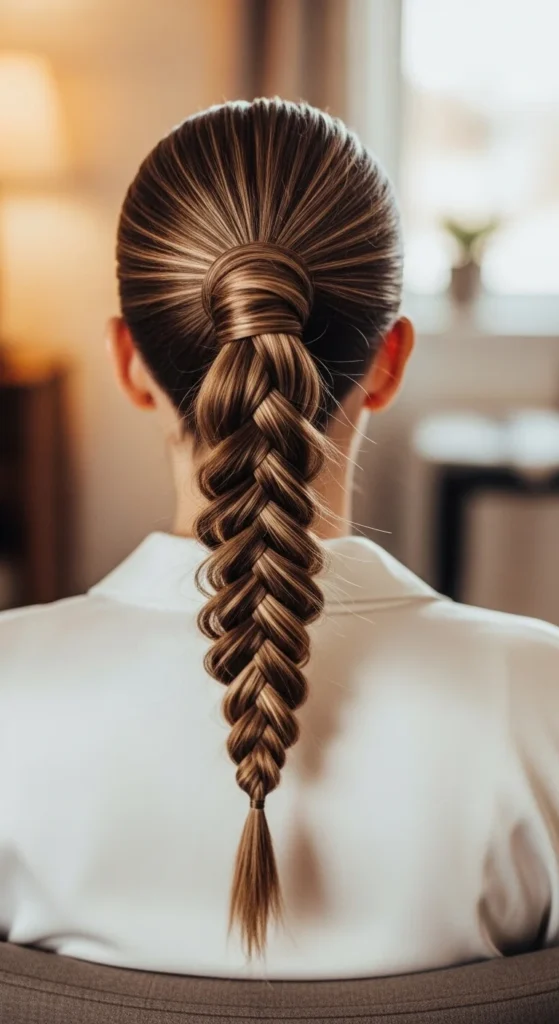
7. French Braid into a Ponytail
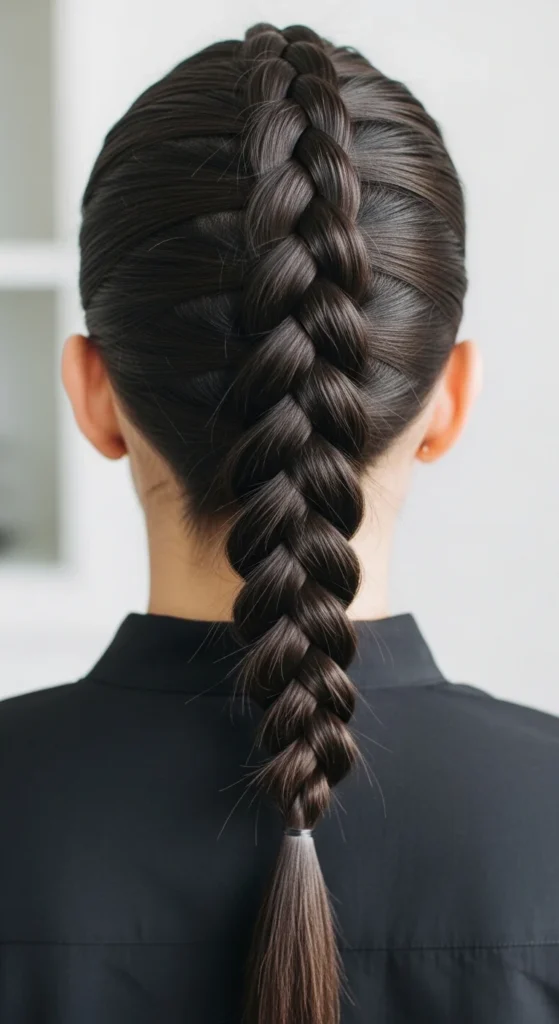
This braid is perfect for busy mornings. It keeps the front neat and leaves the back easy. It also looks professional without feeling boring.
Start a French braid at the forehead. Add hair evenly as you braid back to the crown. Once you reach the crown, secure the rest into a ponytail. If you want a softer finish, gently tug the braid edges to widen it.
Budget tip: If your hair is slippery, sprinkle a little dry shampoo at the roots before braiding. It helps grip and keeps the braid from sliding.
You can keep the ponytail straight, curl the ends, or braid the ponytail length for extra texture. If flyaways pop up, spray hairspray on your fingers and smooth lightly. This style also works great on day-two hair when you want to hide oily roots.
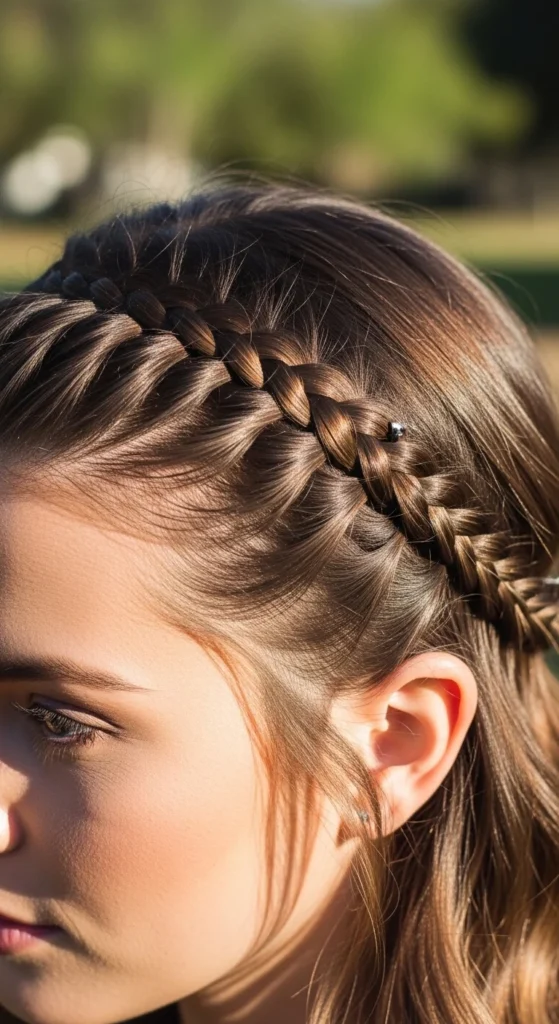
8. Raised Dutch Braid Crown
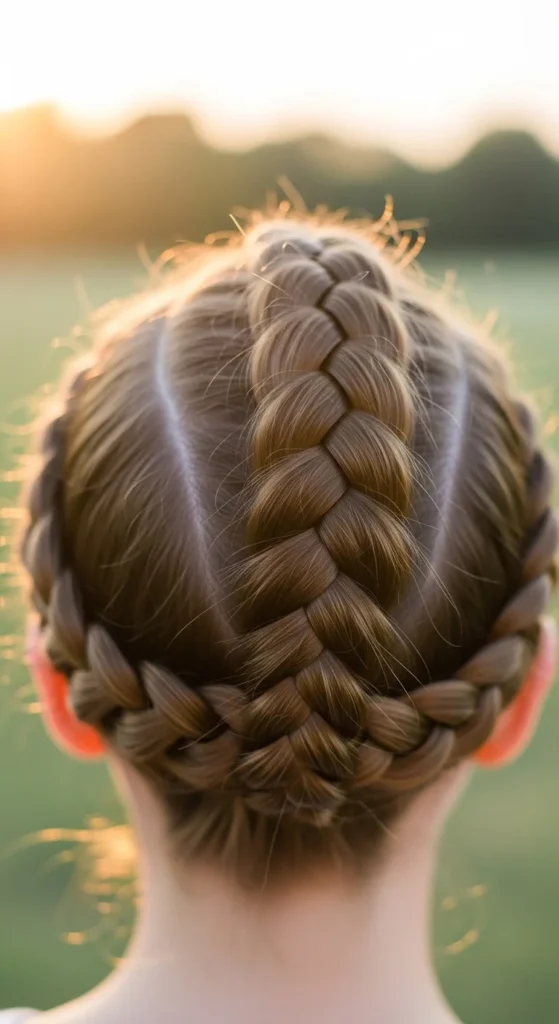
A Dutch braid crown looks romantic and keeps hair off your neck. Because the braid sits on top of the hair, it looks fuller and more textured.
Part hair down the middle. Dutch braid each side from the front toward the back. Wrap each braid around the head and pin securely. Tuck the ends under the braid so the finish looks clean.
Budget tip: U-pins or larger bobby pins hold crowns better than tiny pins. You can find them cheap in bulk.
If you have thick hair, braid a little looser so you don’t get a headache. If you have fine hair, widen the braid by gently pulling the outer loops. Finish with a light mist of spray, then press flyaways down with your palms. This crown also works well for weddings and summer days.
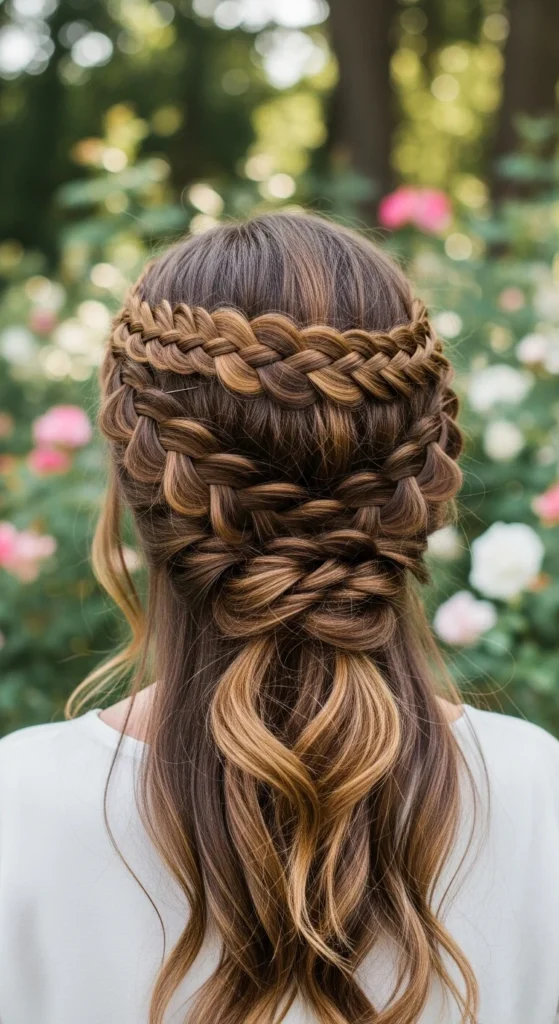
9. Swedish Crown Braid (Soft and Romantic)
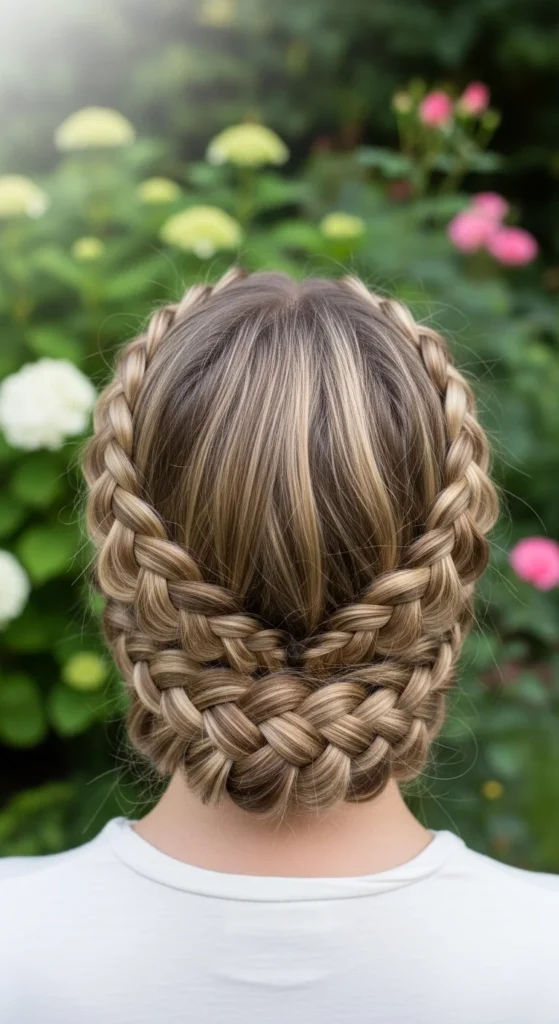
This crown braid is easier than it looks because it starts with two simple braids. It’s comfortable, romantic, and great for thick hair that gets hot.
Make two low braids, one on each side. Pull them up and around the head like a headband. Pin the ends near the top and hide them under the braid. Leave a few face-framing pieces loose for softness.
Budget tip: Use bobby pins that match your hair color. It makes the pins disappear and the style look cleaner.
If your hair is slippery, add dry shampoo before braiding for grip. If your hair is layered, expect a few pieces to pop out. Smooth them back with mousse on your fingertips. This style looks great for parties, outdoor photos, and days when you want hair up without feeling tight.
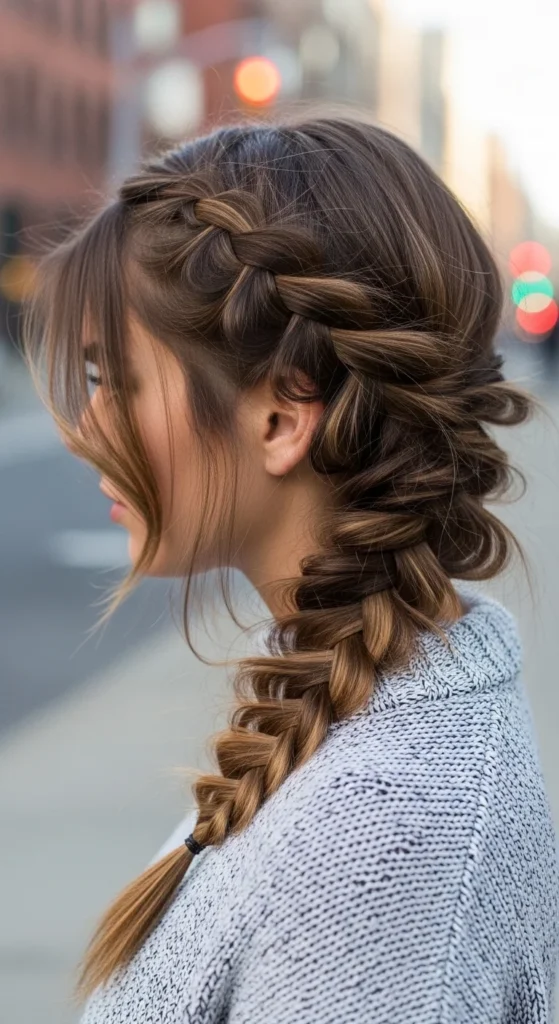
10. Fishtail Side Braid (Festival Style)
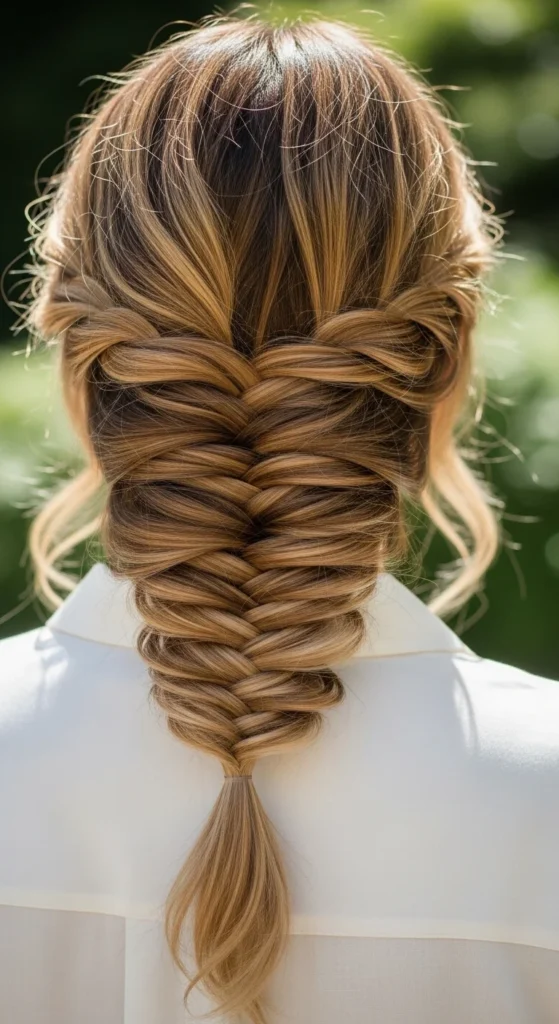
Fishtail braids look detailed, but the method is simple. Split hair into two sections. Take a small piece from the outside of one section and move it to the other. Repeat.
To make it beginner-friendly, start with a low side ponytail. Then fishtail the ponytail length. This saves your arms and keeps the braid neat.
Budget tip: Use a clear elastic at the end so you can widen the braid without it slipping out. After you tie it, tug the braid edges gently to make it look fuller.
For a softer look, pull out a thin piece near the face. If flyaways bother you, smooth them with a tiny bit of styling cream. Keep it light so it still looks relaxed. This braid is great for long hair and medium hair, and it photographs beautifully.
11. Bubble Braid Ponytail (No Braiding Required)
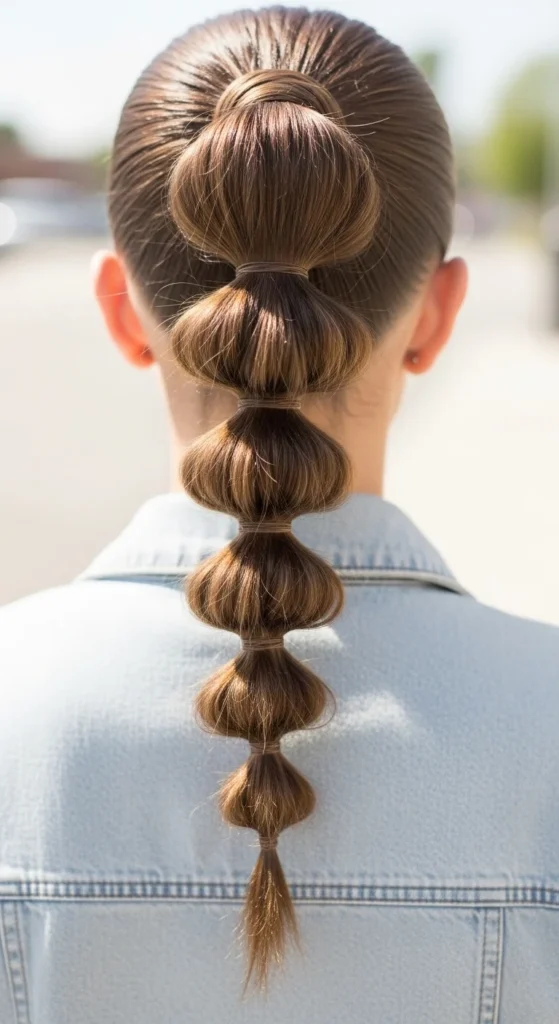
Bubble braids are perfect if you don’t know how to braid yet. You still get a fun textured look with only hair ties.
Start with a ponytail. Add another elastic a few inches down. Pull the hair between elastics outward to form a “bubble.” Repeat down the ponytail.
Budget tip: A pack of clear elastics is cheap and lasts a long time. Keep a few in your bag for quick fixes.
For a more polished look, wrap a small strand of hair around each elastic to hide it. For a more casual look, keep it messy and tug the bubbles wider. If your hair is fine, add a little dry shampoo before you start. It helps bubbles stay full. This style works for school, errands, and even parties when paired with curled ends.
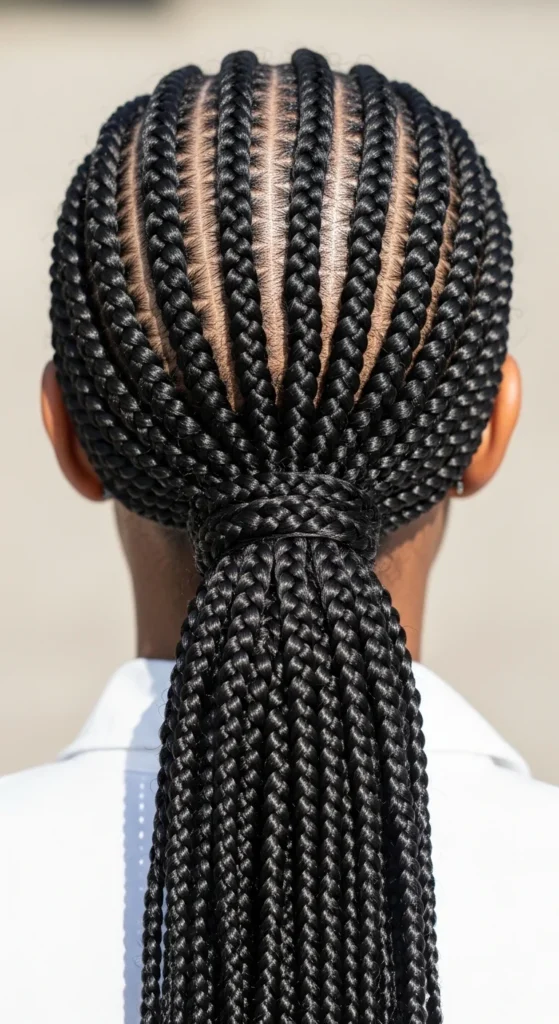
12. Cornrows into a Low Braided Bun
This style looks neat and lasts. The cornrows keep the scalp tidy, and the bun keeps the ends tucked away.
If you already have cornrows, gather the ends into a low ponytail. Braid the ponytail, then wrap it into a bun and pin. If you’re starting from scratch, braid the cornrows toward the nape so the ends meet easily.
Budget tip: A hair net over the bun makes it look cleaner and helps control frizz. They’re inexpensive and easy to use.
If you want a softer look, leave one small braid or two near the ears. For hold, use mousse on the bun and smooth with your palms. If the bun feels tight, loosen the base slightly. Comfort matters, especially if you’re wearing the style all day.
13. Ombre Senegalese Twists
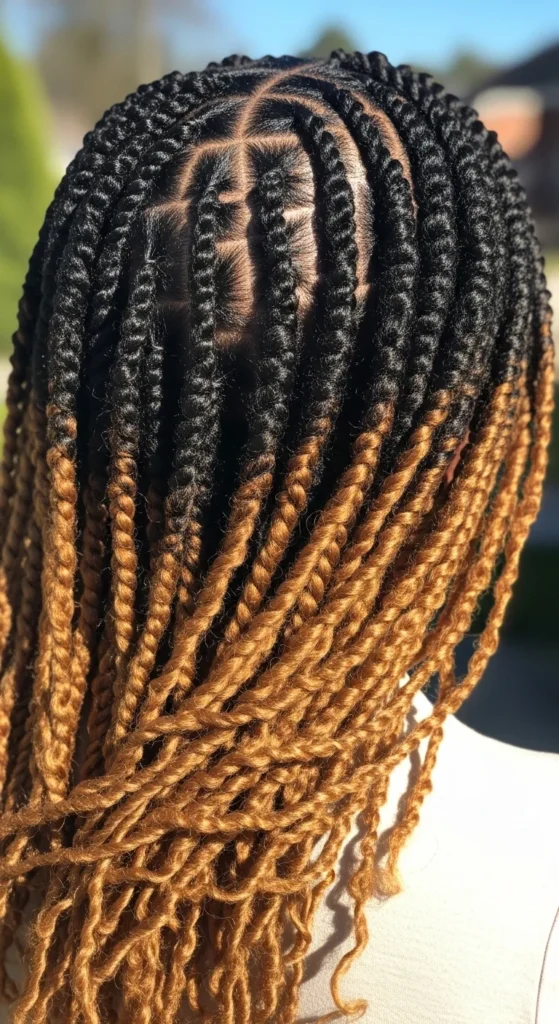
Senegalese twists look smooth and rope-like, and ombre color makes them stand out. You can go subtle or bold depending on your comfort level.
Styling is easy. Try a side-swept look, a half-up bun, or a low ponytail. If the ends are too straight, wrap them around flexi rods with warm water for a soft curl effect.
Budget tip: Mix one lighter pack with one darker pack to create a custom ombre without buying expensive specialty packs. Use lighter strands mostly toward the ends.
For care, use a water-based spray and a little mousse to control frizz. Keep scalp care simple with a nozzle bottle wash when needed. If your twists feel heavy, choose medium size instead of jumbo. It still looks full but feels easier on the scalp.
14. Braided Mohawk with Side Cornrows
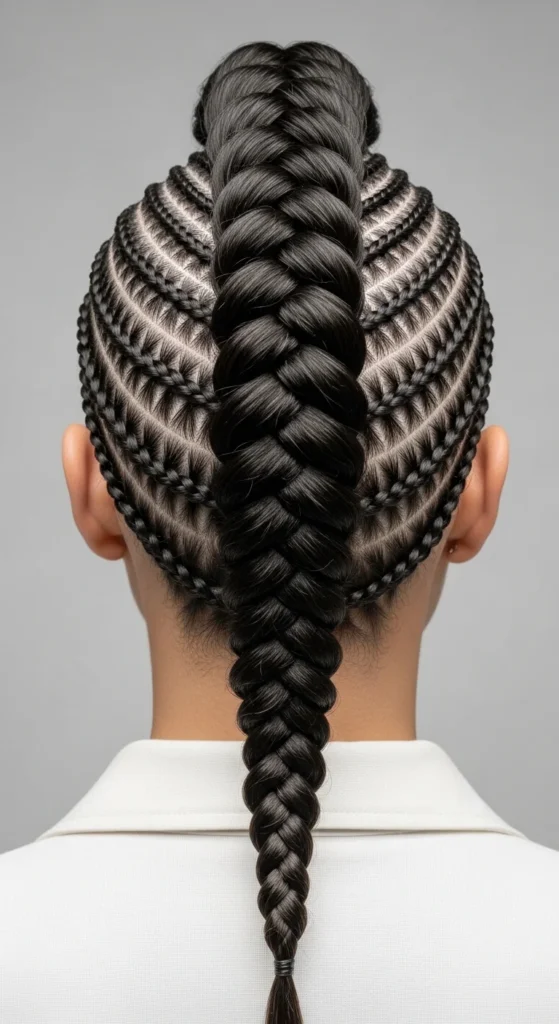
This is an edgy braided look that still feels wearable. The sides are cornrowed upward, and the center becomes a thick braid or twist.
At home, part a center strip from forehead to nape. Braid or twist the center into a ponytail. Then do two cornrows on each side, braiding toward the center.
Budget tip: If you want more volume in the center, a clip-in ponytail piece can help and costs less than a full install.
Keep the ponytail base comfortable. A too-tight base can cause soreness quickly. Finish with mousse and smooth the sides with your hands. This style works great for events, concerts, and photo days, and it keeps hair controlled even in wind.
15. Messy Open Side Braid (2026 Vibe)
Messy open braids are trending because they look relaxed and modern. They’re also easy.
Part hair to one side. Gather hair over one shoulder. Braid loosely and tie off. Then tug gently on the braid edges to widen it.
Budget tip: Dry shampoo before braiding makes a big difference. It adds grip so the braid stays full and doesn’t slip.
If you have layers, don’t fight them. Let a few pieces fall out for a softer look. If you want more control, smooth only the top surface with a tiny amount of cream.
This braid is great for long hair and medium hair. For short hair, do a mini side braid and pin it back. It still gives that “braid detail” look without needing length.
16. Ribbon-Woven Dutch Braid
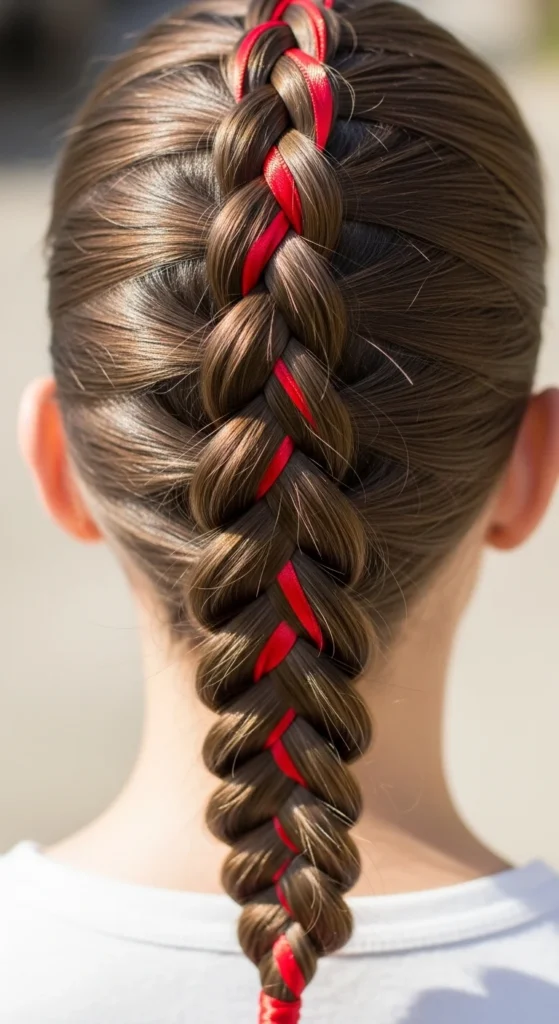
A ribbon turns a basic Dutch braid into something special. It’s also a smart day-two hairstyle because it hides frizz and makes the braid look planned.
Start by tying a ribbon at the crown under a small section of hair. Then use the ribbon as a strand while you Dutch braid. Tie off the end with the ribbon in a bow.
Budget tip: Craft ribbon works perfectly. Choose satin for a smoother look or cotton for a casual look.
If you want it subtle, use a thin ribbon that matches your hair. If you want it bold, pick a bright color. This braid looks cute for birthdays, festivals, and photos. Finish with a light mist of spray on your fingertips to tame flyaways without making hair stiff.
17. “Knot Braid” Hack for Thin Hair
If your hair is thin, braids can look tiny. This hack makes a braid look fuller without extensions.
Do a basic three-strand braid. Then hold the end firmly and gently pull the outer loops outward. Work slowly from the bottom up. This widens the braid and gives it that “full plait” look.
Budget tip: Use a clear elastic so you can adjust the braid without it unraveling. Clear elastics are cheap and easy to hide.
For extra fullness, add dry shampoo before you braid. It adds grip and texture. If your hair is super silky, a tiny bit of mousse on damp hair and air-drying first can help.
This hack works for side braids, low braids, and half-up braids. It’s also great for photos because the braid looks bigger without extra work.
18. Dutch Braid Ponytail with Lift
This style is sporty but still cute. The Dutch braid adds texture on top, and the ponytail keeps it easy.
Start a Dutch braid at the hairline and braid back toward the crown. Secure the rest into a ponytail. Tug the braid edges slightly to widen it.
Budget tip: If you don’t want to buy styling spray, use dry shampoo for grip before braiding. It helps the braid stay neat and gives the ponytail volume.
If you want a softer finish, don’t slick everything down. Leave a small piece near the ear. Twist it and let it sit while you finish the ponytail.
For the ponytail length, you can leave it natural, curl it, or do a loose braid and undo it for texture. This look is great for workouts, travel, and busy days.
19. Sculptural Cornrows with Curved Parts
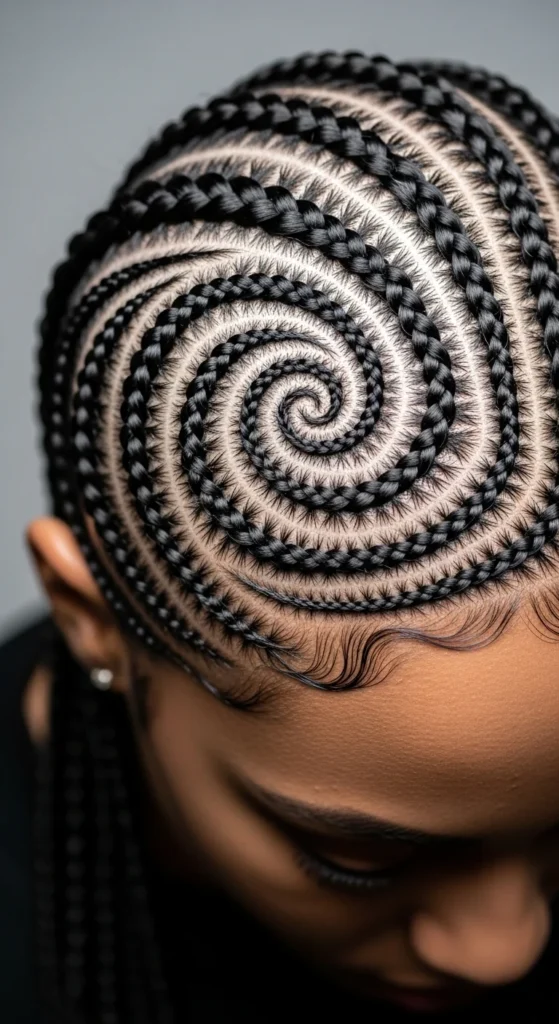
Curved cornrow patterns look like hair art. They’re bold and look amazing in photos. If you’re booking a stylist, bring a clear pattern photo so the parts match what you want.
A simple DIY version is two curved cornrows on each side, then the rest into a low bun or puff. The key is clean parting. Take your time.
Budget tip: Use edge control only along the parts. That’s where it shows most, so you use less product overall.
For hold, tie the style down with a satin scarf for 10 minutes after styling. It helps the braids lay flatter and look cleaner.
Scalp care matters for longer wear. Use a nozzle bottle to rinse gently between rows and pat dry. If you feel soreness, skip tight ponytails and keep styles low and relaxed.
20. Braided Headband (From a Side Braid)
This is a cute style that looks harder than it is. You braid one side section, then pin it across the top like a headband.
Take a section above one ear and braid it. Pull it across the head and pin above the other ear. Hide the pins under your hair for a clean finish.
Budget tip: Use bobby pins that match your hair color. It makes the pins blend in so the braid looks like it’s floating.
If your hair is short, braid a smaller section and pin it back as a mini headband. It still gives the same idea.
This style looks great with loose hair, waves, or a low bun. It’s also helpful when you want to keep bangs or front pieces out of your face without pulling everything back tightly.
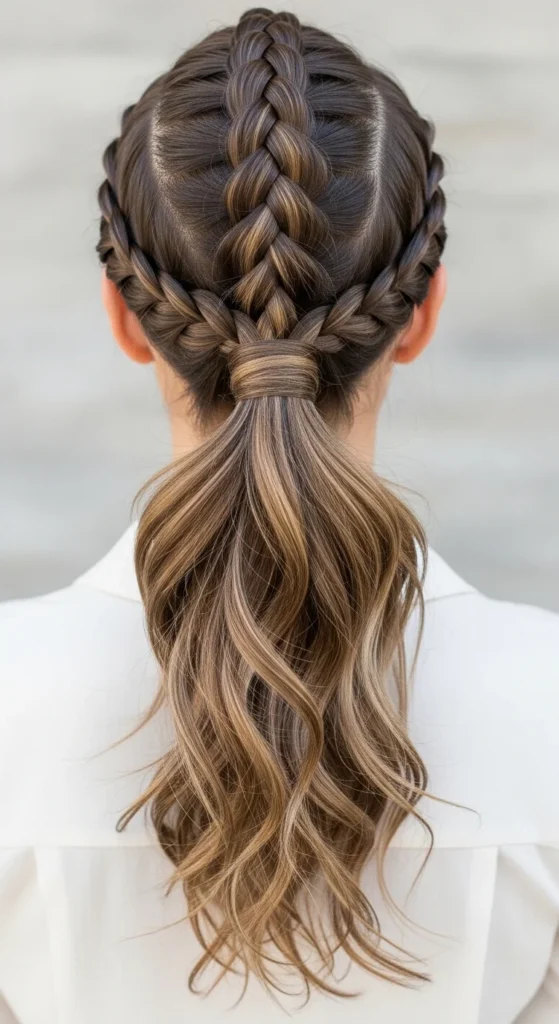
21. Double Dutch Braids (Boxer Braids)
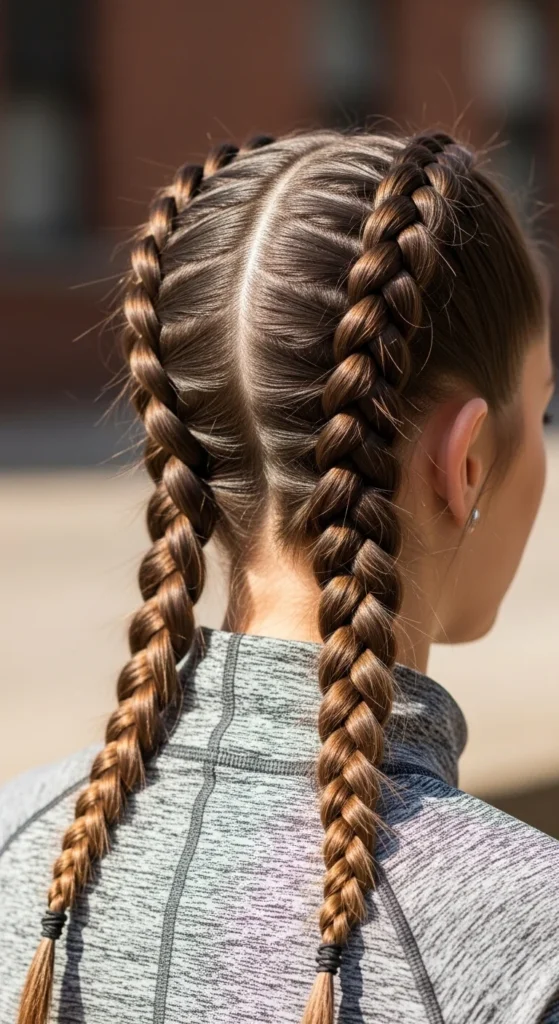
Double Dutch braids are a go-to for busy days because they hold well and keep hair controlled. They also work on many hair types and lengths.
Part hair down the middle. Dutch braid each side from forehead to nape. Tie off with elastics. For a softer look, tug the braid edges slightly. For a cleaner look, keep tension even and smooth flyaways with mousse.
Budget tip: If you struggle with parts, use a rat-tail comb and a little hair oil on the tip so it glides cleanly. You don’t need fancy sectioning tools.
These braids are great for workouts and travel. At night, wrap them with a satin scarf so they don’t frizz. In the morning, smooth the top with your hands and go.
22. Top-Knot Braided Bun (Fast Fix)
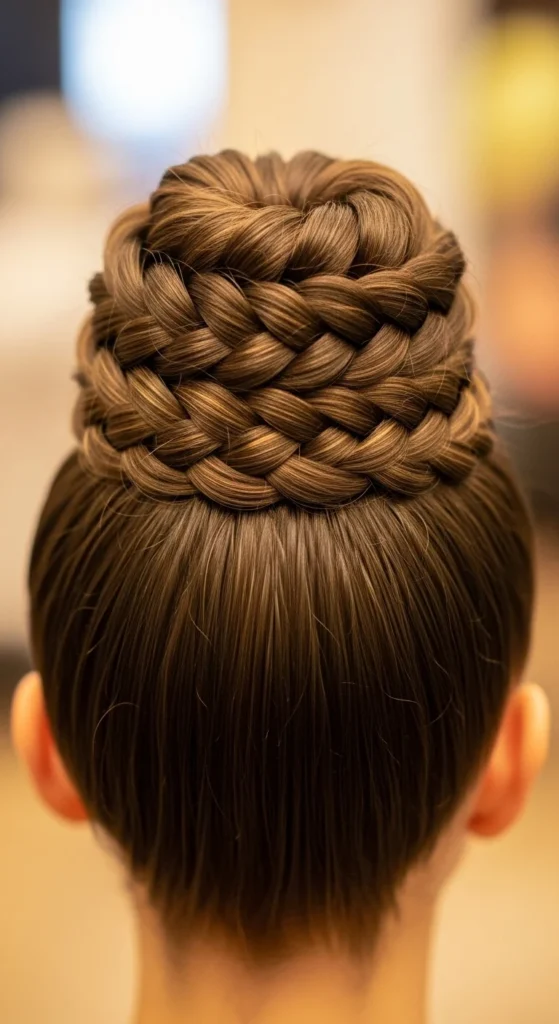
This is the fast “put-together” braid. Make a high ponytail, braid it, then wrap it into a bun. Pin it and you’re done.
Budget tip: If your bun looks small, a cheap hair donut can help. Wrap the braid around it for a fuller bun shape.
For softness, leave out two small face pieces. If your hair is frizzy, smooth only the top surface with a tiny amount of cream. Don’t overload.
This bun works for work, errands, and events. It also keeps ends tucked away, which many people like for lower manipulation.
If it feels too tight, lower the ponytail slightly and loosen the base with your fingertips. Comfort matters more than perfection, and a slightly loose bun still looks stylish.
23. Low Fishtail Braid (Easy Ponytail Version)
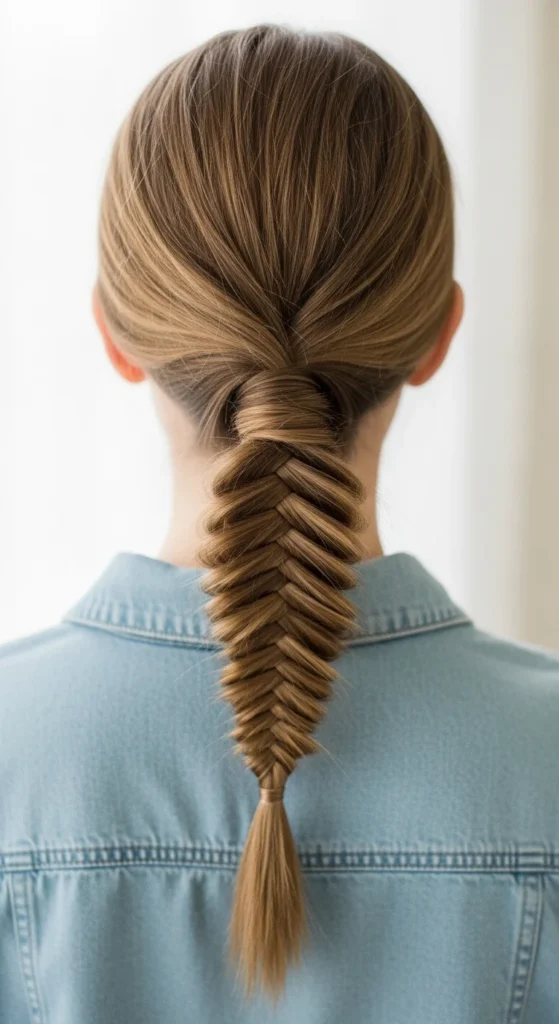
A low fishtail looks detailed but can be made simple by starting with a ponytail. Tie hair low, split into two sections, and move small outside pieces across, alternating sides.
Budget tip: If your fishtail looks too tight, widen it after tying the end. Pull gently on the edges for a fuller look. Clear elastics help because they don’t stand out.
If flyaways pop up, smooth with mousse on your fingertips. Keep it light so it stays relaxed.
This style looks great on day-two hair because a little texture helps grip. If your hair is too clean and slippery, add dry shampoo first. It’s a simple step that makes braiding easier and helps the braid last longer.
24. Passion Twists with a Half-Up Bun
Passion twists have a soft, curly texture that looks playful and stylish. A half-up bun shows off the texture while keeping hair out of your face.
Gather the top section and twist it into a bun. Pin it or tie it with an elastic. Let the rest hang.
Budget tip: Maintenance can stay simple. A water-based spray and mousse can keep twists neat. You don’t need a long product list.
If you get itch or dryness, use a nozzle bottle to rinse your scalp gently. Pat dry and avoid heavy oils if they cause buildup.
To keep the style neat, tie down the top bun area with a scarf for 10 minutes after styling. It helps smooth frizz. This look works for casual days and also looks great dressed up.
25. Bubble Braid Pigtails (Playful and Quick)
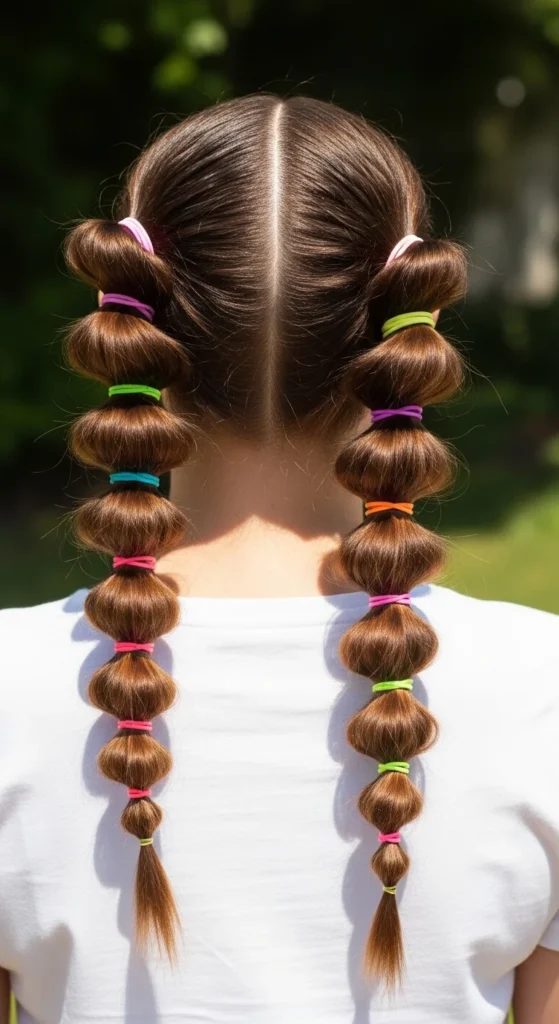
Bubble pigtails give a fun look even if you can’t braid. Split hair into two pigtails, then create bubbles down each side using elastics.
Pull the bubbles wider for a fuller look. Keep the top smooth or leave it slightly messy depending on your style.
Budget tip: Mini elastics are cheap and super useful. Keep a few in your bag for touch-ups.
If your hair is fine, spray dry shampoo before you start. It helps bubbles hold shape. If your hair is thick, use thicker elastics so they don’t snap.
This style is great for weekends, festivals, and quick photos. If you want it to look more grown-up, do low pigtails and keep the bubbles smaller.
26. Wrapped-Base Braided Ponytail
A wrapped base makes a ponytail look polished, and adding a braid makes it feel more creative.
Make a ponytail. Take a small strand, braid it, then wrap it around the base and pin underneath. If you want the ponytail length braided too, do a loose braid and widen it slightly.
Budget tip: If your hair is short, a small clip-in ponytail piece can help. It often costs less than repeated salon styling.
For texture, use dry shampoo before styling. It gives grip and helps the braid hold. If flyaways show up, smooth them with mousse on your hands.
This style works for school, work, and events. It’s easy but looks like you put in effort.
27. Mixed Braid Combo (Crown + Side Braid)
If you want something different, combine two braid ideas into one style. It looks creative but is still doable at home.
Start with a small braid near one temple. Pin it across the top like a mini crown. Then gather the rest of your hair into a loose side braid. Tug the side braid edges slightly to widen it.
Budget tip: This style uses what you already have. No extensions required. No special tools.
If your hair is layered and pieces fall out, smooth them back with a tiny bit of mousse on your fingertips. Add pins only where you need them.
This combo is great for photos and events because it frames the face and keeps hair controlled. It also works well on day-two hair when you want to hide frizz and still look cute.
Conclusion
Braids are trending because they fit real life. You can go protective with box braids, knotless braids, twists, and cornrows. Or keep it simple with Dutch, French, fishtail, and bubble styles that beginners can learn quickly. Pick one braid to practice this week, start with the easiest version, then add one small detail like a ribbon or wrapped base. Small changes make a braid look brand new without spending much.

Leave a Reply